
| ☰ See All Chapters |
Java Module Example
In this tutorial you will learn to develop and test a simple Java 9 Module example by using eclipse IDE. We have used eclipse photon version. Please install JDK 9 and set the path. To know how to set path in environment variable refer our tutorial. Setup the eclipse and its workspace. In this example first we learn to create java 9 example then we will create another java 9 module to use the first module.
Simple module example
Follow the below steps to create the java 9 sample project.
Step 1:
Create a Java project “com.java4coding.example” by selecting “jre-9.0.4” option as shown below. It can be any version greater then version 9. Make sure you should not select the eclipse internal JRE. You should select the jre that you have installed in your machine.
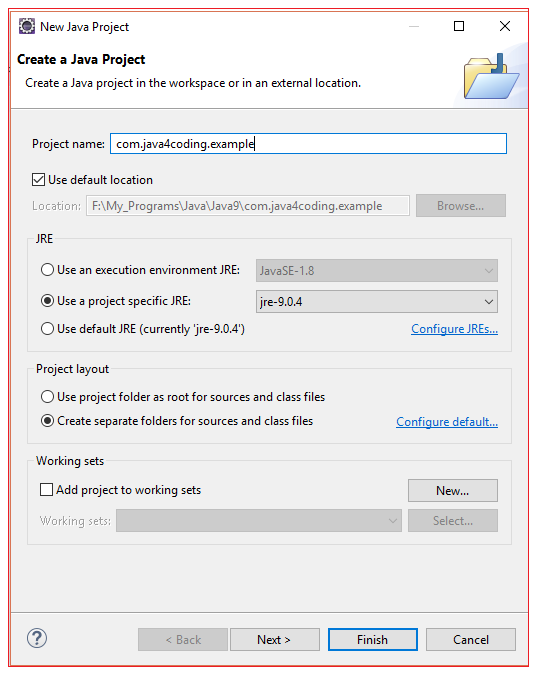
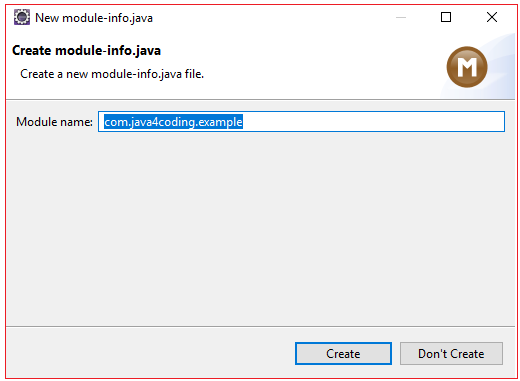
Click Finish, eclipse prompts for you to create module-info.java. Click Create.
Step 2:
Create package and write your code in your class file.
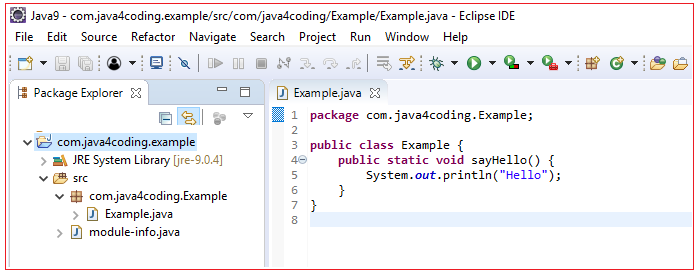
Example.java
package com.java4coding.Example; public class Example { public static void sayHello() { System.out.println("Hello"); } } |
Step 3:
Add exports directive in module-info.java to make the package accessible outside.
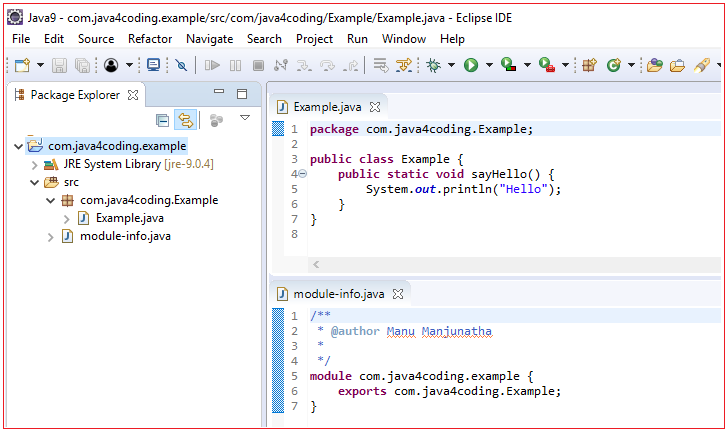
module-info.java
module com.java4coding.example { exports com.java4coding.Example; } |
Simple client module example
Step 1:
Follow the same steps as above example and create a Java project “com.java4coding.client”.
Step 2:
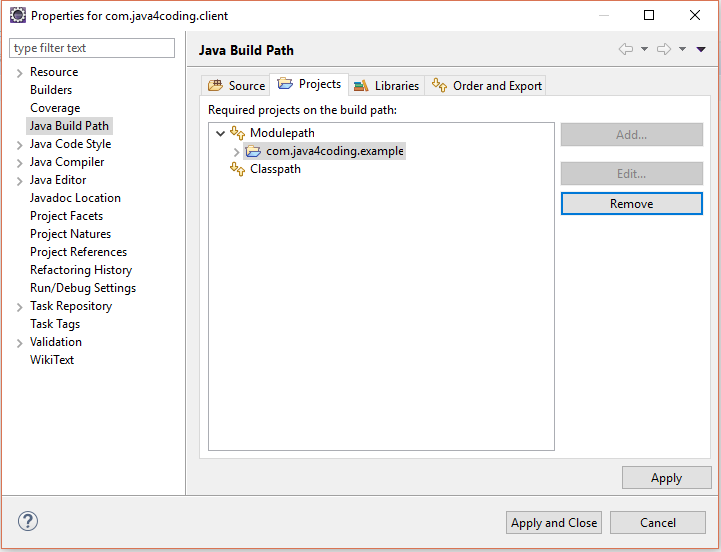
Add “com.java4coding.example” project the module path of “com.java4coding.client”
Step 3:
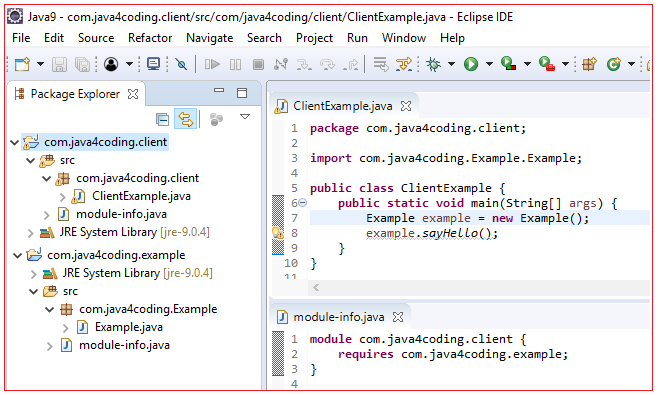
Add requires directive in module-info.java to specify the dependency.
module-info.java
module com.java4coding.client { requires com.java4coding.example; } |
Step 4:
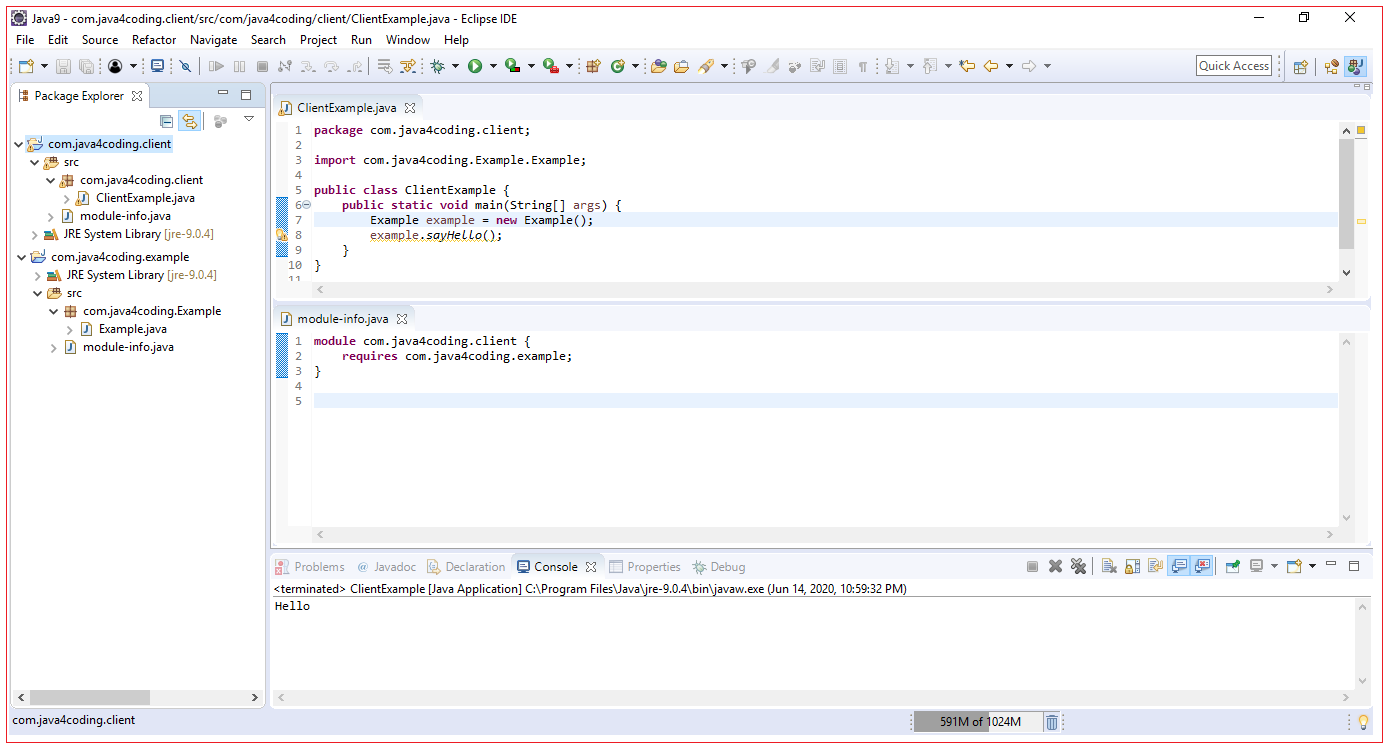
Crete the client example using the Example class form “com.java4coding.example”
Step 5:
Execute client program.
All Chapters
