
| ☰ See All Chapters |
Simple Java Program - Hello World Example
In the Java programming language, programs are built from classes. From a class definition, you can create any number of objects that are known as instances of that class. A class contains data members/fields/variables and methods. Fields are data variables belonging either to the class itself or to objects of the class; they make up the state of the object or class. Methods are collections of statements that operate on the fields to manipulate the state. Statements define the behavior of the classes: they can assign values to fields and other variables, evaluate arithmetic expressions, invoke methods, and control the flow of execution.
Long tradition holds that the first sample program for any language should print "Hello World":
public class HelloWorld { public static void main(String[] args) { System.out.println("Hello World"); } } |
Class Declaration
‘The first line
public class HelloWorld
declares a class, which is an object-oriented construct. Java is a true object-oriented language everything must be placed inside a class. class is a keyword used to create class definition. HelloWorld is a Java identifier that specifies the name of the class to be defined.
Opening Brace
All the code should be placed inside opening brace “{” and ends with a matching closing brace. And all the code between opening brace “{” and matching closing brace is called as class definition.
Main method
Every Java application program must include the main() method. Java program execution starts from main method. This is the starting point for the interpreter to begin the execution of the program. A Java application can have any number of classes but only one of them must include a main method to initiate the execution.
public static void main(String[] args) {
}
This line contains a number of keywords, public, static and void.
public: The keyword public is an access specifier that declares the main method as unprotected and therefore making it accessible to entire application.
static: static keyword declares this method as one that belongs to the entire class and not a part of any objects of the class. The main must always be declared as static since the interpreter uses this method before any objects are created. More about static methods and variables will be discussed later chapters.
void: The type modifier void states that the main method does not return any value (but simply prints some text to the screen.)
All parameters to a method are declared inside a pair of parentheses. Here, String[] args declares a parameter named args, which contains an array of objects of the class type String.
Output Line
The only executable statement in the program is
System.out.println("Hello World");
Since Java is object oriented language, every method must be part of an object. The println method is a member of the out object, which is a static data member of System class. This line prints the string "Hello World".
Java Program execution flow:
To compile the program, we must run the Java Compiler javac, with the name of the source file on the command line as shown below:
javac HelloWorld.java
If everything is OK, the javac compiler creates a file called HelloWorld.class containing the bytecode of the program.
Compiler automatically names the bycode file as <classname>.class
We need to use the Java interpreter (JVM) to run a bytecode file. Execute the below command from command prompt:
java HelloWorld
Now interpreter looks for the main method in the program and begins the execution from there. When executed we see the Hello World output.

Below are the steps to create a simple java program:
Install the JDK (Java Development Kit).
Set path in environment variables
Write the java program
Compile the program to bytecode and run the bytecode
Step 1: Install the JDK (Java Development Kit)
Download the JDK from below link and install the software in your system. We have used jdk-9.0.4_windows.
https://www.oracle.com/in/java/technologies/javase/javase9-archive-downloads.html
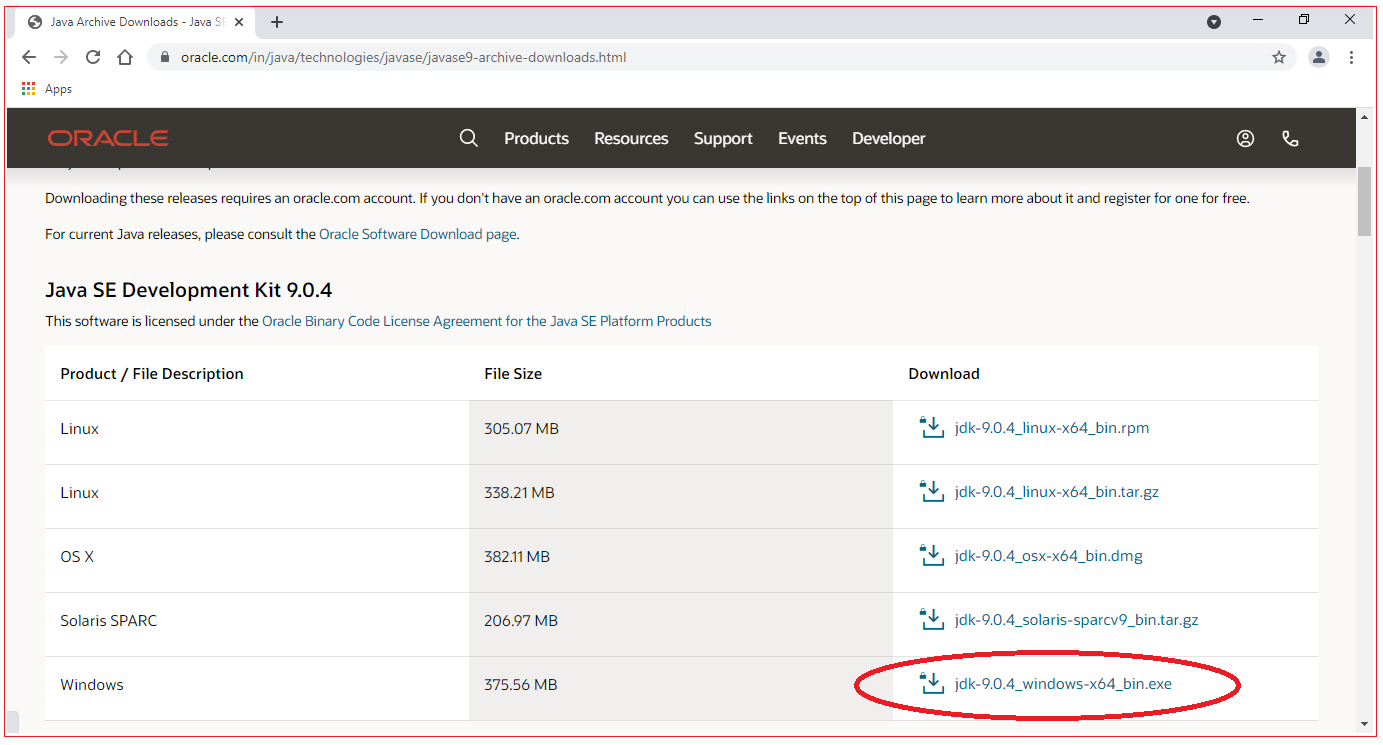
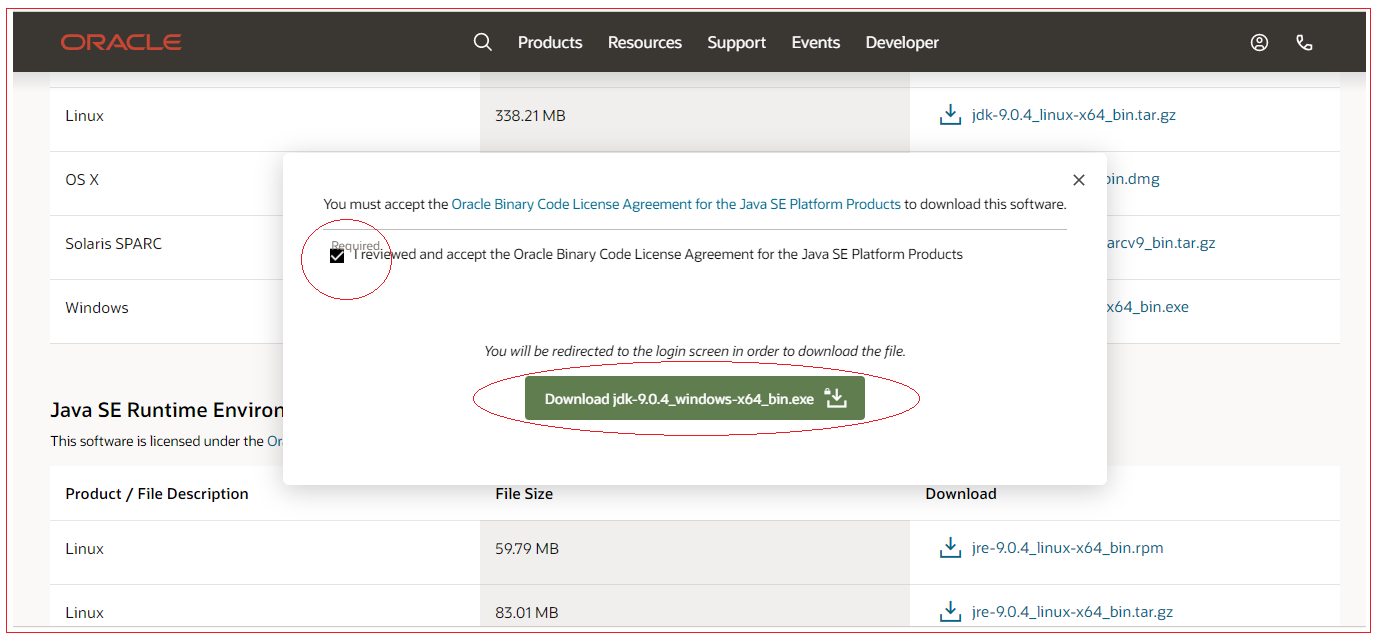
Accept the Oracle Binary Code License Agreement and click Download jdk-9.0.4_windows-x64_bin.exe
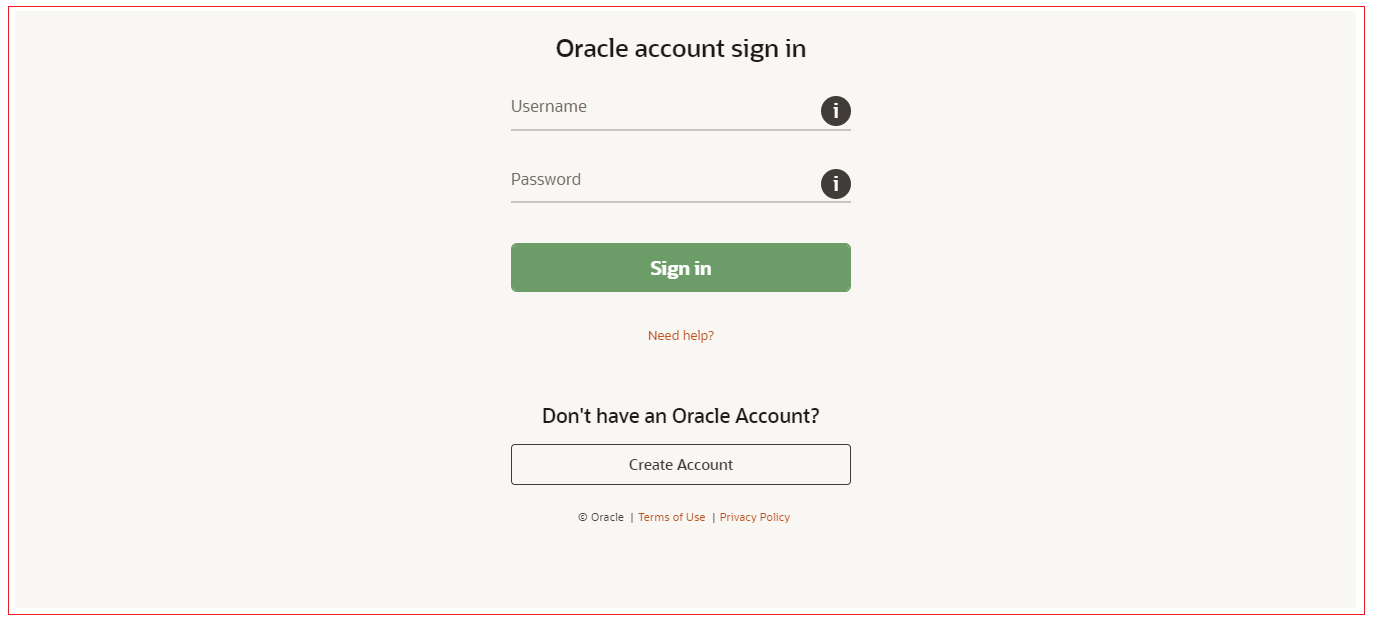
Now you will be landed to Oracle account sign in screen. Sign in if you have already oracle account; otherwise create an account to download JDK.
After download, installation is simple as installing any other software, involves multiple steps each steps requires you to click on Next buttons.
Step 2: Set path in environment variables
Why we need to set path?
When we set the path, we can compile and execute java programs by keeping java files in our desired folder structures. If path is not set, then to execute programs you have to keep java files in a folder where java compiler (javac.exe) is present. We should not disturb the java development kit installation environment by keeping our program files.
How to set path?
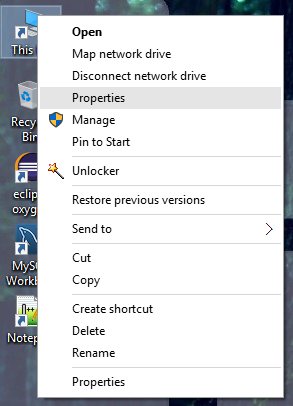
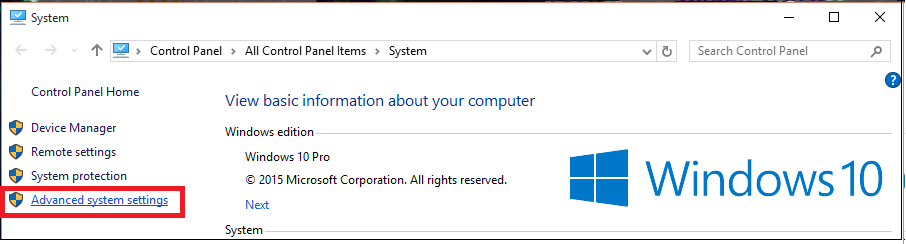
a. Right click on Computer (Windows 7)/ This PC (Windows 10), select Properties
b. Click on “Advanced System Settings”
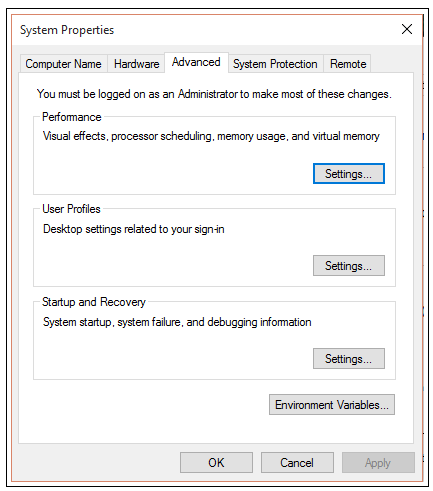
c. Click on Environment Variables
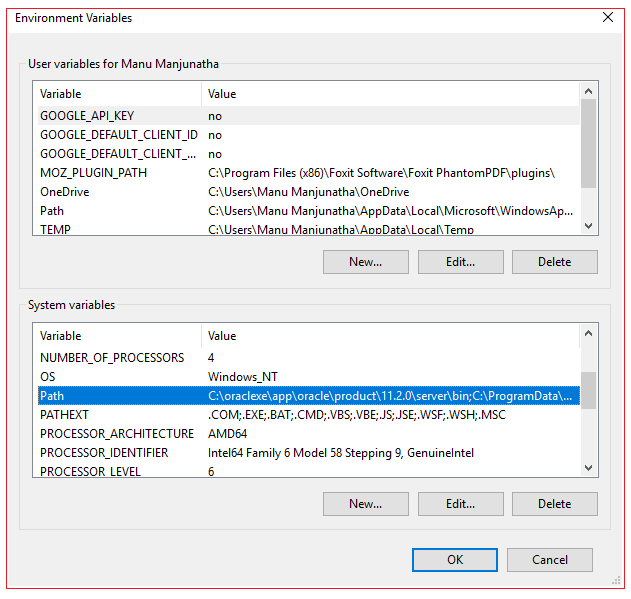
d. In System Variables double click on path variable.
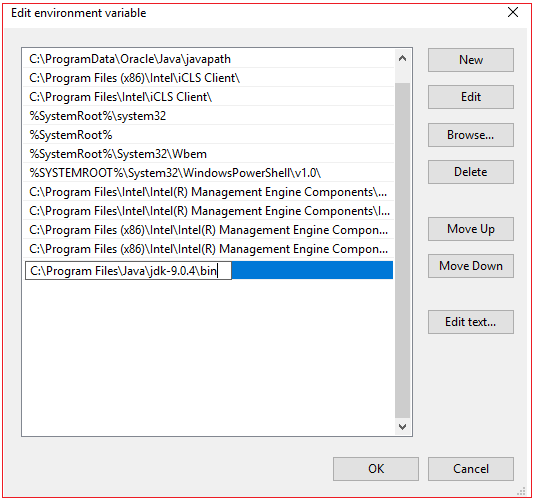
Now click on New button and add new value C:\Program Files\Java\jdk-9.0.4\bin as below and click OK to save.
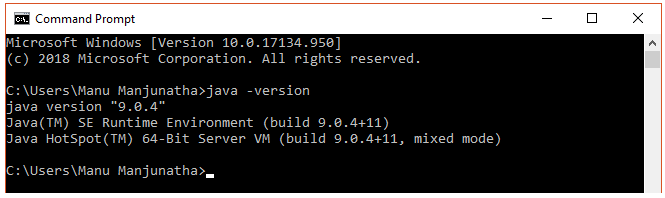
Once java path is set open command prompt and type “java –version”, we should see java version. If you get the error as “java is not recognized as an internal or external command, operable program or batch file” then java is not installed in your system.
Step 3: Write the java program
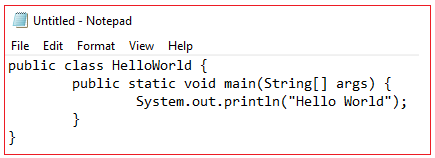
a. Open notepad or your favorite text editor and type this code into a file.
public class HelloWorld { public static void main(String[] args) { System.out.println("Hello World"); } } |
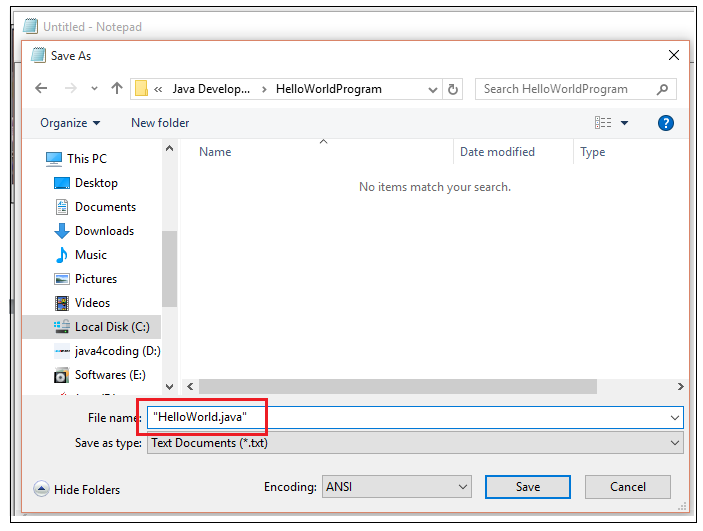
b. Save this text file with name “HelloWorld” and with extension .java. To save file with .java extension give the file name with extension inside double quotes.
Step 4: Compile the program to bytecode and run the bytecode
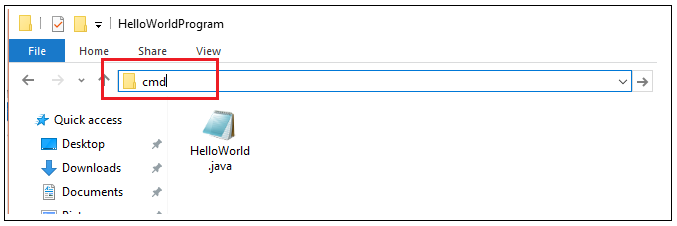
a. Navigate to the folder where you have saved your java file and open command prompt. Or open command prompt and then navigate to the directory where java file is saved using cd command. It is better to open command prompt directly for the folder where java file is saved. To do this open windows explorer for the folder, then type “cmd” in navigation bar and then press enter.
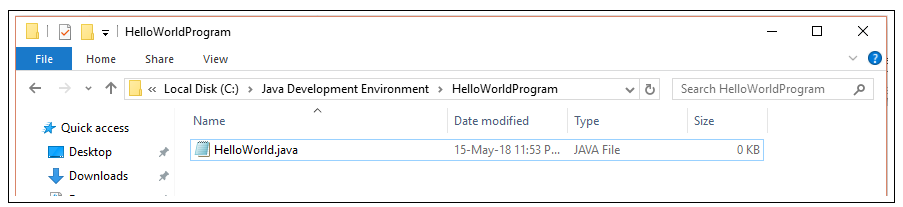
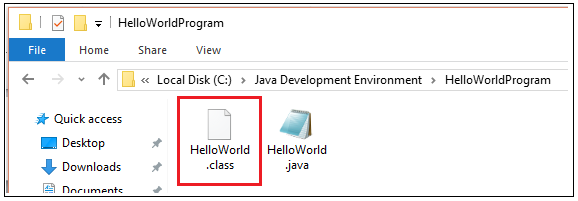
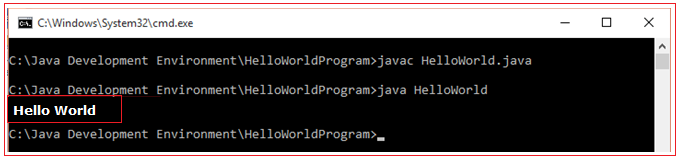
b. Now type the command “javac HelloWorld.java” and press enter. This will compile java file and generates file with .class extension. This file is also called as java byte code. You can see below, class file is generated.

If compilation is done without any errors, ideally we can see no message printed on console.

Open the folder and check if class file is generated.
c. Now to run the java byte code (class) file, type the command “java HelloWorld” and press enter. We can see the output printed on console.
Quick revision to the steps to execute the program
Write the program, save it with the same name as class name, save with .java extension, while saving use double quotes in order to avoid saving file with some other extension. (Use any of the editors like notepad , editplus, eclipse)
Do not save your Java source files in a directory with spaces in the name of the directory. This may cause problems, depending on the version of Windows you are using; therefore, do not save your files in the My Documents folder.
Do not save your Java source files in any of the java installation directory. Save in separate directory, separate folder. Name of folder should not contain spaces.
Set path and new system variable class path.
If executing in Command prompt directly then change the directory to location where source program is saved.
Type javac <name of program>.java → to compile
Type java <name of program> → to run
All Chapters
