
| ☰ See All Chapters |
How to deploy Spring Boot application to AWS Elastic beanstalk using EB CLI
Step 1: Initialize eb
Initialize Beanstalk project for Spring Boot application by running below command from root directory of your project
eb init
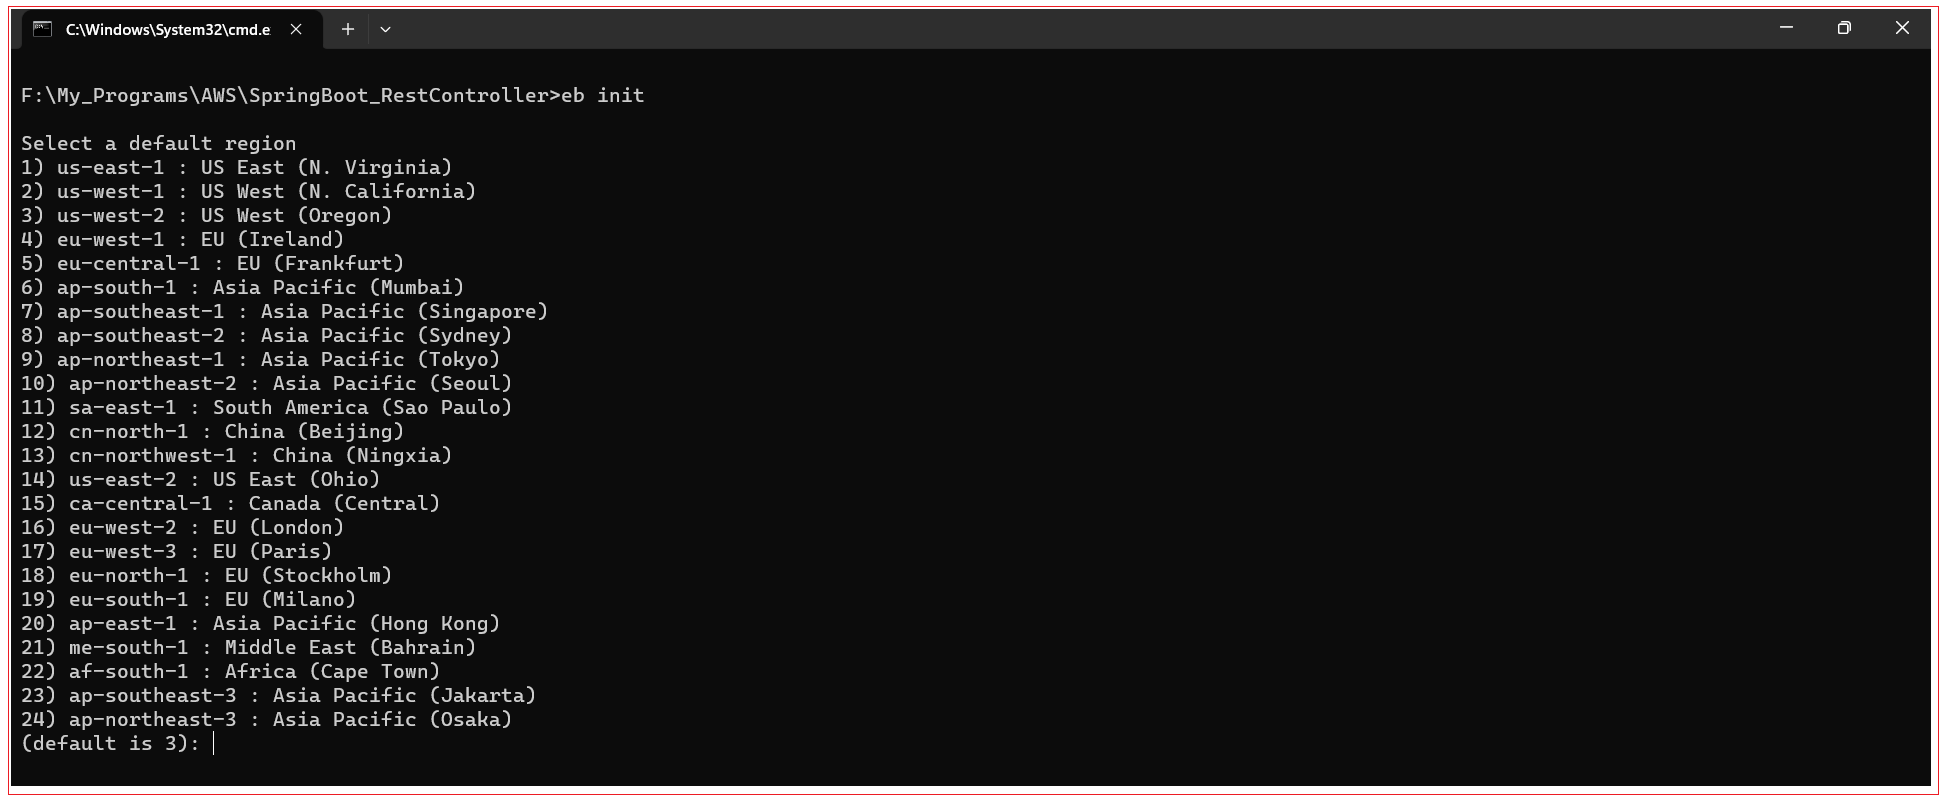
Upon running the eb init command, you are prompted to select the region as shown below. Select your region and press Enter to select default region.
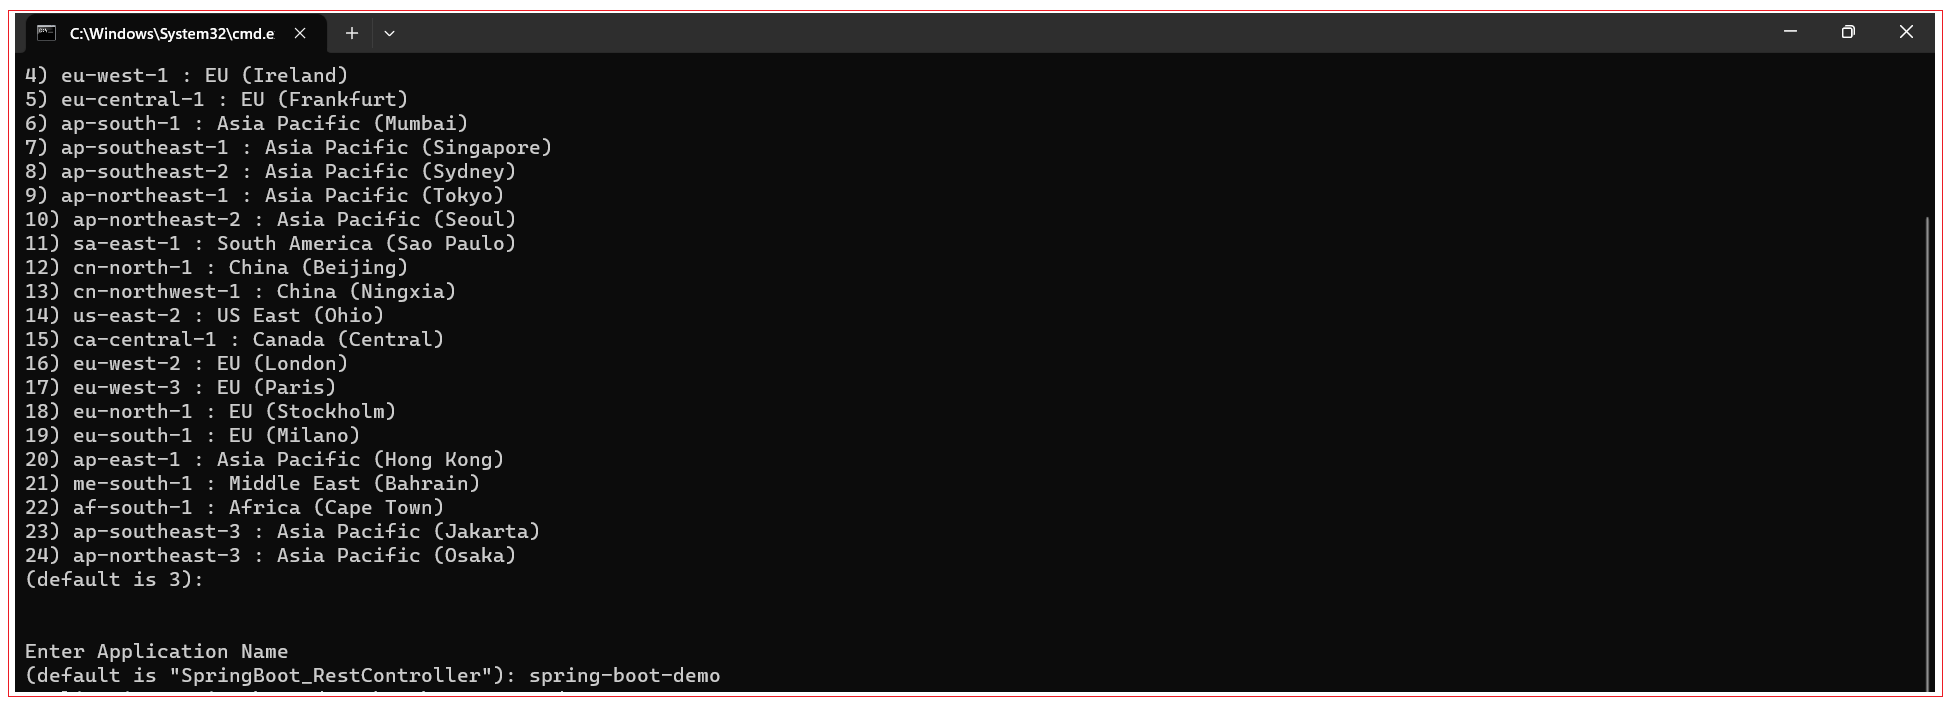
Now you are prompted to enter the name of the application. Enter the name of your application.
Now you are prompted to select the platform of the application. Select Java for Spring Boot application. Input 5 and press Enter.
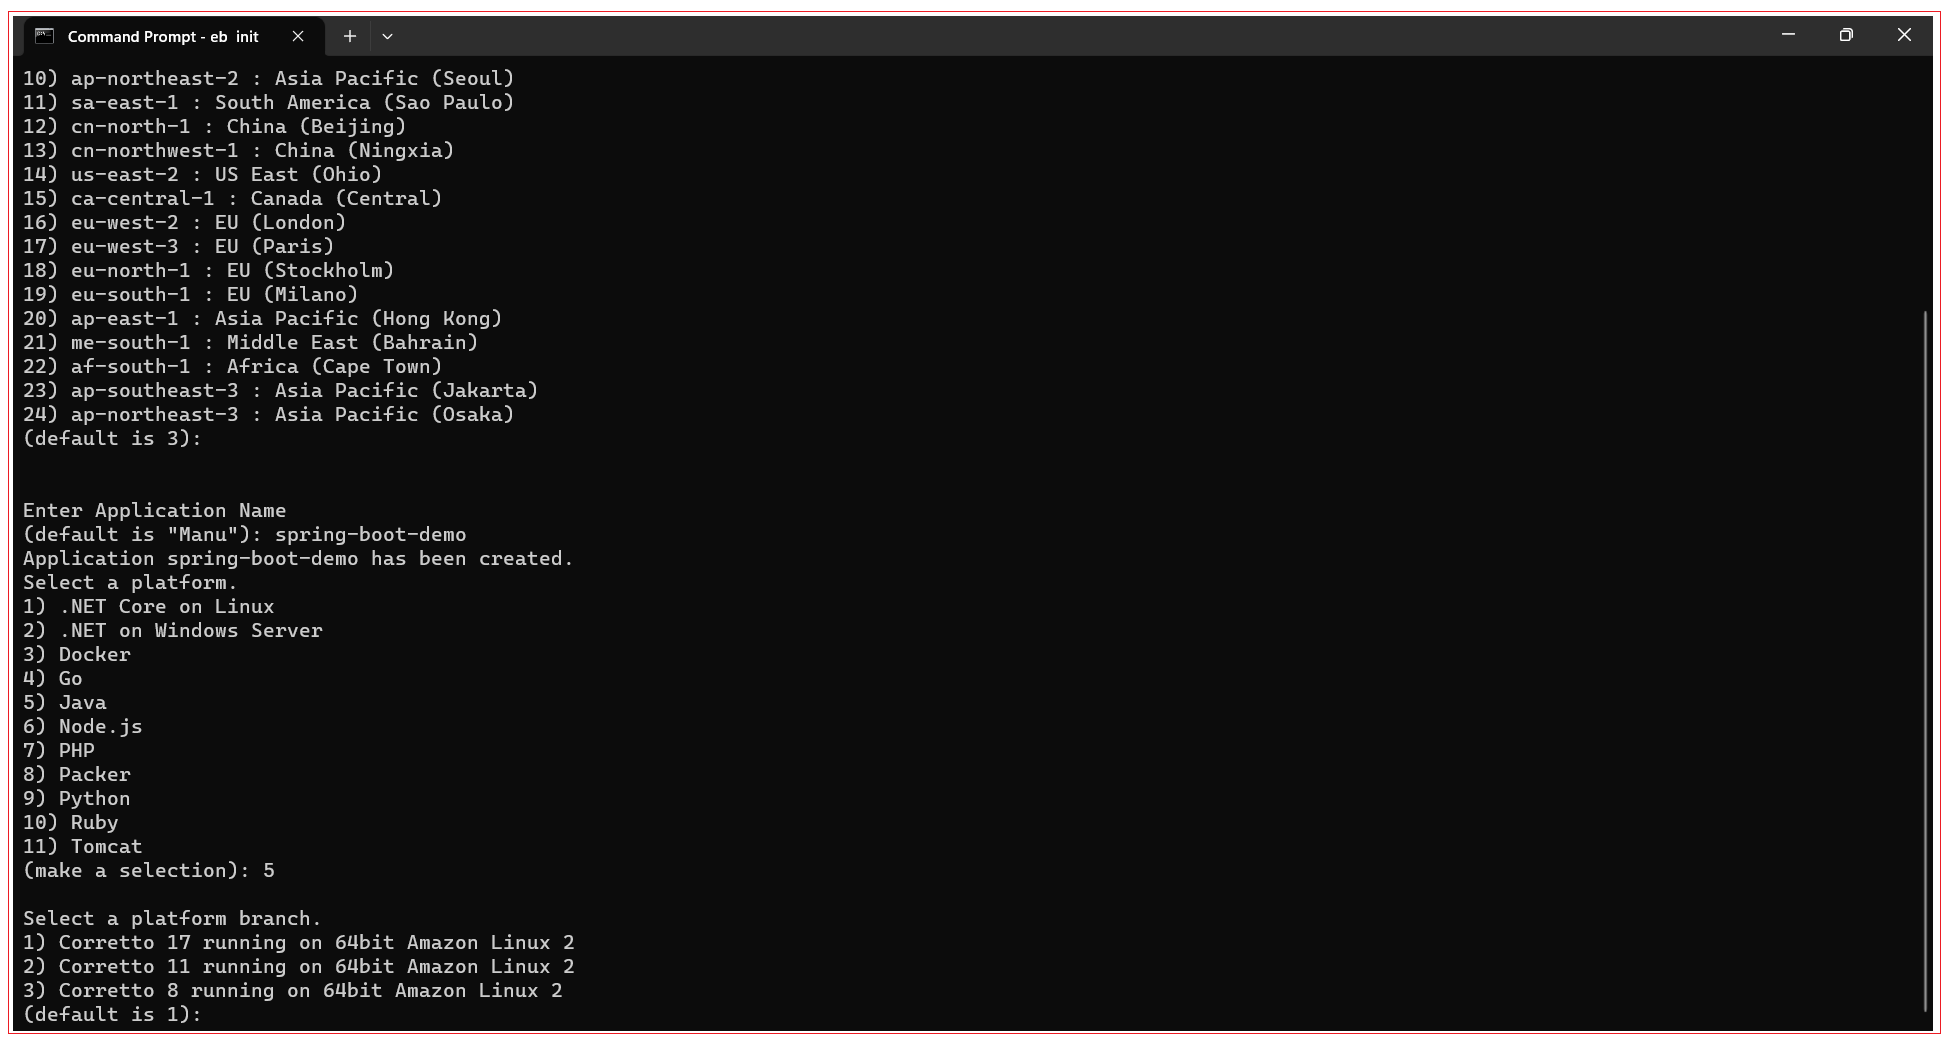
Now you are prompted to select the platform branch of the application. Select “Correctto 17 running on 64 bit Amazon Linux 2” for Spring Boot application. Input 1 and press Enter.
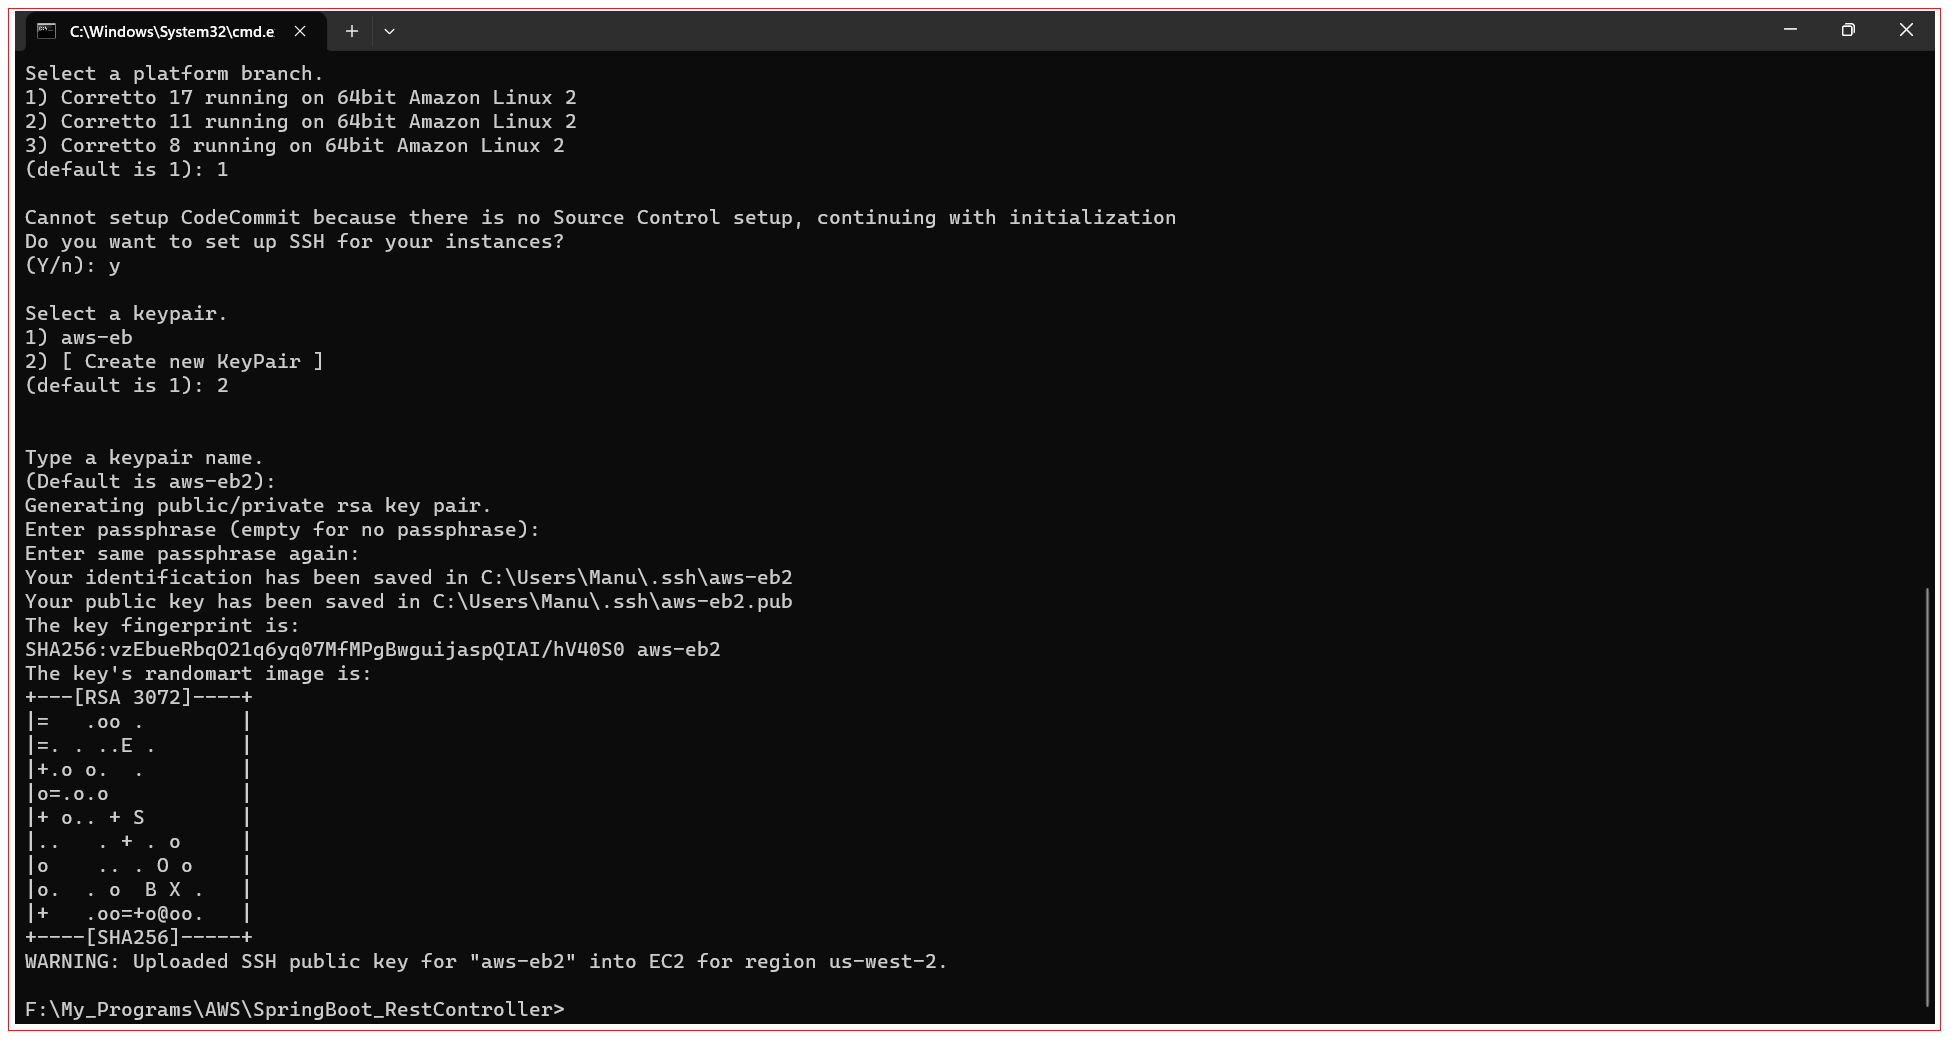
Next you are prompted set up SSH for your instances, Input Y and press Enter.
Next you are prompted type keypair name, enter the key pair name and press Enter. You can use any value for key pair name.
Next you are prompted type passphrase, enter the passphrase and press Enter. You can use any value for passphrase.
Step 2: Create deployment configuration
After eb binit is ran successfully, Elastic beanstalk will automatically create a configuration file in Spring Boot project directory: .elasticbeanstalk/config.yml.

config.ymlbranch-defaults:
|
Build spring boot application using maven command “mvn clean install”, it generates the jar file inside target directory. Add the below entry to the config.yml file
deploy:
artifact: target/SpringBoot_RestController-0.0.1-SNAPSHOT.jar
So final config.yml looks like
config.ymlbranch-defaults:
|
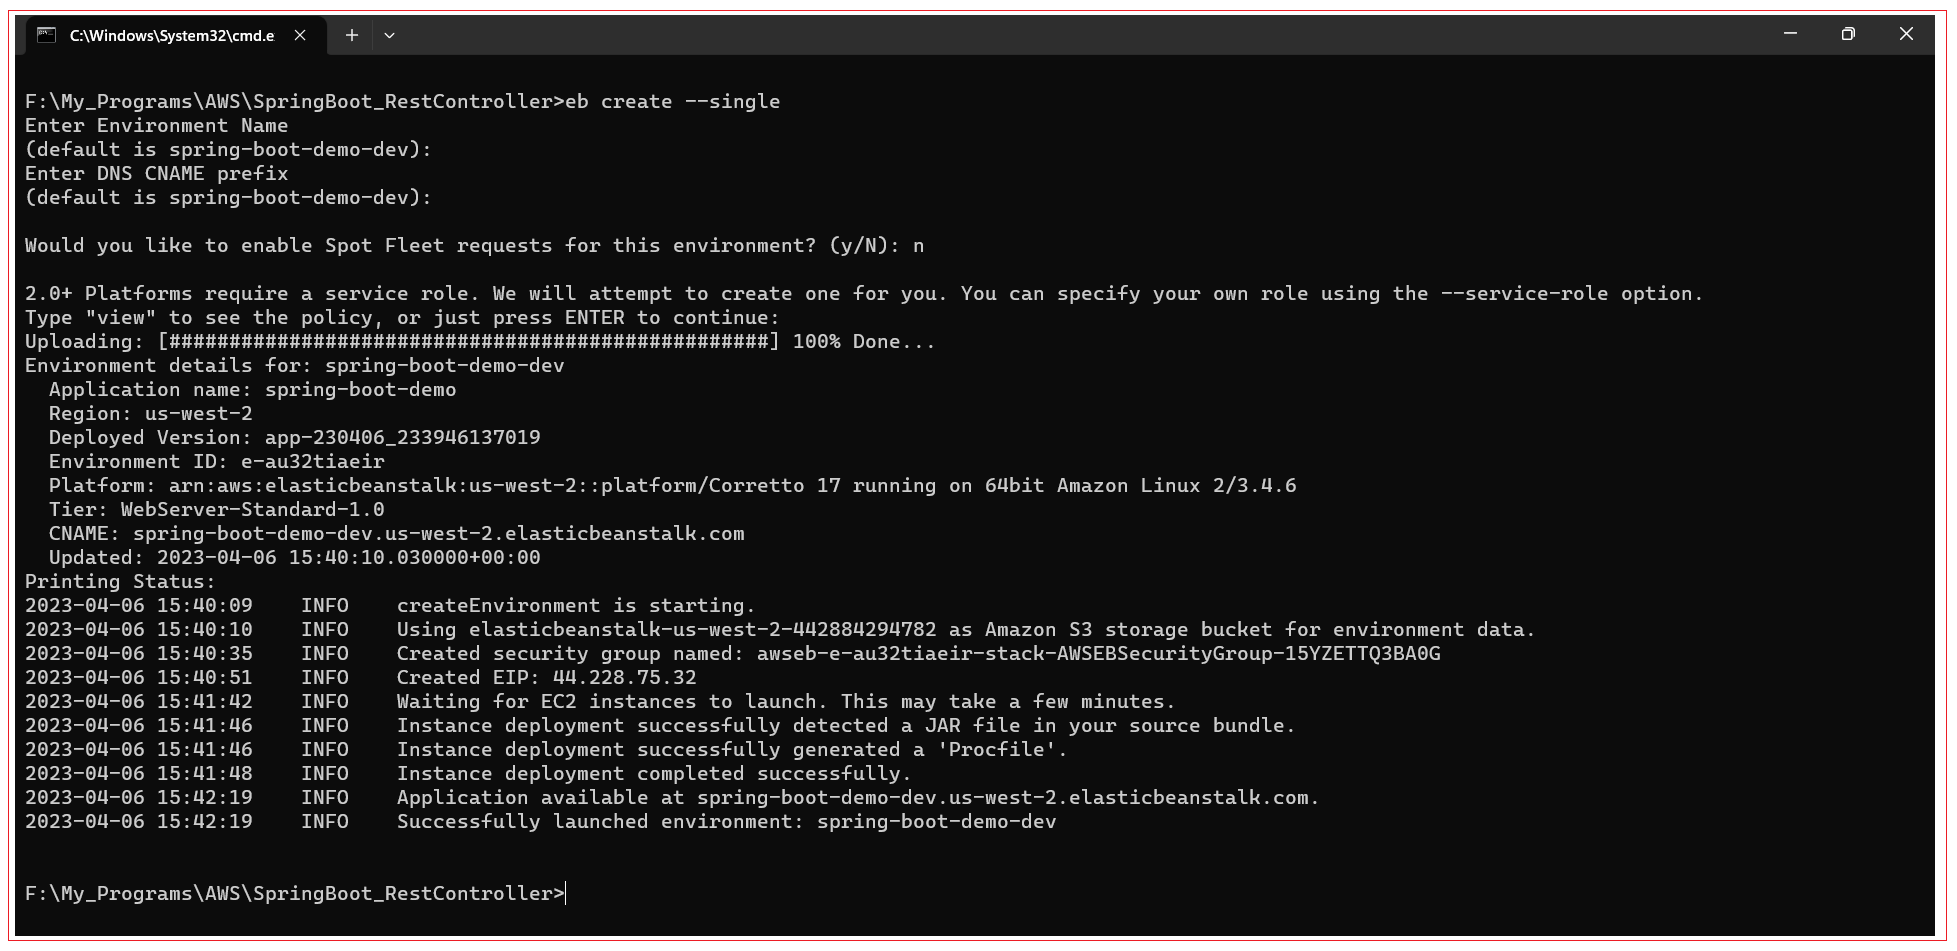
Step 3: Create environment
Create an Elastic Beanstalk environment with the command:
eb create --single
Use –Single flag to indicate CLI to create only one instance otherwise multiple instances will be created with a load balancer which cost our money. Upon running “eb creat --single” command, subsequent prompts appear to enter environment name, DNS CNAME Prefix etc… You can input your desired names or press Enter to capture default name. We gave default values in our example.
Step 4: Test the application
Navigate to AWS Console and you can see application environment.
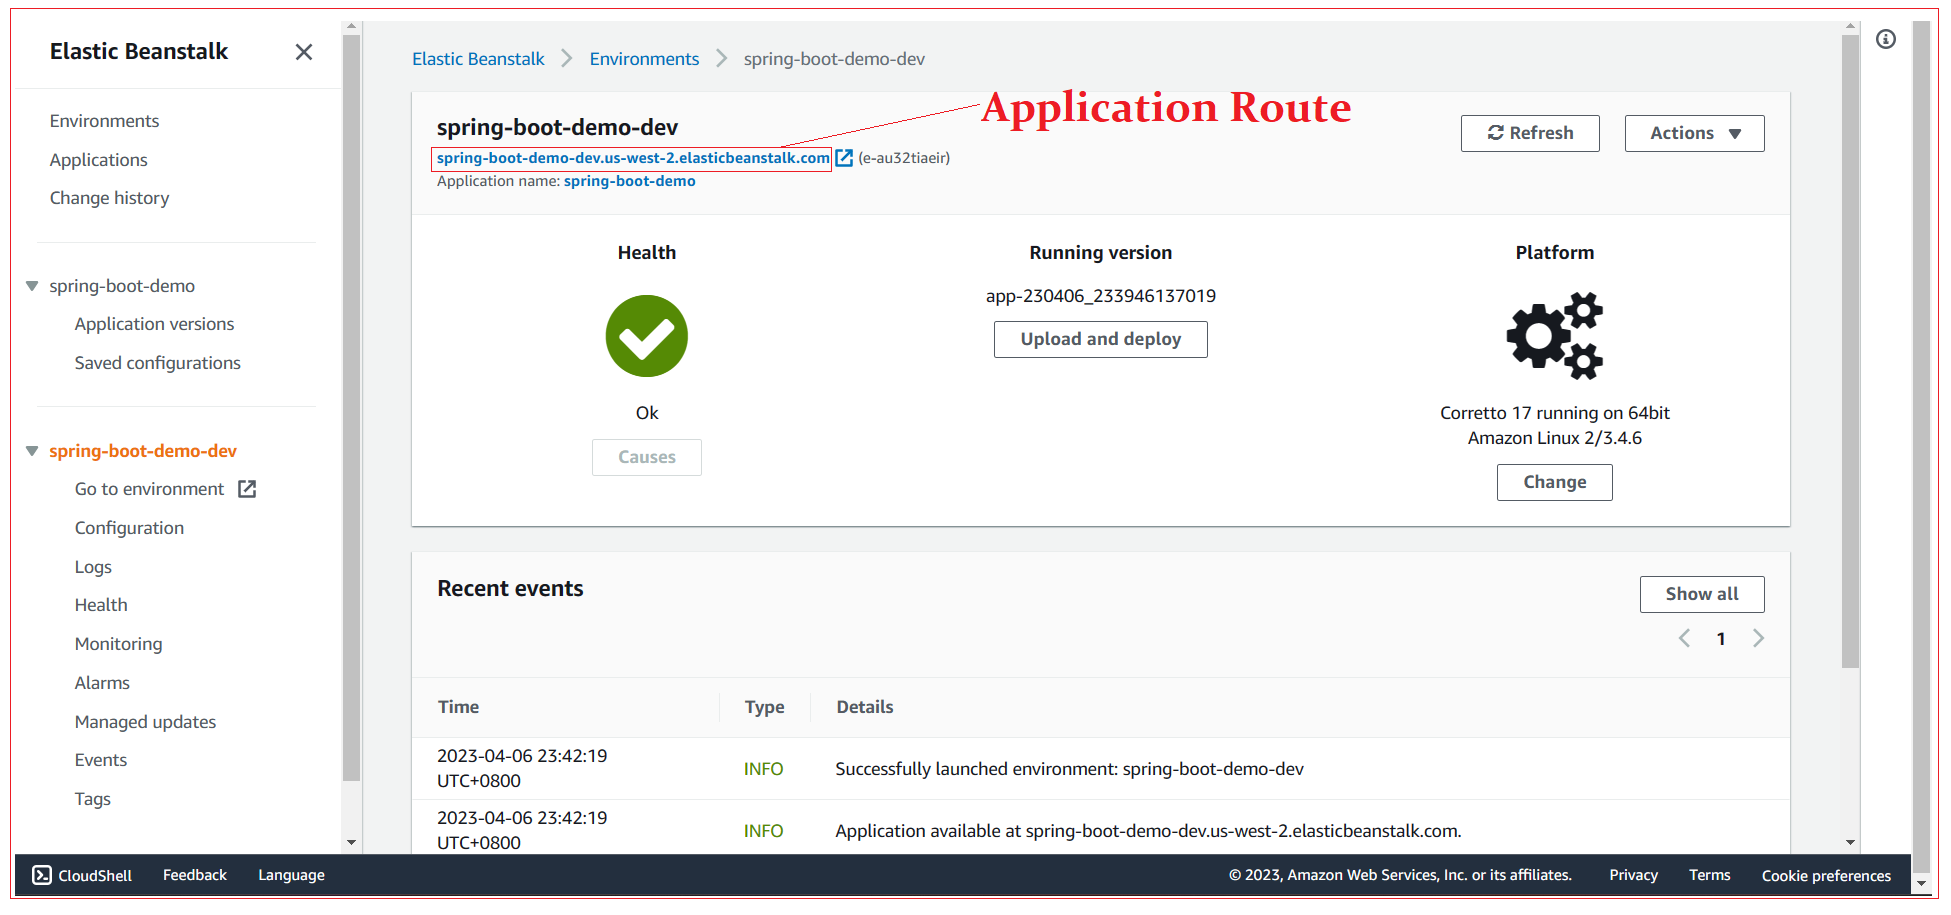
AWS attaches a default route to application which can use to test the application. When you open the route in browser you can see Whitelabel Error Page.

Test the rest API

Test the actuator and health check endpoint.

All Chapters
