
| ☰ See All Chapters |
How to launch a virtual machine from AWS EC2
Below steps explain how to create and launch EC2 instance from AWS Console Management. The GUI Console is a fast-changing console where amazon adds new services frequently and adds updates to the ways it works today. Keep that in mind as you proceed with the steps click-here-click-there parts may be not be same that you see from your account which might have changes as time goes on. The AWS command-line interface is far more stable which we study in later chapters.
Step 1: Navigate to EC2 Management Console
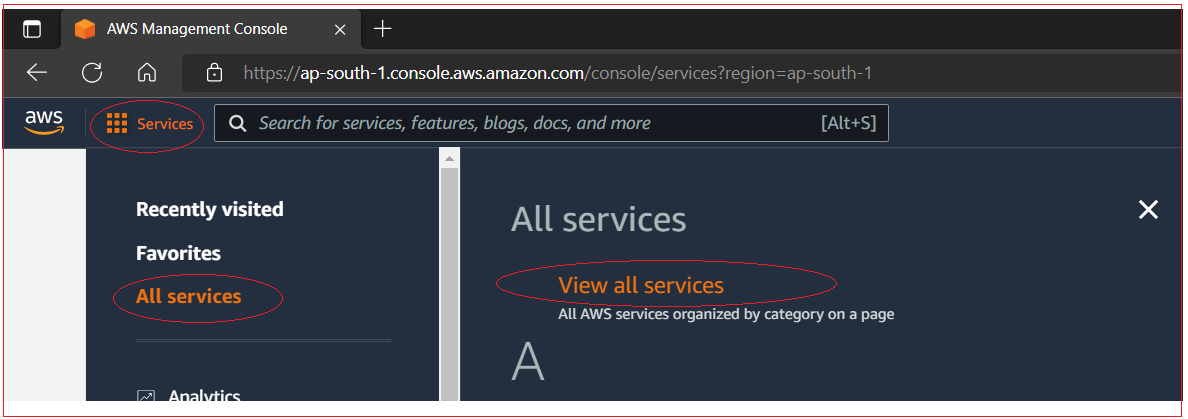
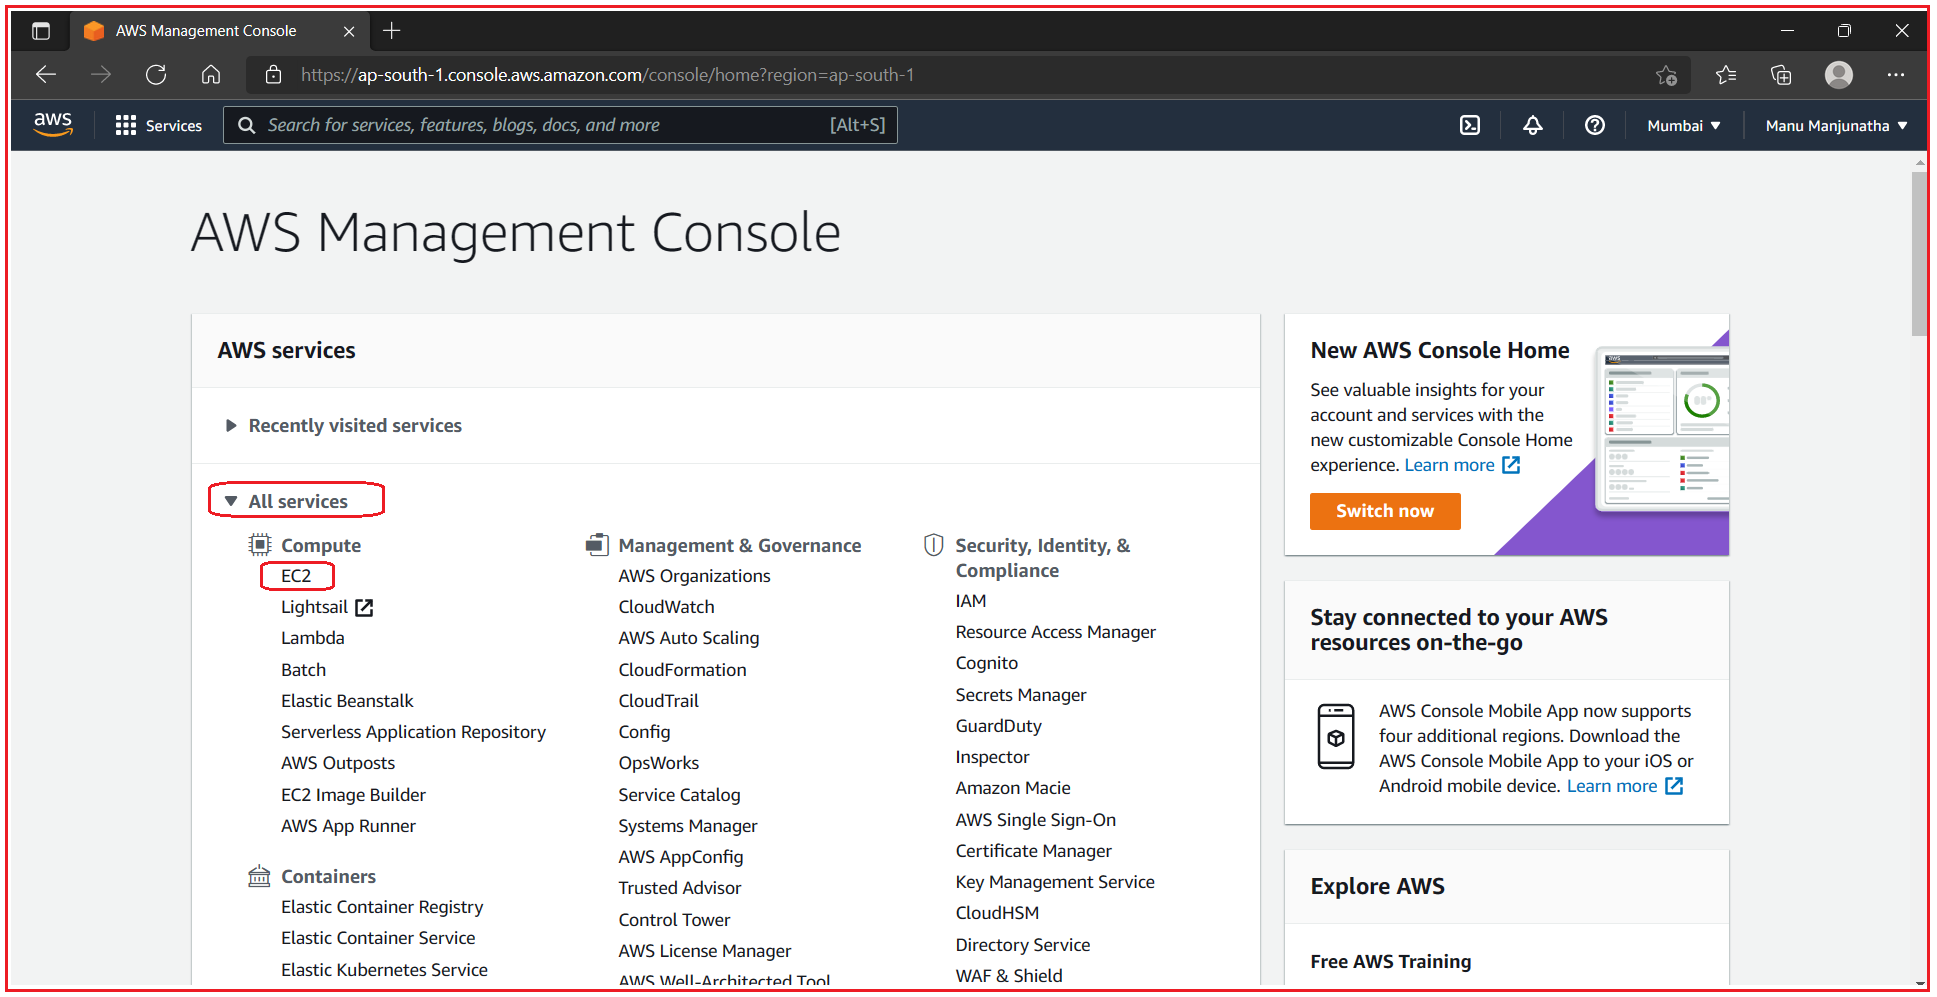
Open AWS Console (https://console.aws.amazon.com) from your browser, Click All Services to expand the displayed links, and click the EC2 option.
Step 2: Choose an Amazon Machine Image (AMI)
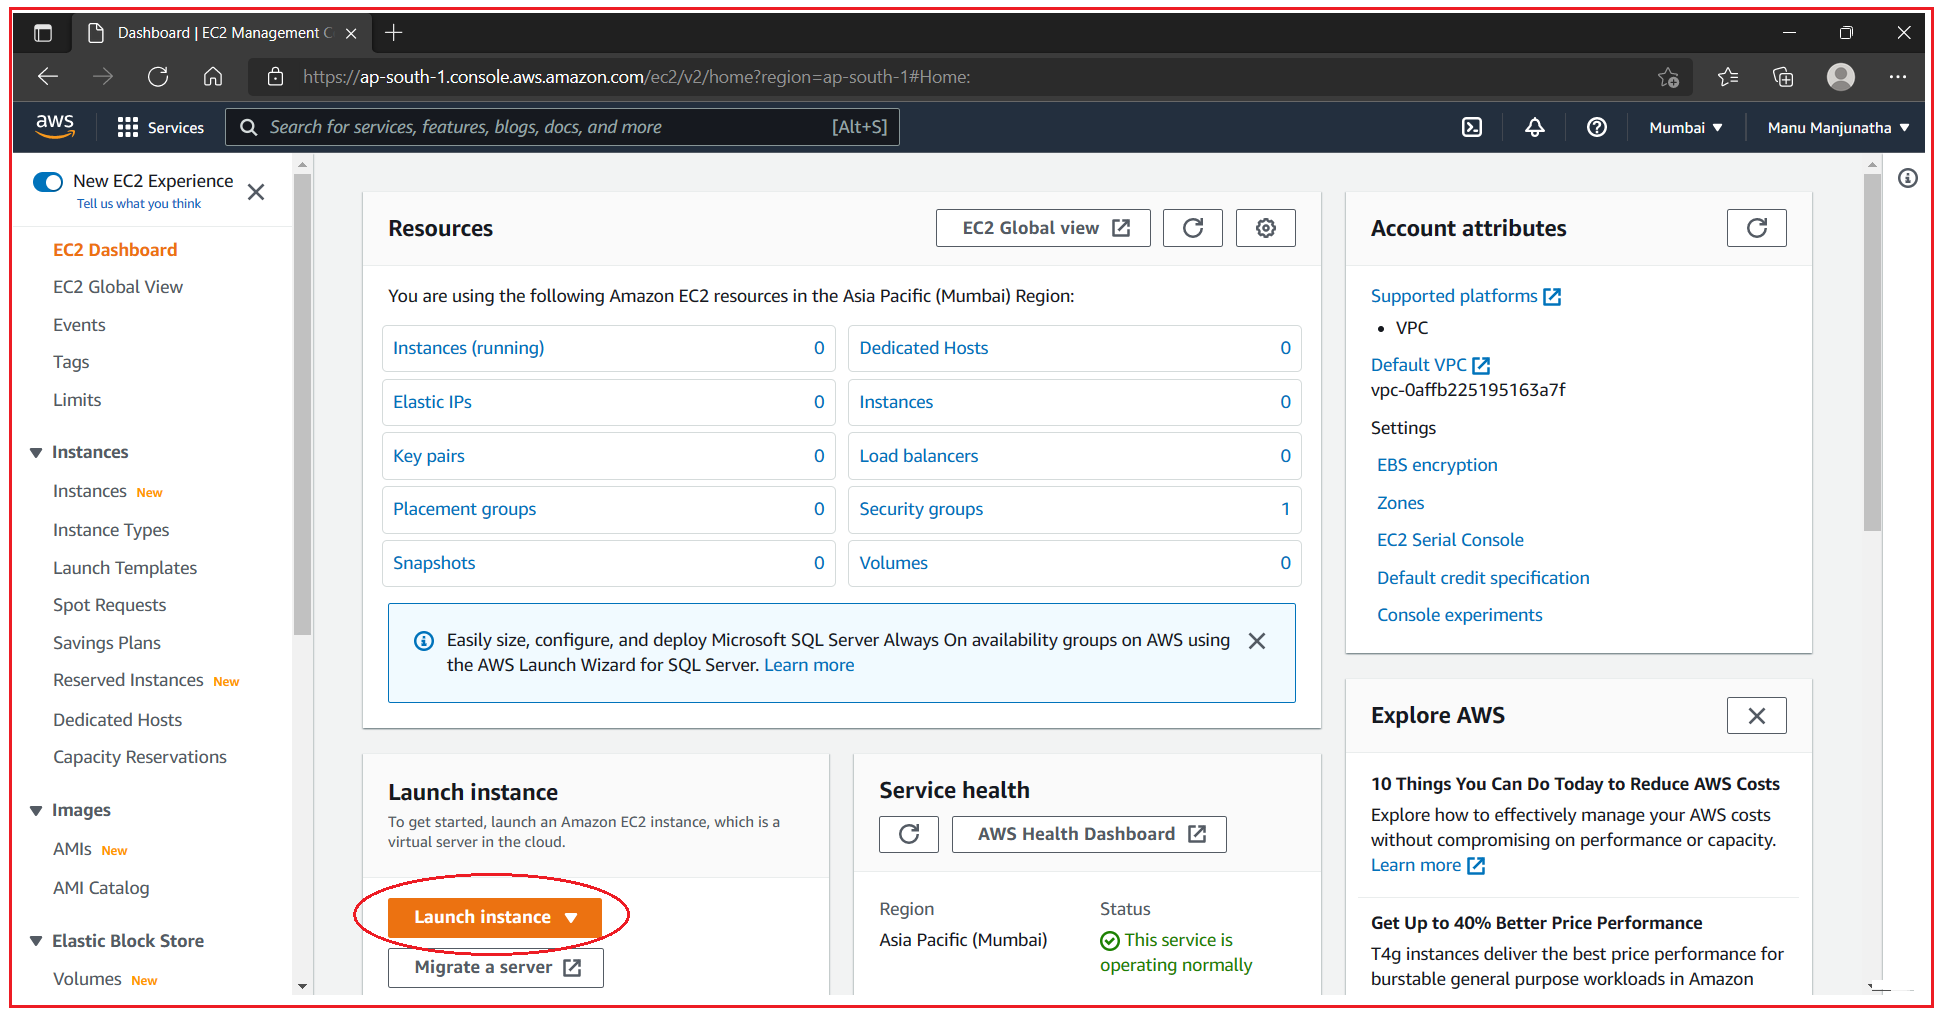
Click Launch Instance.
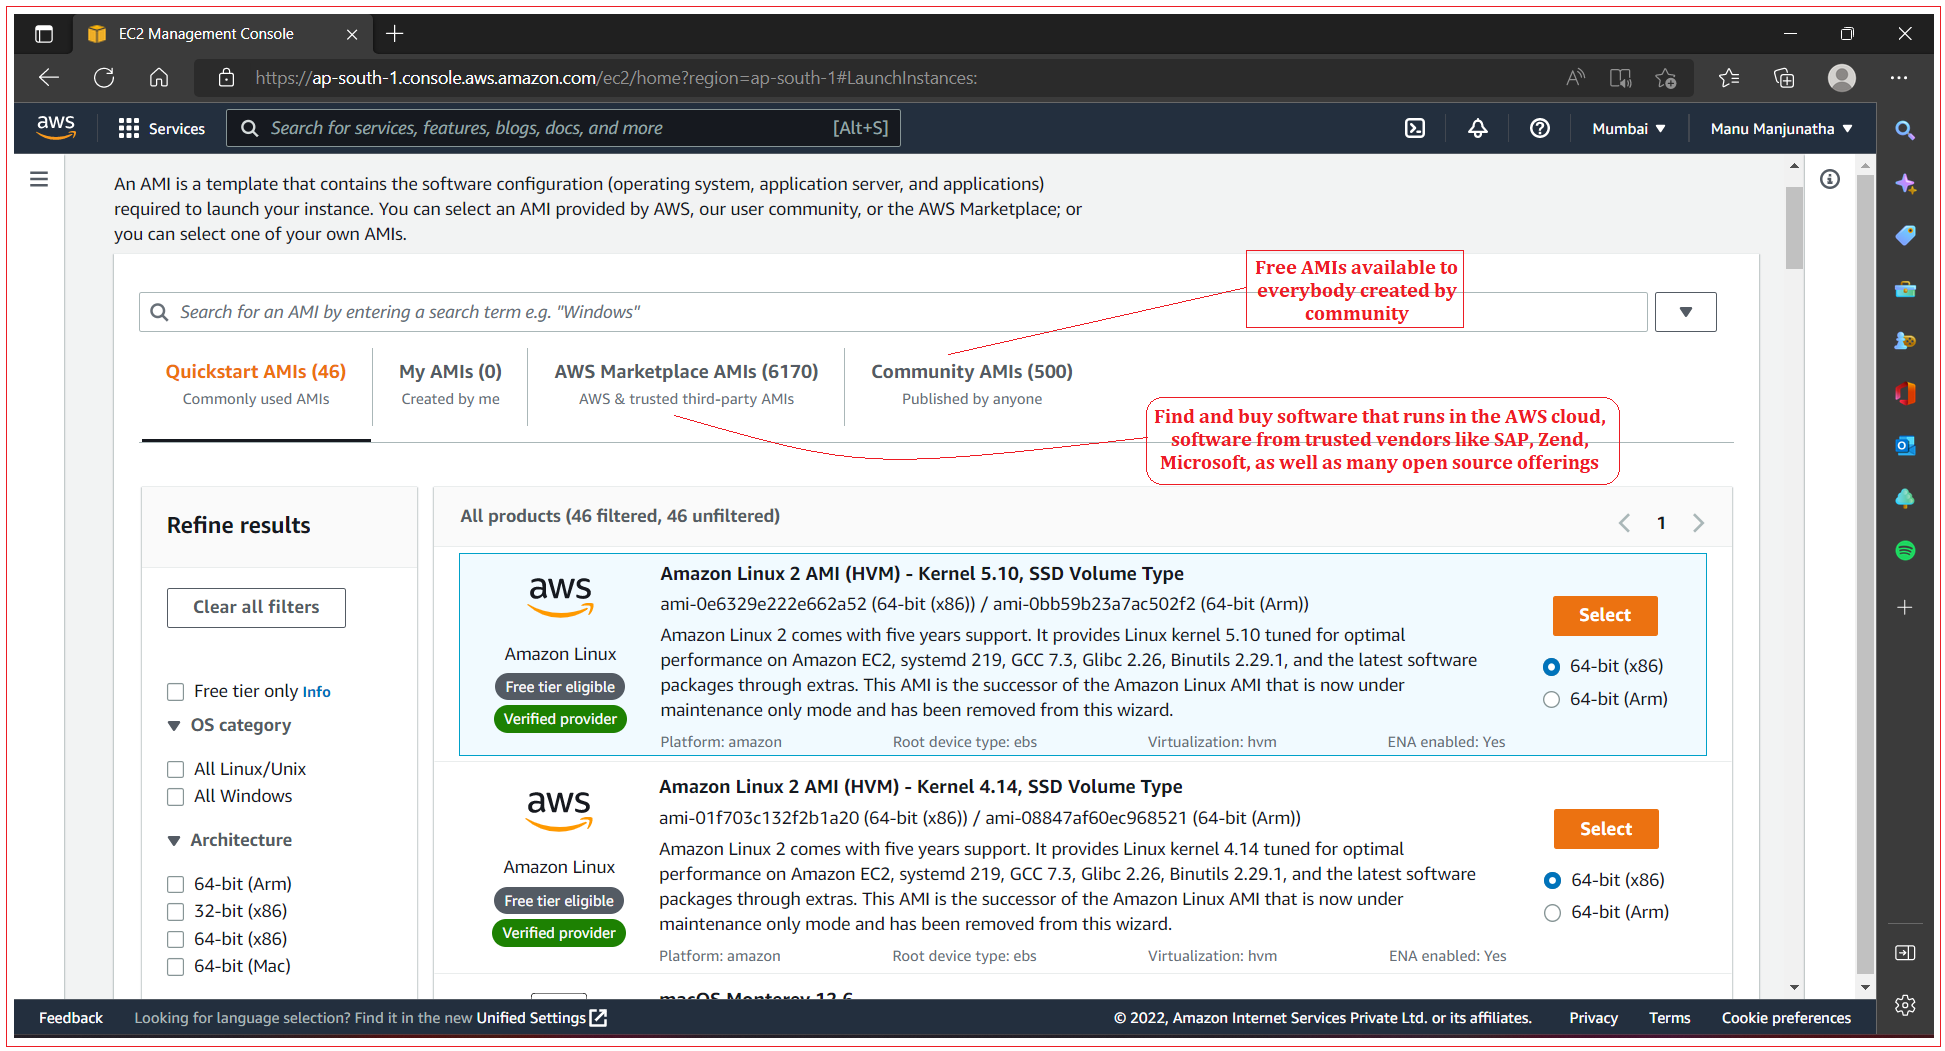
Choose an Amazon Machine Image (AMI) which has the required pre-installed software package. Click on "Browse more AMIs”, Now you will see all the list of Common AMIs including Linux and Windows, Free AMIs available to everybody created by community.
From this wizard you will be guided through the following steps:
Selecting an Operating System
Choosing the compute size of your virtual machine
Configuring details
Adding storage
Tagging your virtual machine
Configure Security Group
Reviewing your input and selecting a key pair used for SSH authentication
Step 3: Selecting an Operating System
Select Amazon Machine Image (AMI) which has come with preinstalled software for your virtual machine. We have selected Ubuntu Server. AMI is the basis for all virtual machines. You can select an AMI provided by AWS, our user community, or the AWS Marketplace; or you can select one of your own AMIs. AWS offers the Amazon Linux AMI, which is based on Red Hat Enterprise Linux and optimized for use with EC2.

Step 4: Choosing the compute size of your virtual machine
On AWS, computing power is classified into instance types. An instance type primarily describes the number of virtual CPUs and the amount of memory. Amazon EC2 provides a wide selection of instance types optimized to fit different use cases. Instance types comprise varying combinations of CPU, memory, storage, and networking capacity and give you the flexibility to choose the appropriate mix of resources for your applications. Each instance type includes one or more instance sizes, allowing you to scale your resources to the requirements of your target workload.
AWS currently organizes its instance types into 10 families, each designated by a single letter: T, M, and so on. The identifying name of a particular type within a family consists of its family letter along with a number to differentiate it from any other types that exist in the family. If you don’t get the instance type belong to any family then they are probably older types that have since been deprecated.
Type family | Member types | Description |
T | T2 | Baseline general purpose |
M
| M3, M4
| General purpose: balance between compute, memory, and network |
C | C3, C4 | Computer optimized: high-performance processors |
X | X1 | Memory optimized for enterprise-class, in-memory applications |
R | R3, R4 | Memory optimized for memory-intensive applications |
P | P2 | Graphics accelerated for GPU-intensive applications |
G | G2 | Graphics-heavy processing |
F | F1 | Hardware acceleration with field-programmable arrays (FPGAs) |
I | I2, I3 | Storage optimized: very fast storage volumes for efficient I/O operations |
D | D2 | Storage optimized: high disk throughput for very large data stores |
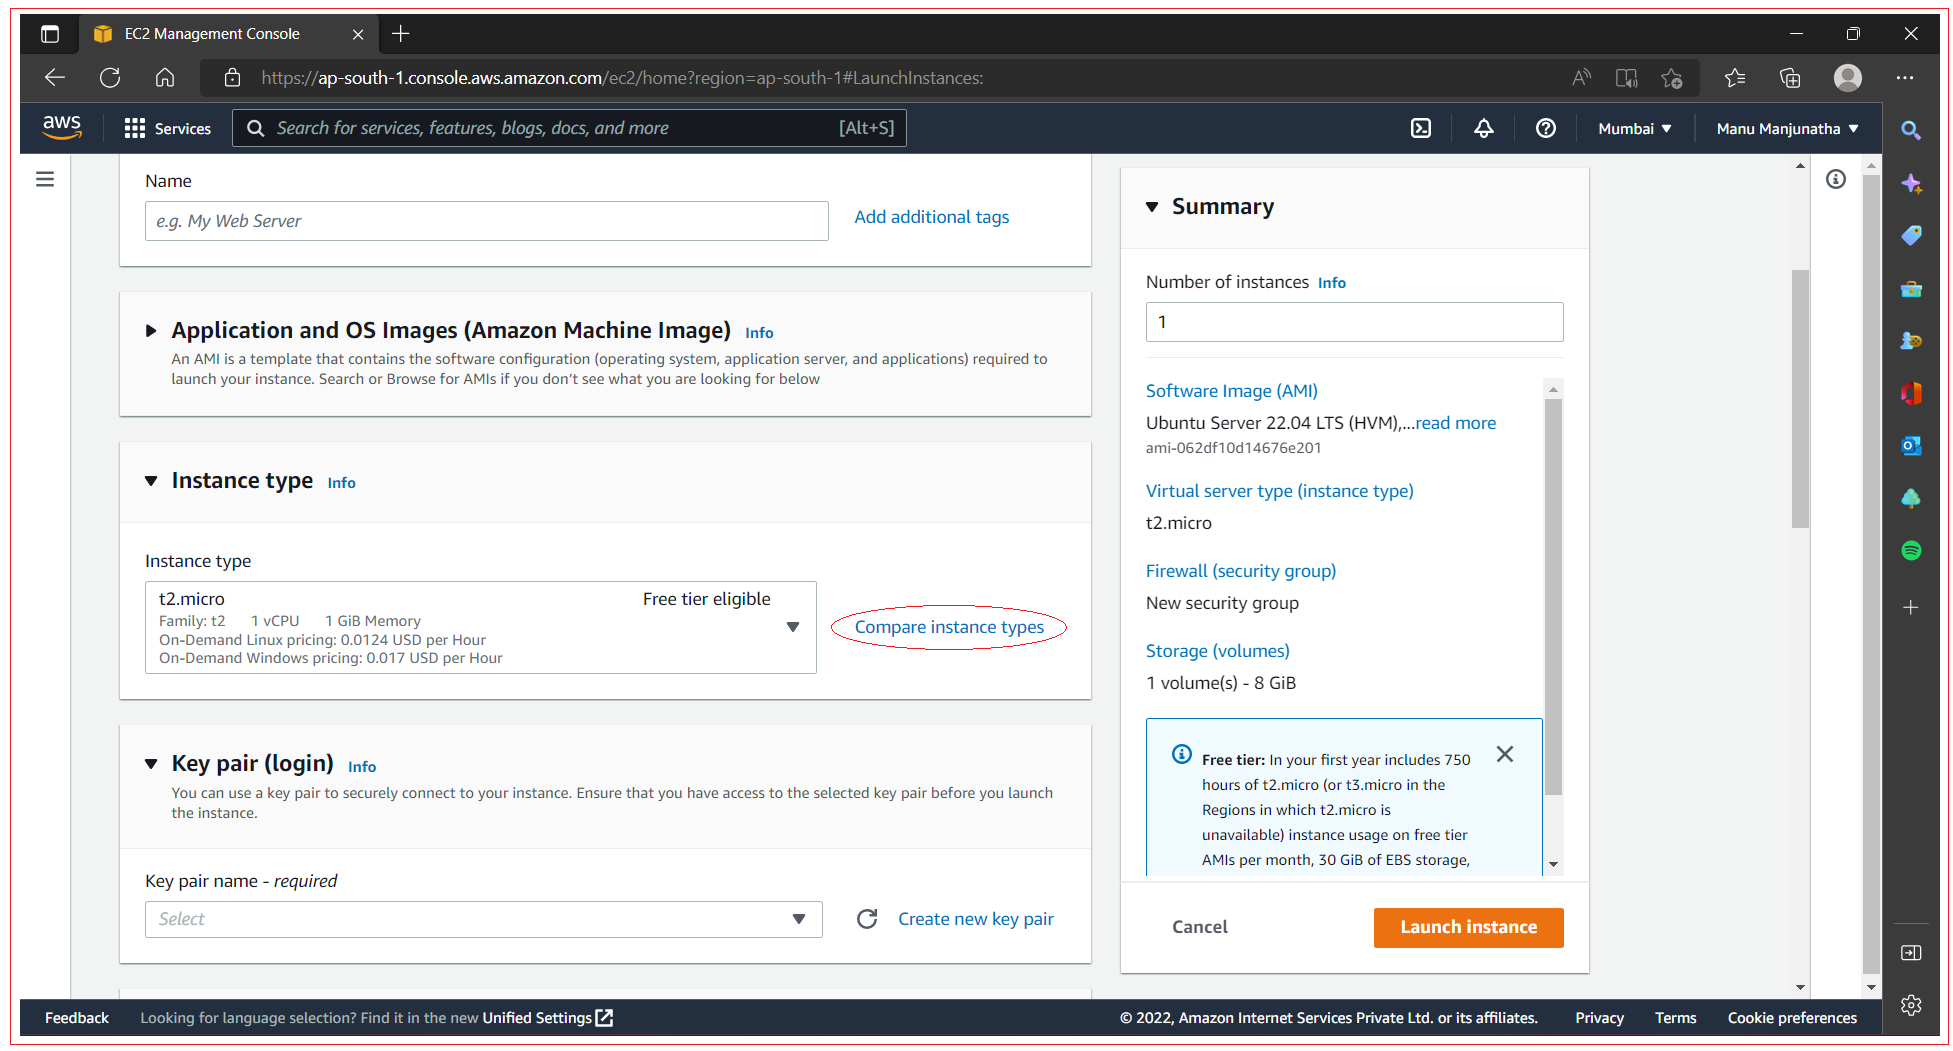
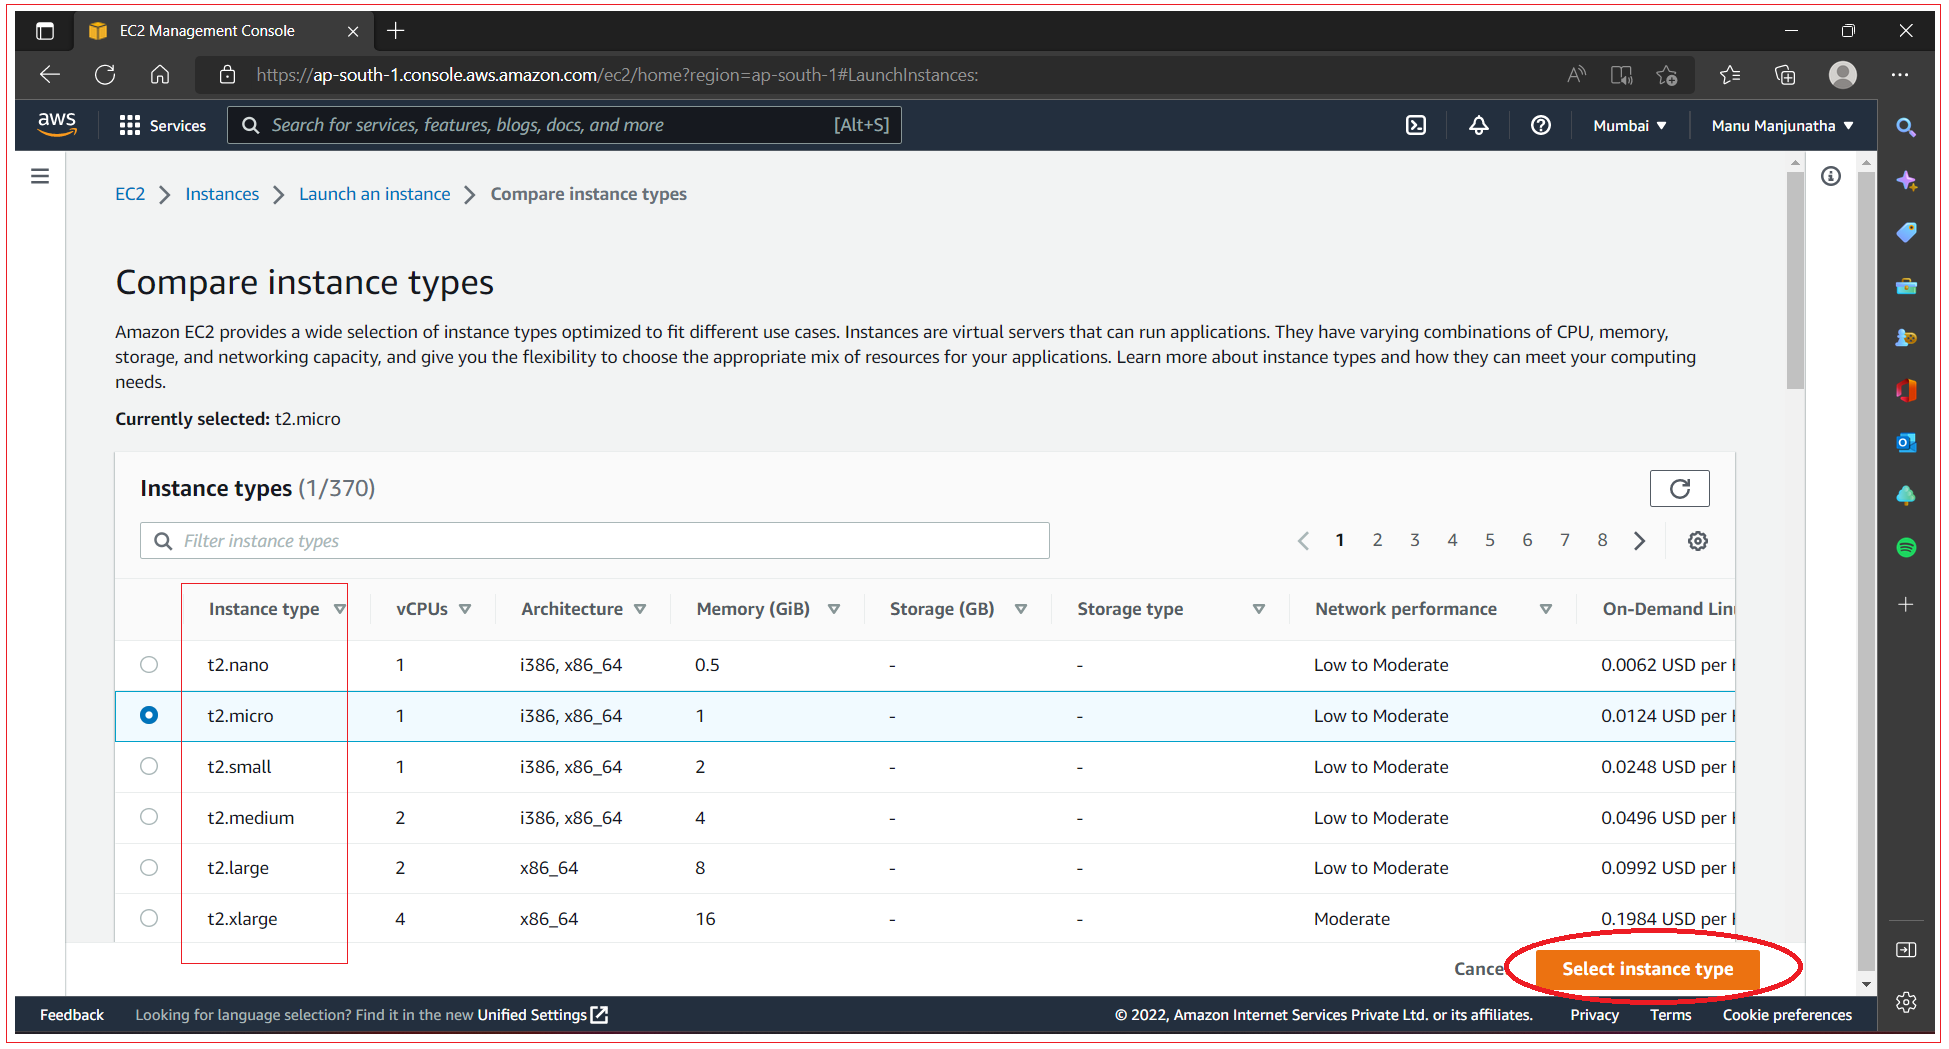
After you select Ubuntu AWS offered Linux AMI, by default t2.micro instance type is selected, click on “Compare instance types” to select different instance type.
You can refer all available instance types from https://aws.amazon.com/ec2/instance-types/
These instance types are split into five categories:
General purpose
Compute optimized
Memory optimized
Accelerated computing
Storage optimized
We have selected instance type t2.micro, which is eligible for the Free Tier. After selecting click “Next: Configure Instance Details” to proceed.
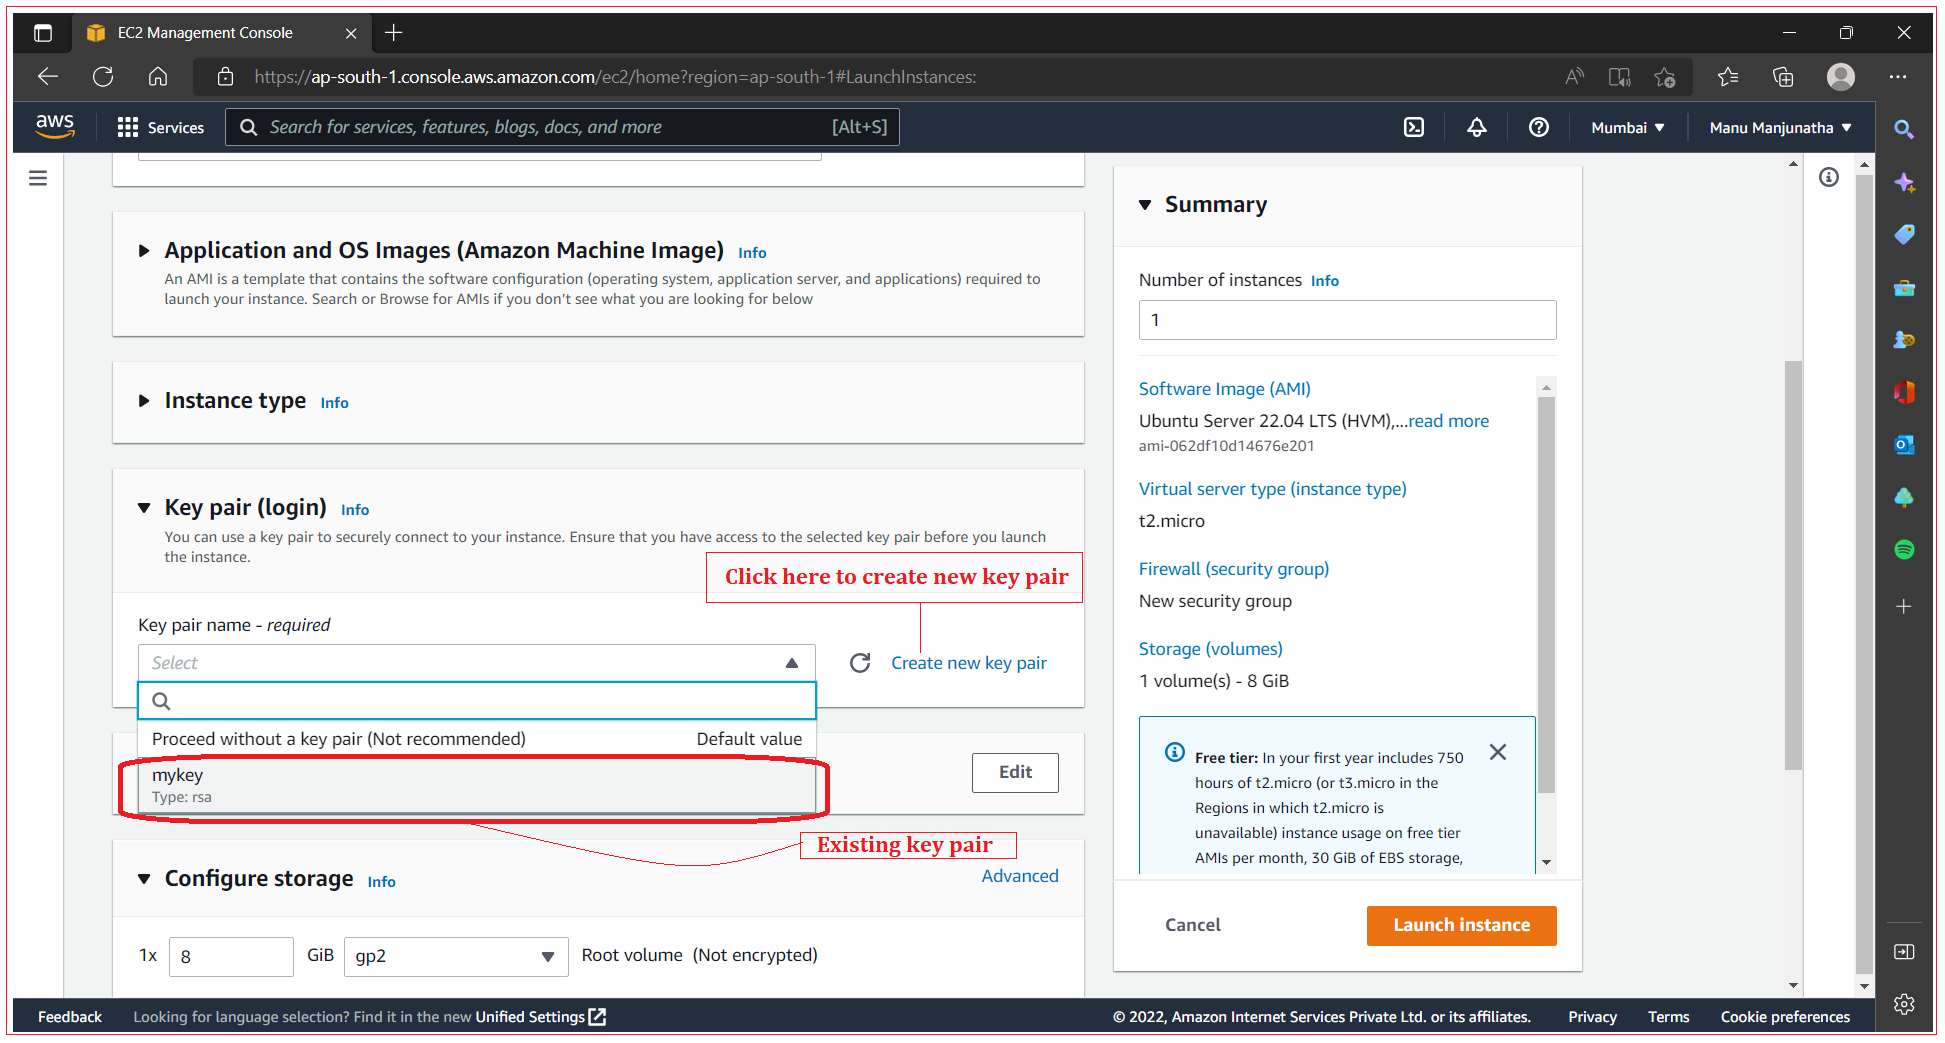
Step 5: Select key pair used for SSH authentication
Select an existing key pair or create a new key pair.
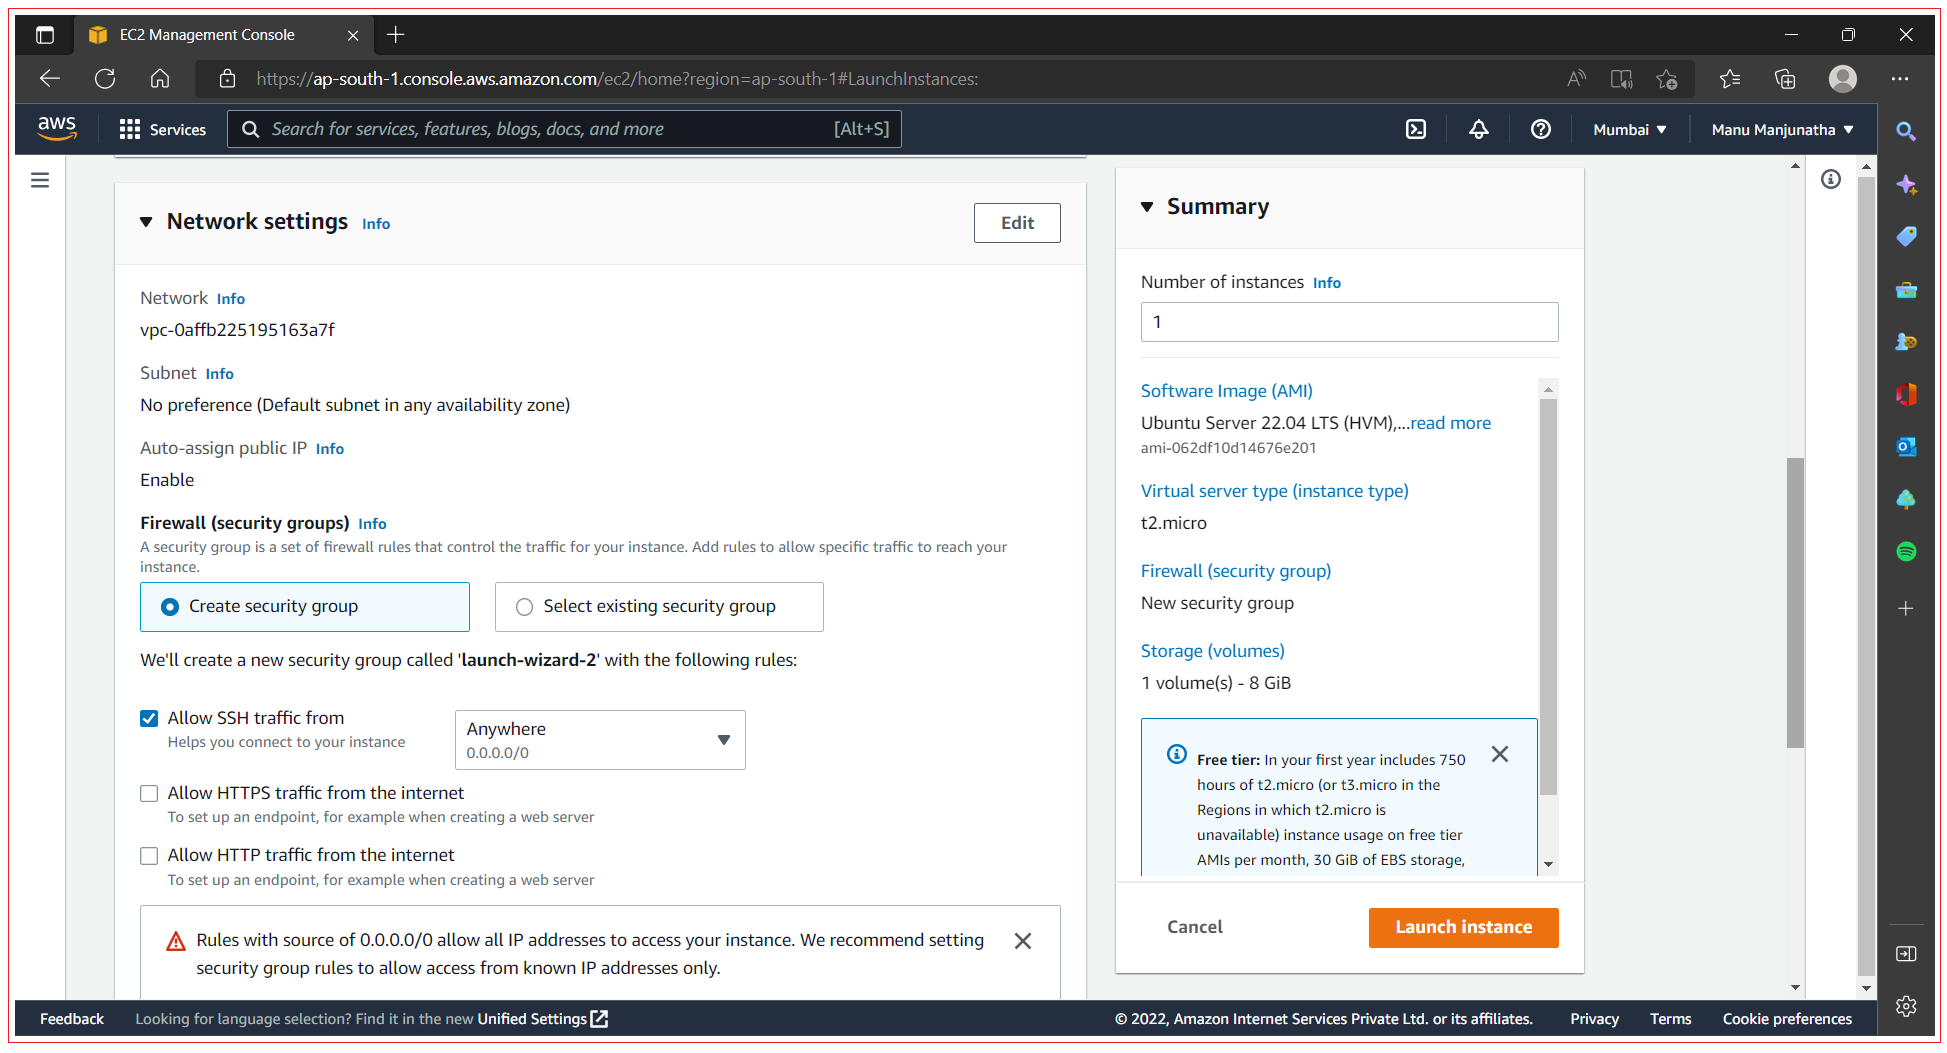
Step 6: Configure network settings
Add the configurations as per your requirements. You can change the details for your VM, such as the network configuration, firewall security group. A security group is a set of firewall rules that control the traffic for your instance. A firewall helps to secure your virtual machine. On this page, you can add rules to allow specific traffic to reach your instance. For example, if you want to set up a web server and allow Internet traffic to reach your instance, add rules that allow unrestricted access to the HTTP and HTTPS ports. You can create a new security group or select from an existing one below. Select values as shown below for a default firewall allowing access via SSH from anywhere.
Step 7: Configure storage
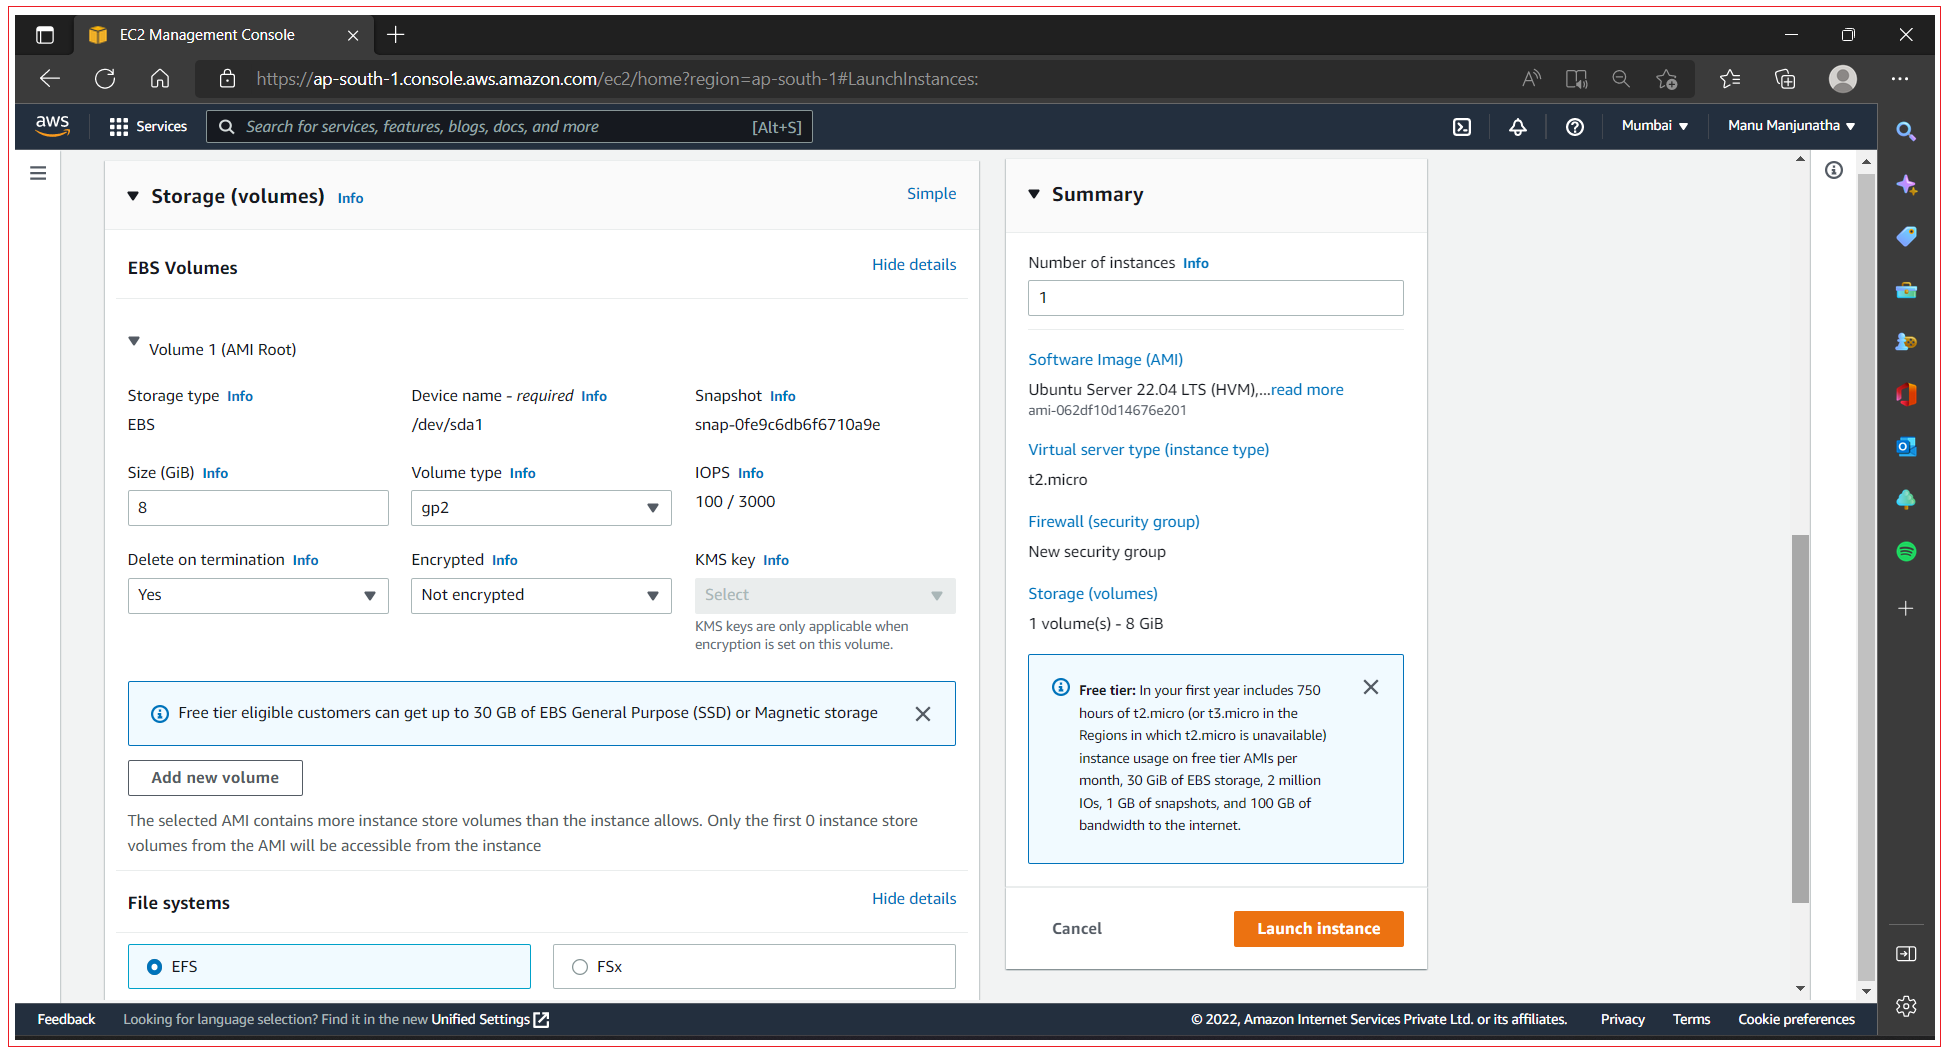
We can add additional volume in this step. You can increase the size of the volume as per your requirements: There are different options for storing data on AWS, which we’ll cover in detail in the following chapters. For now, keep the defaults, and click “Next: Add Tags”.
Here, the Delete on Termination option is selected as Yes, which means the volume will be deleted when the instance is terminated. If you want to keep the volume even after the instance is terminated, deselect this checkbox.
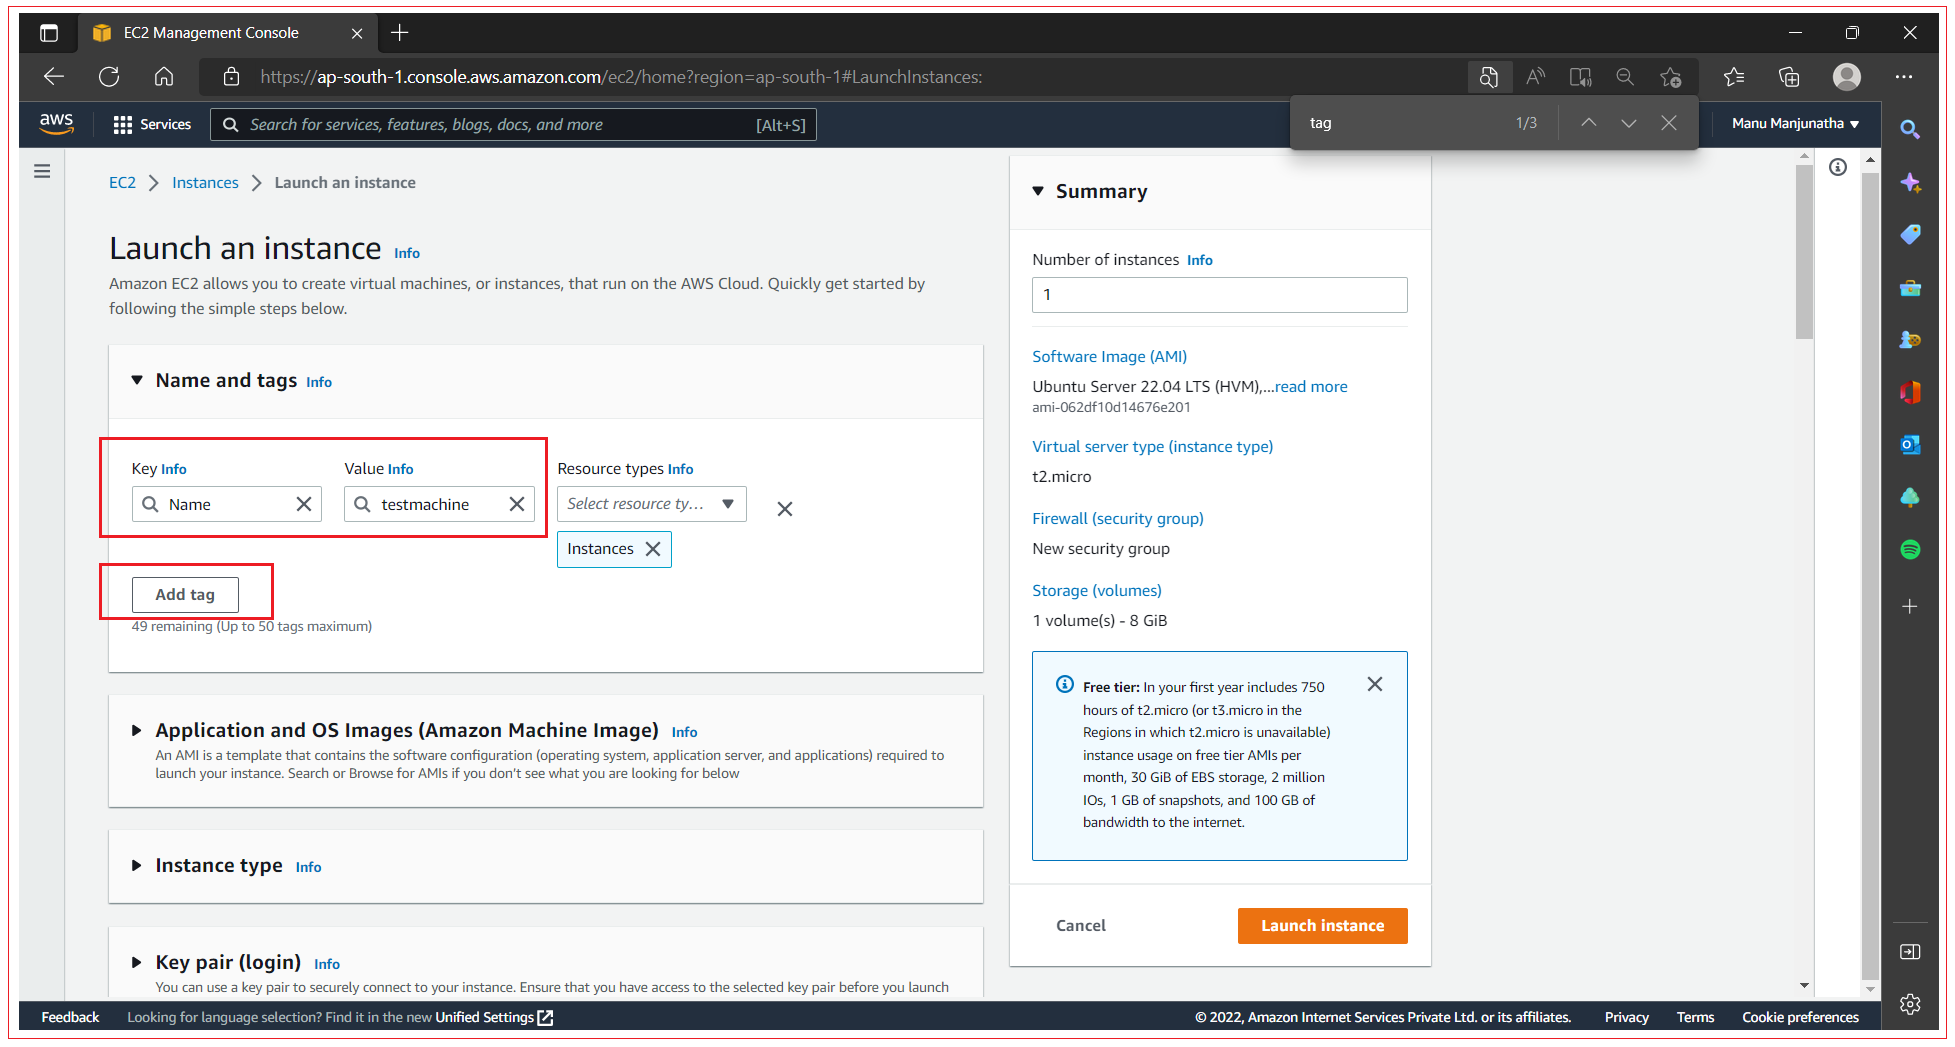
Step 8: Tagging your virtual machine
By attaching tag to EC2 instance you can easily manage AWS resources, so in future, if you want to know which EC2 instance belongs to which category, we can identify it using tags. Each tag is nothing more than a key-value pair. For this example, add at least a Name tag to help you find your EC2 instance later. Use Name as the key and testmachine as the value, as shown in the figure. After entering value click on “Add tag”.
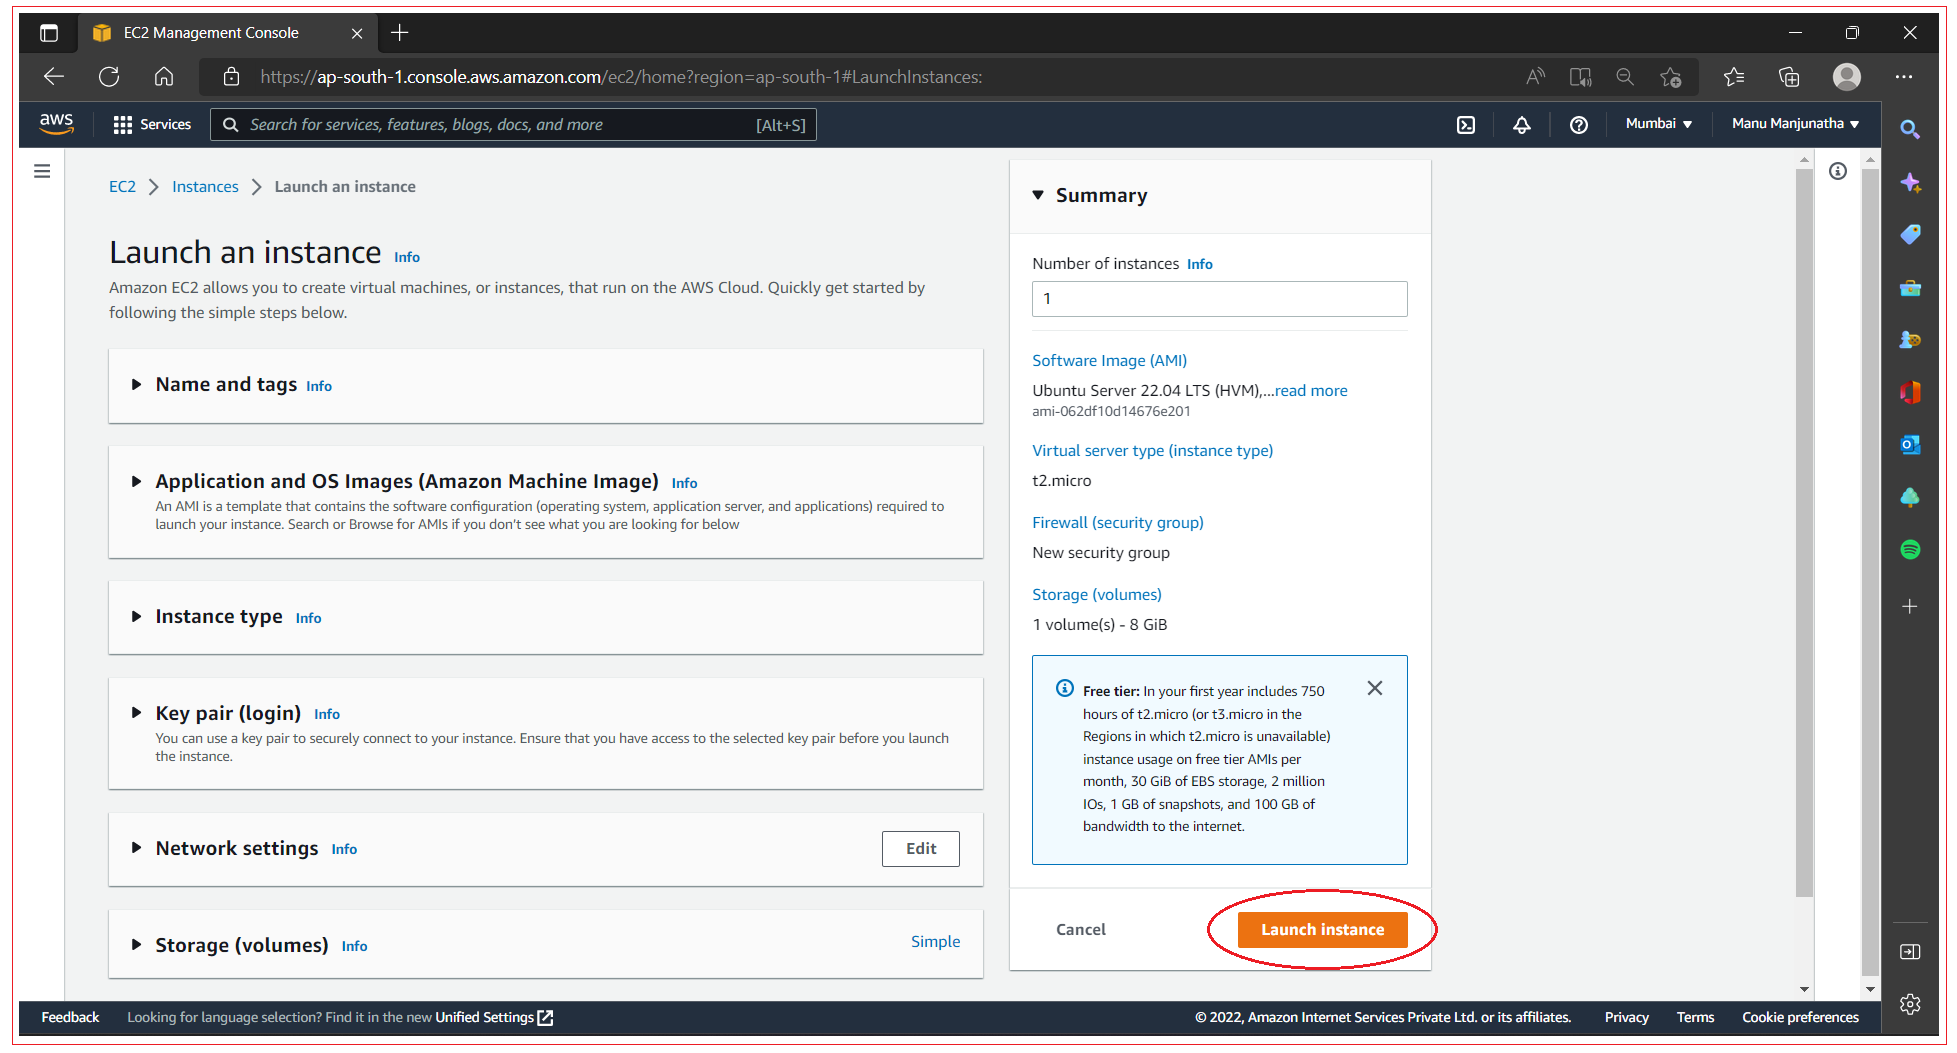
Step 9: Launch
Click on Launch button.
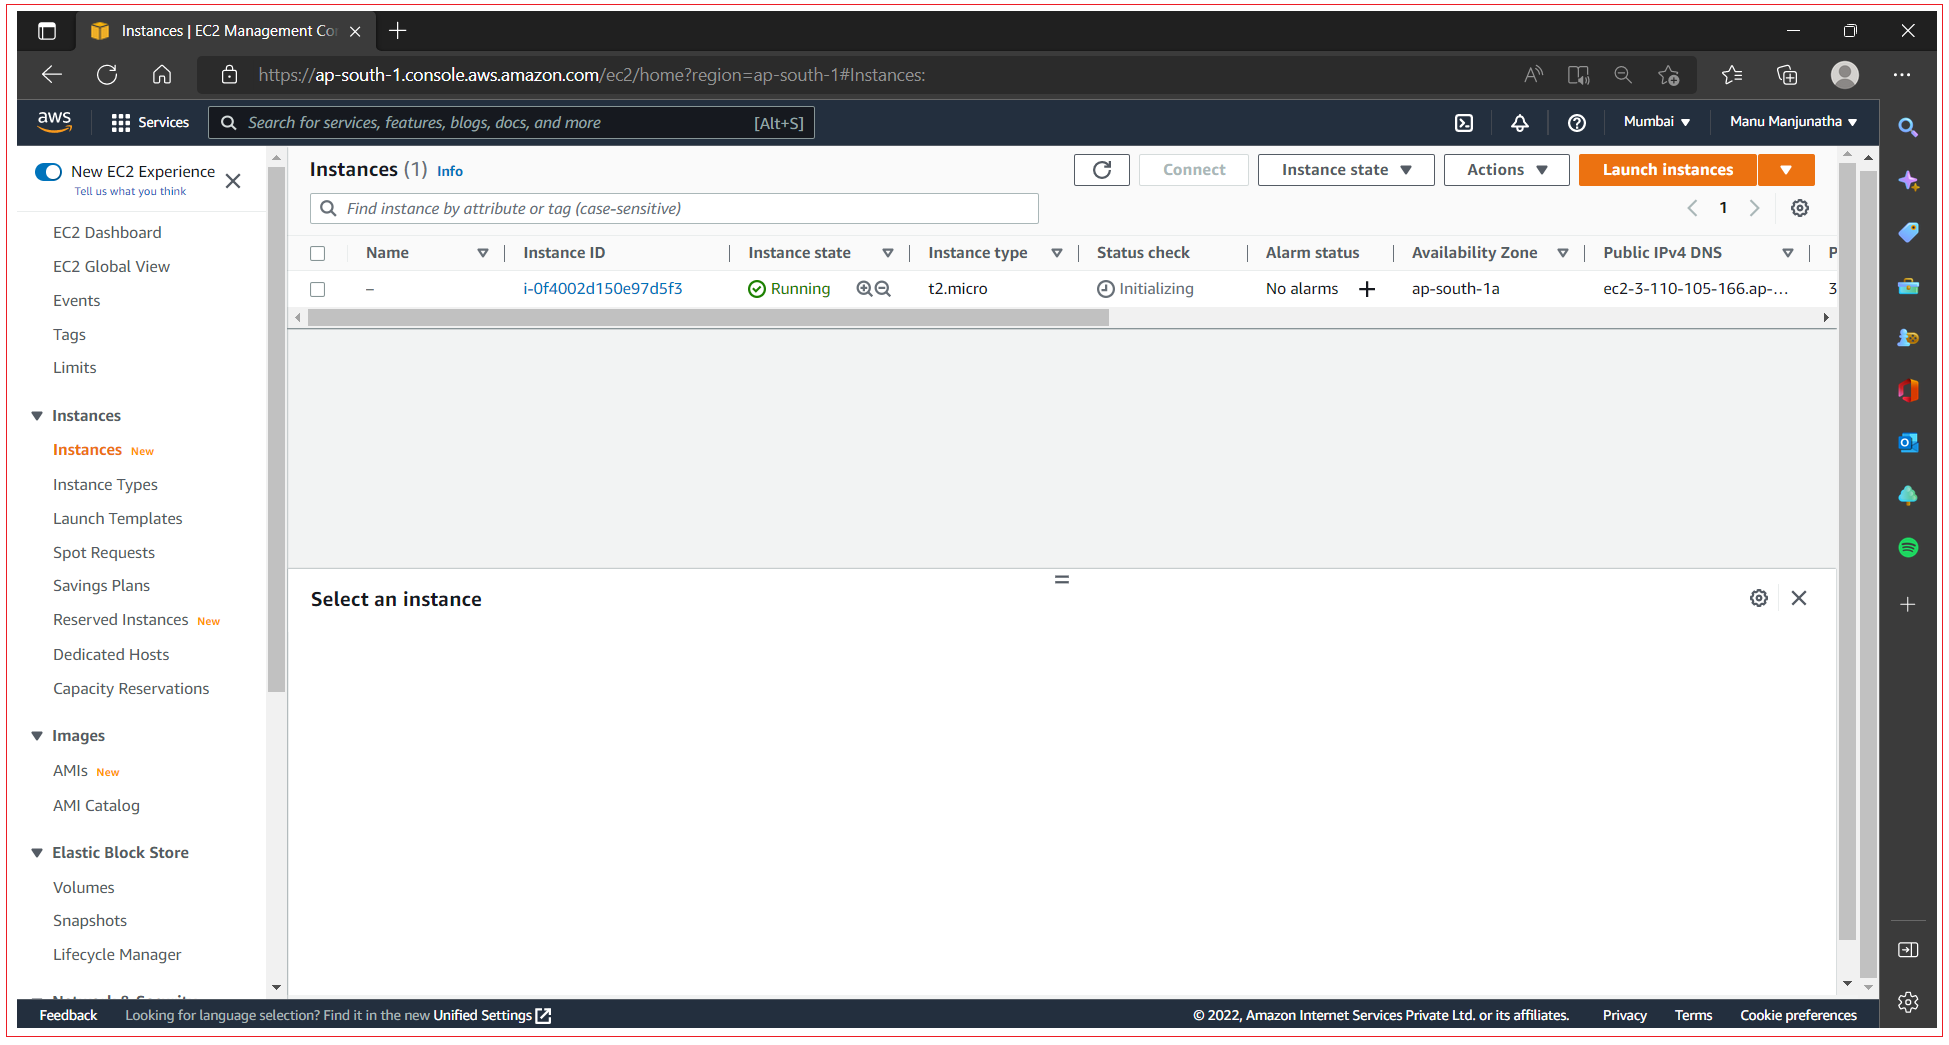
Now you can success message.
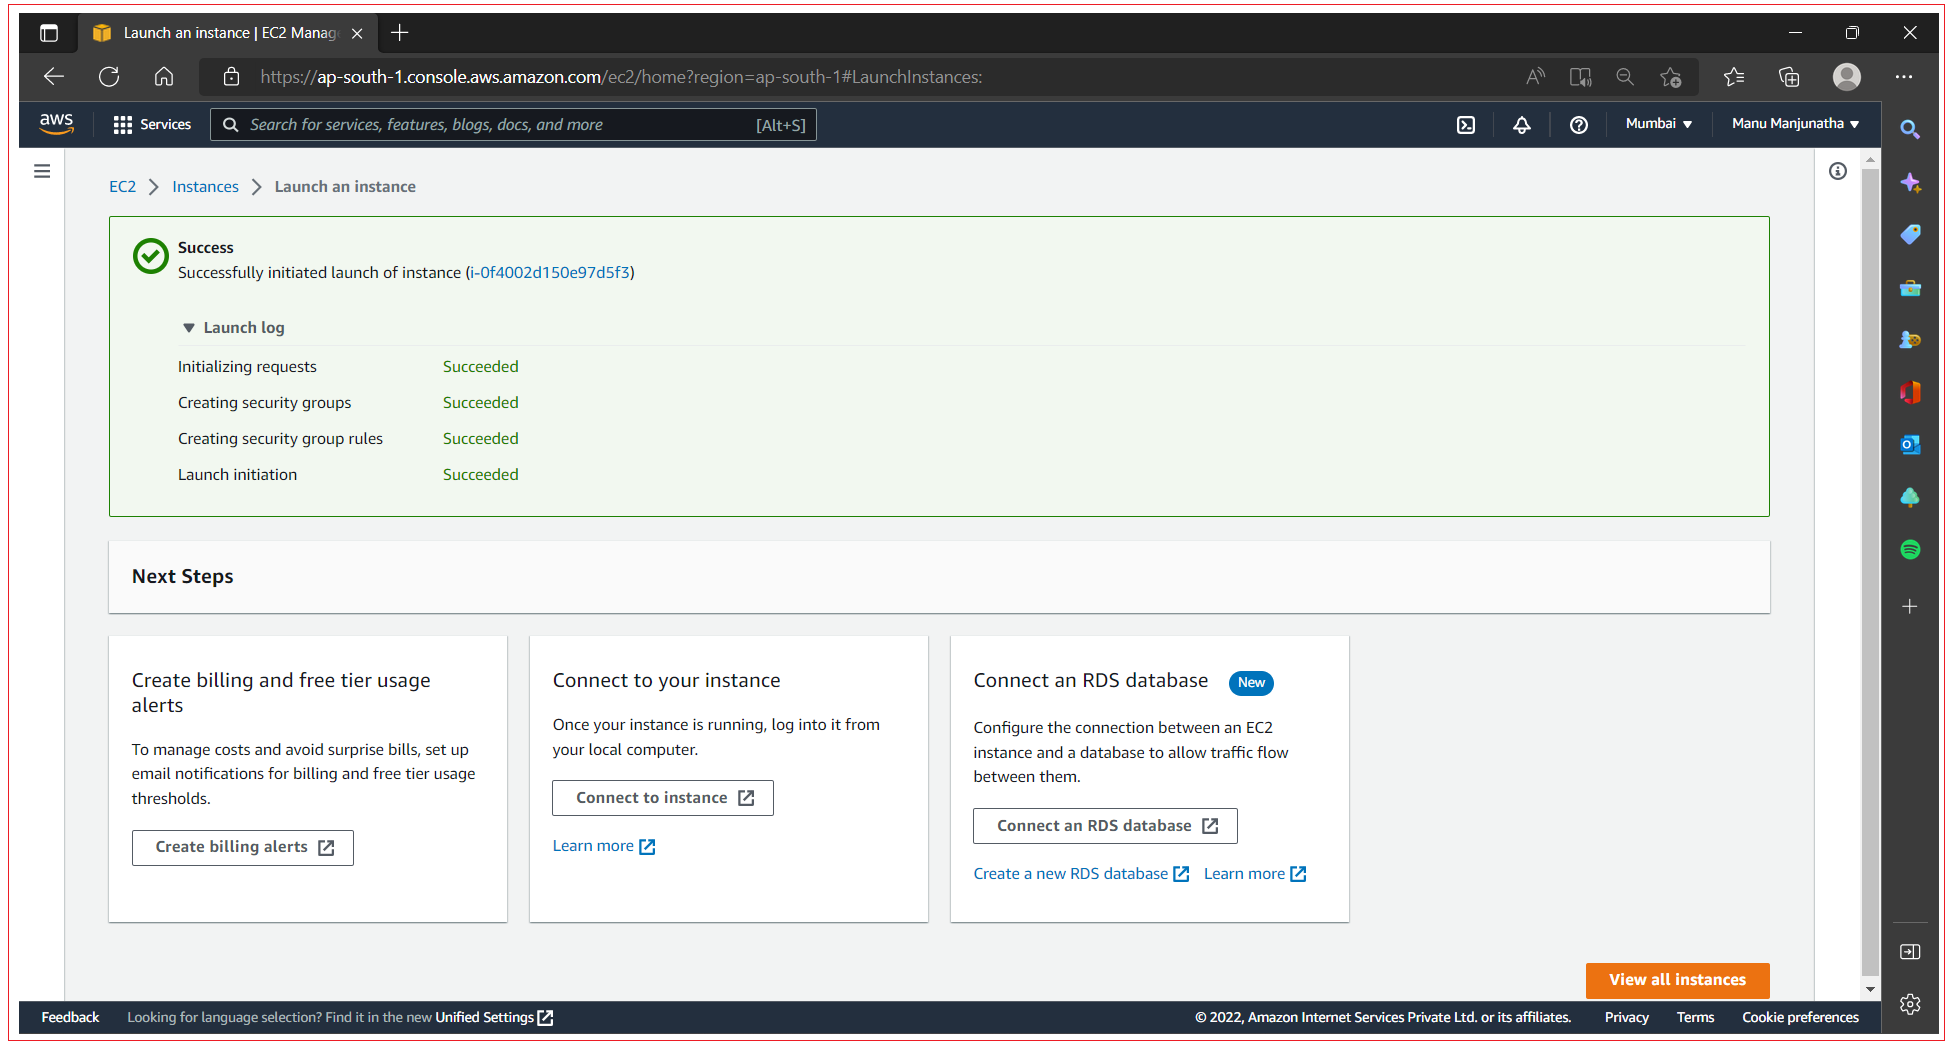
Click on View all instances to see all the instances.
All Chapters
