
| ☰ See All Chapters |
How to configure AWS CLI
Step 1: Create AWS accessKey and secretKey to connect from CLI to AWS
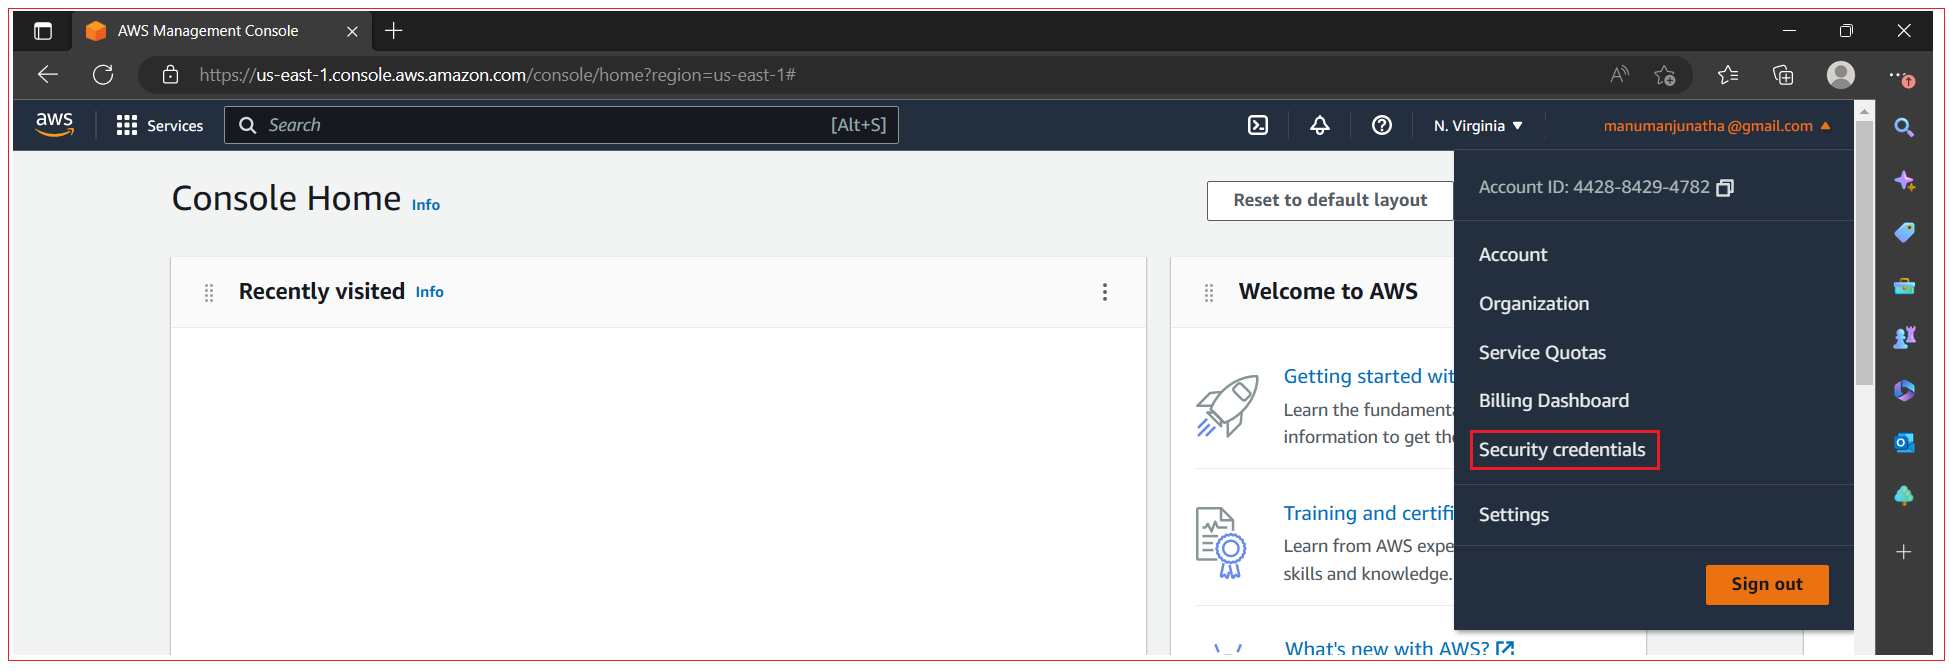
Click on your account and select Security Credentials.
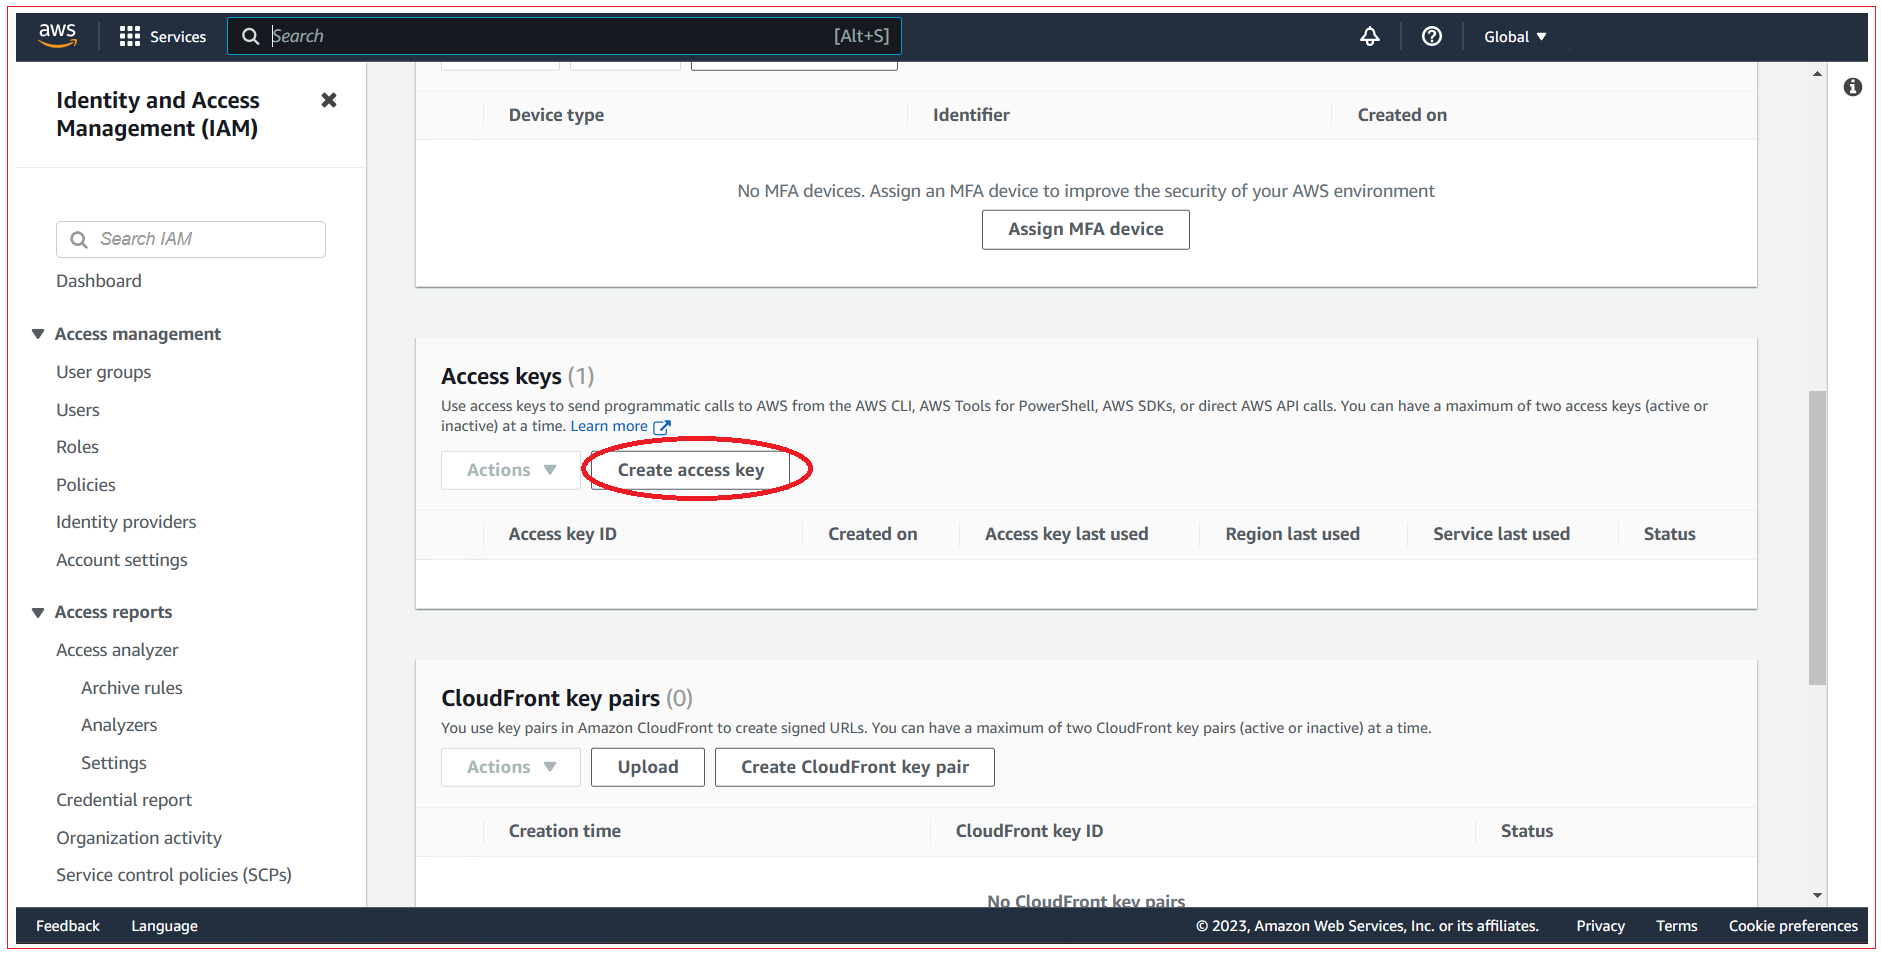
Scroll a bit down and Click on “Create access key”
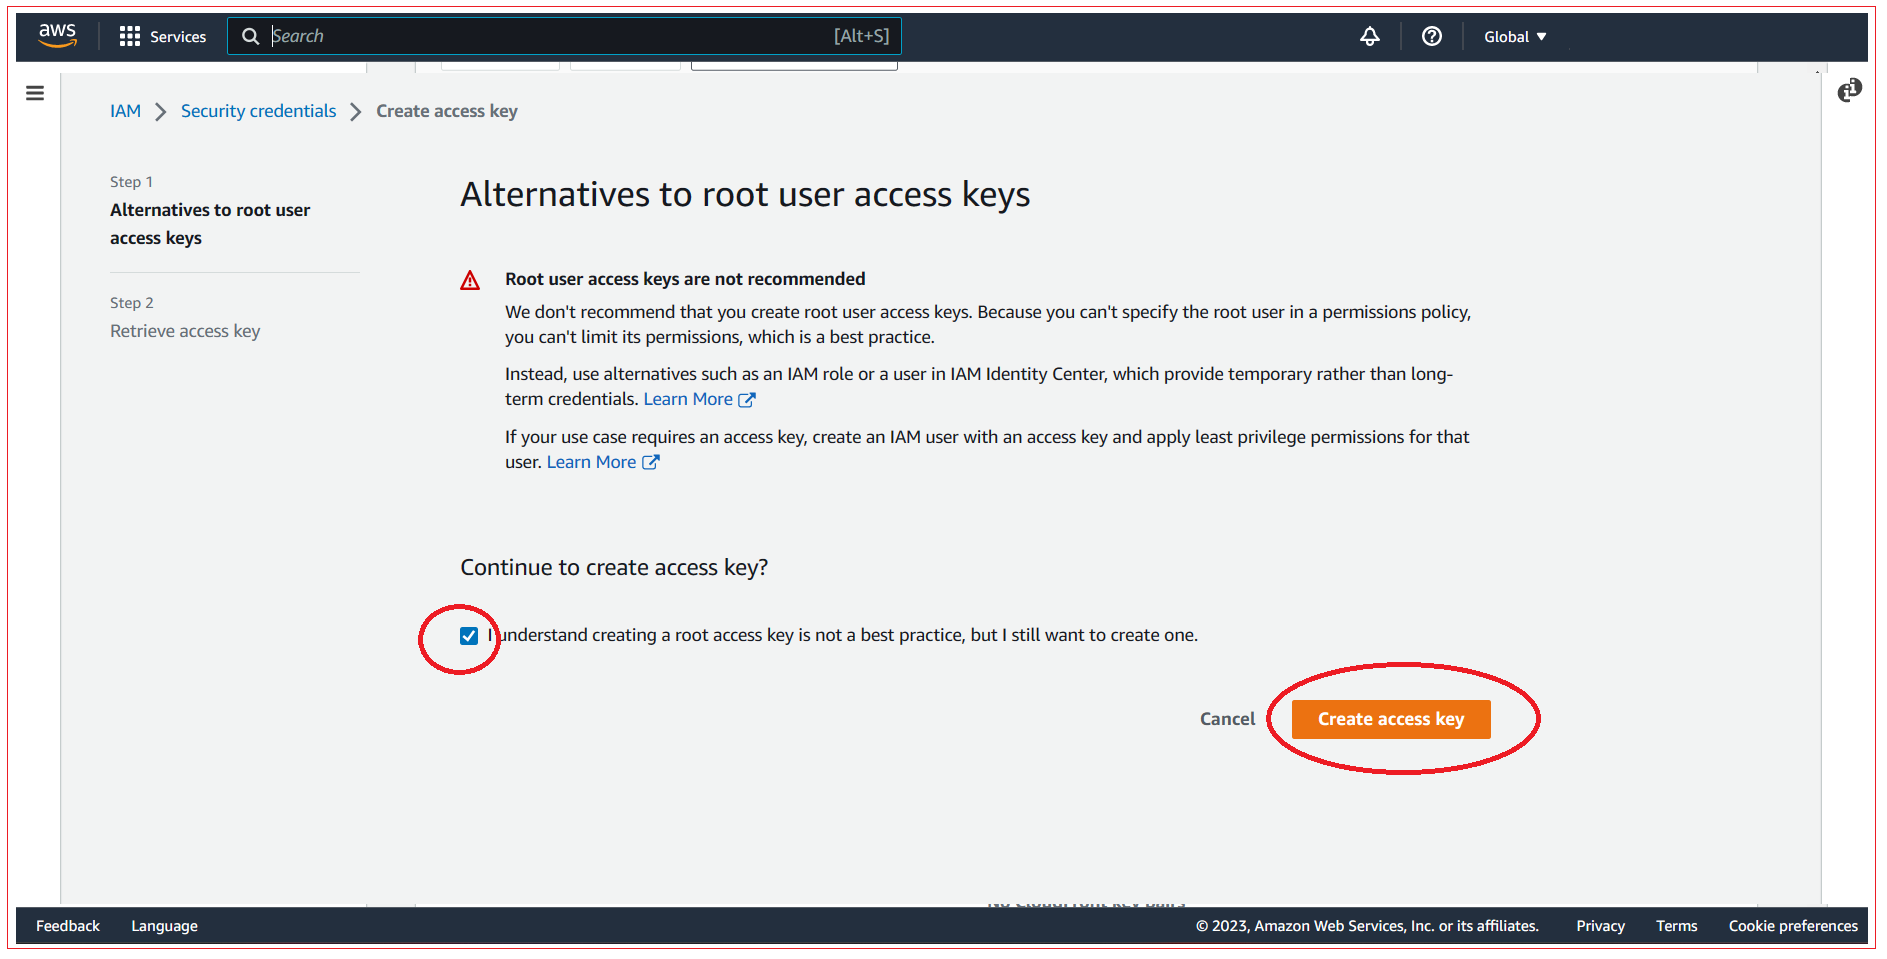
Select the consent check box and click on “Create access Key”
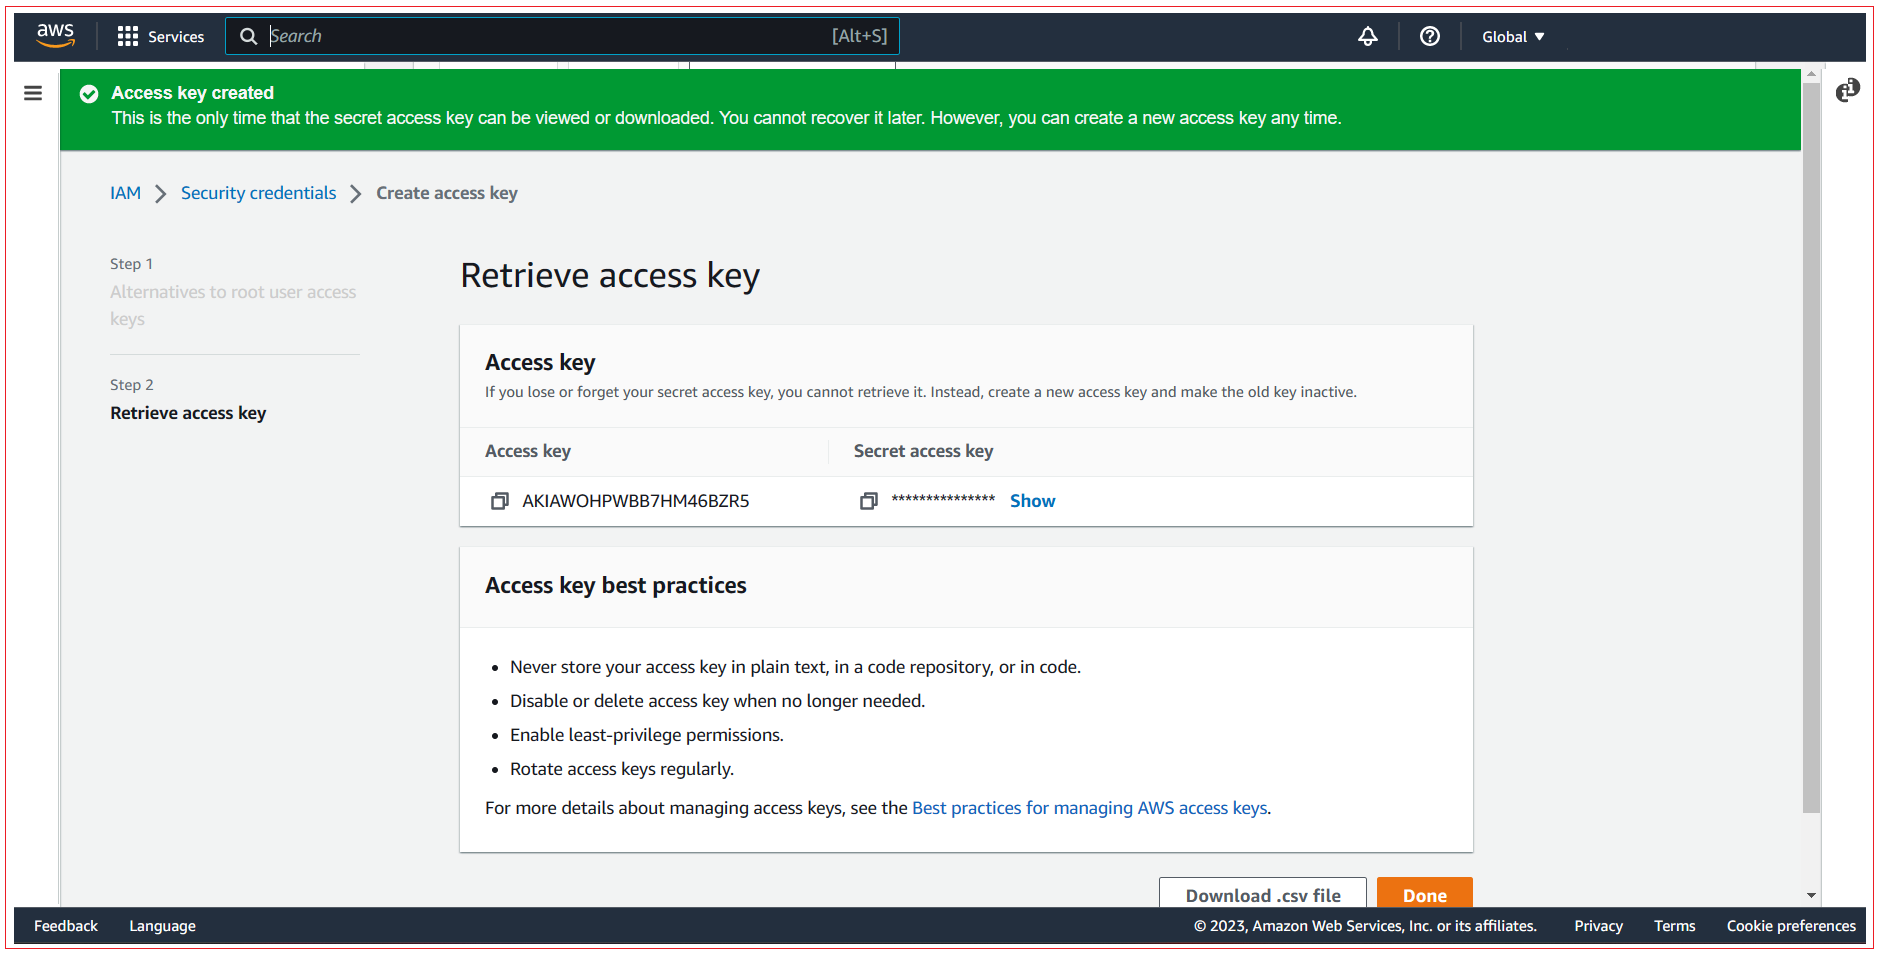
Once done, save the access key and secrete key in a secure place. The former serves the same function as a login name, and the latter acts like its password.
Step 2: Configure AWS CLI
Open the terminal on your computer (PowerShell on Windows or a shell on Linux and macOS, not the AWS Management Console), and run aws configure. You’re asked for four pieces of information:
AWS access key ID: Use the access key you saved from previous step
AWS secret access key: Use the secret key you saved from previous step
Default region name: Enter us-west-2
Default output format: Enter json
In the end, the terminal should look similar to this:

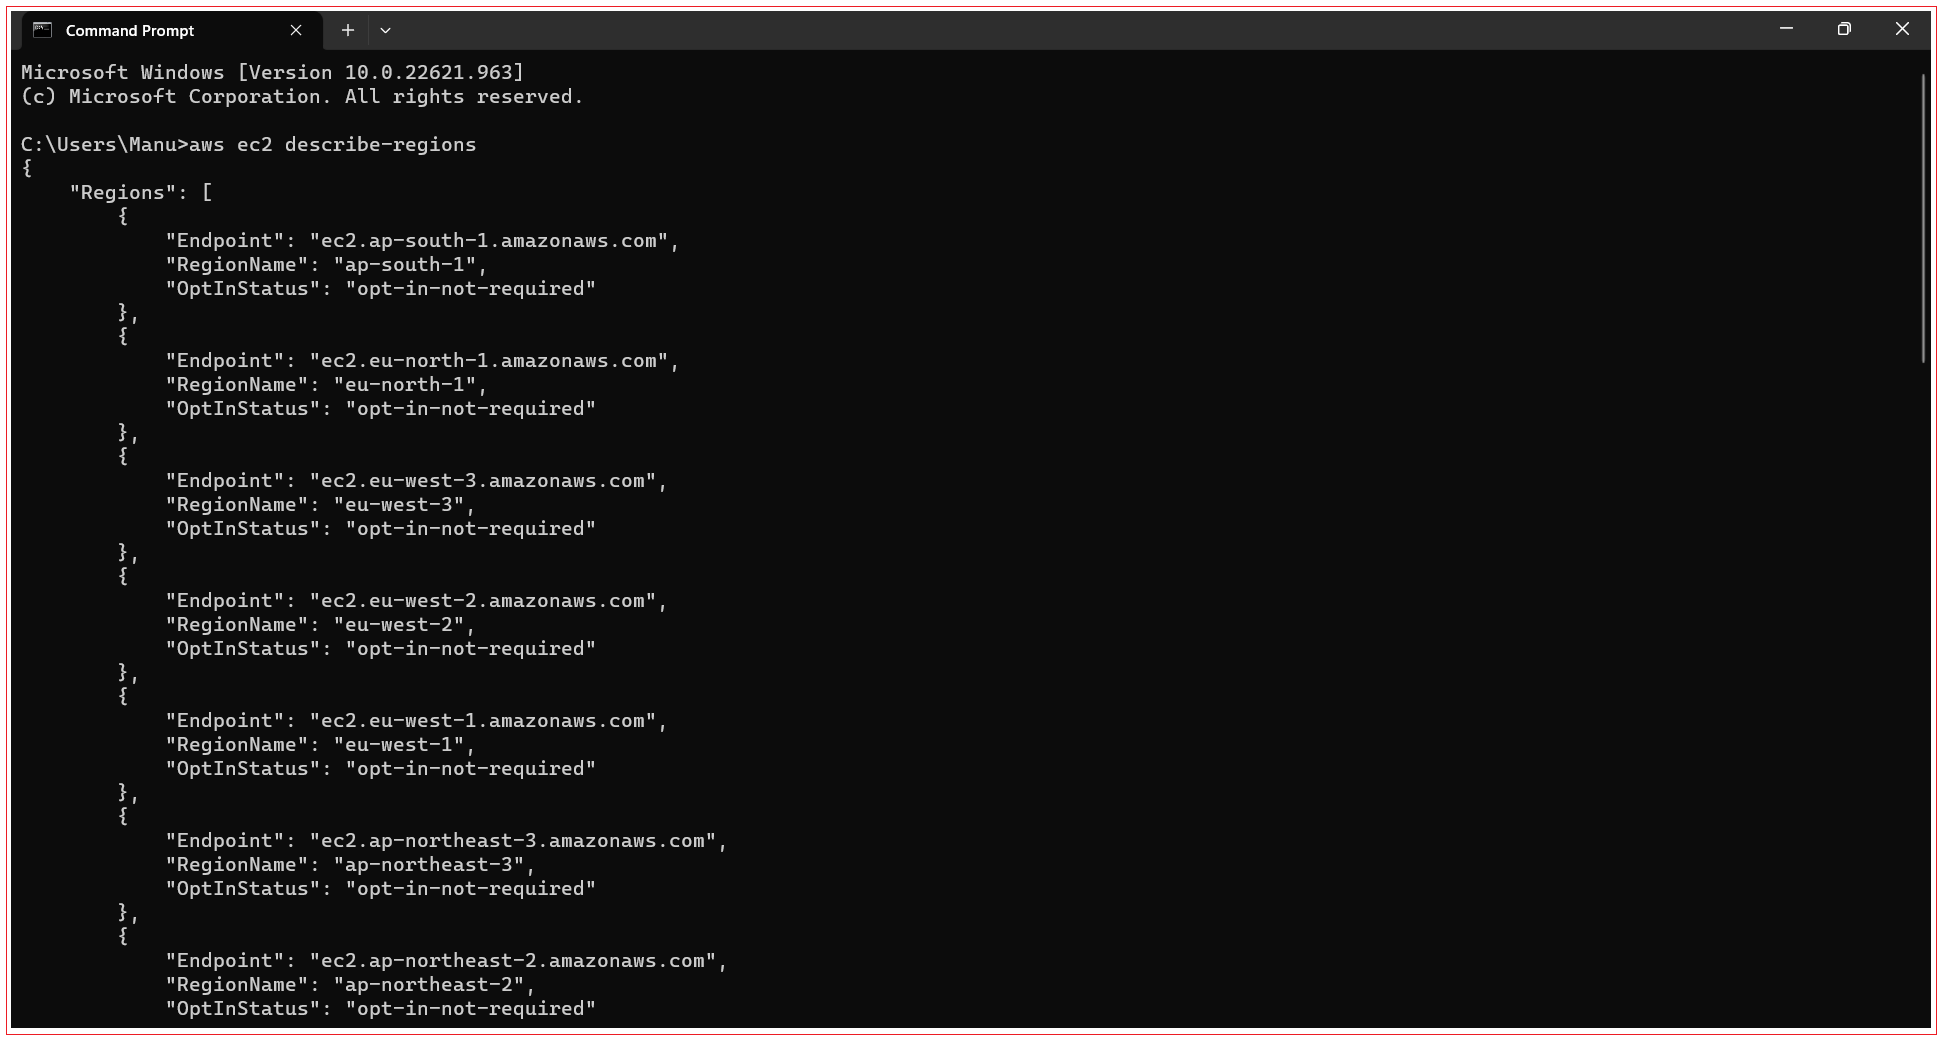
The CLI is now configured, It’s time to test whether the CLI works. Switch to the terminal window, and enter aws ec2 describe-regions to get a list of all available regions:
Step 3: Test AWS CLI
Execute the below command to get a list of all running EC2 instances of type t2.micro so you can see what is running in your AWS account.
aws ec2 describe-instances --filters "Name=instance-type,Values=t2.micro"

All Chapters
