| ☰ See All Chapters |
How to connect to AWS EC2 virtual machine from PuTTY
To install additional software like servers, DB engines and to run commands on your virtual machine you have to connect to your machine. In this tutorial we guide you to connect to EC2 virtual machine from PuTTY software client. Follow the below steps to connect to your EC2 virtual machine through PuTTY.
Step 1: Download and install PuTTY client
Download PuTTY from https://www.putty.org/ and install it into your system.
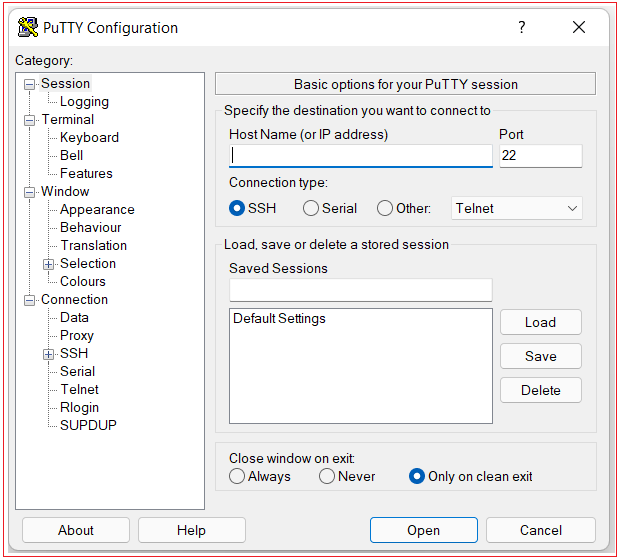
Launch PuTTY, You should see PuTTY Configuration window as shown below:
Step 2: Get the public IP address of your virtual machine
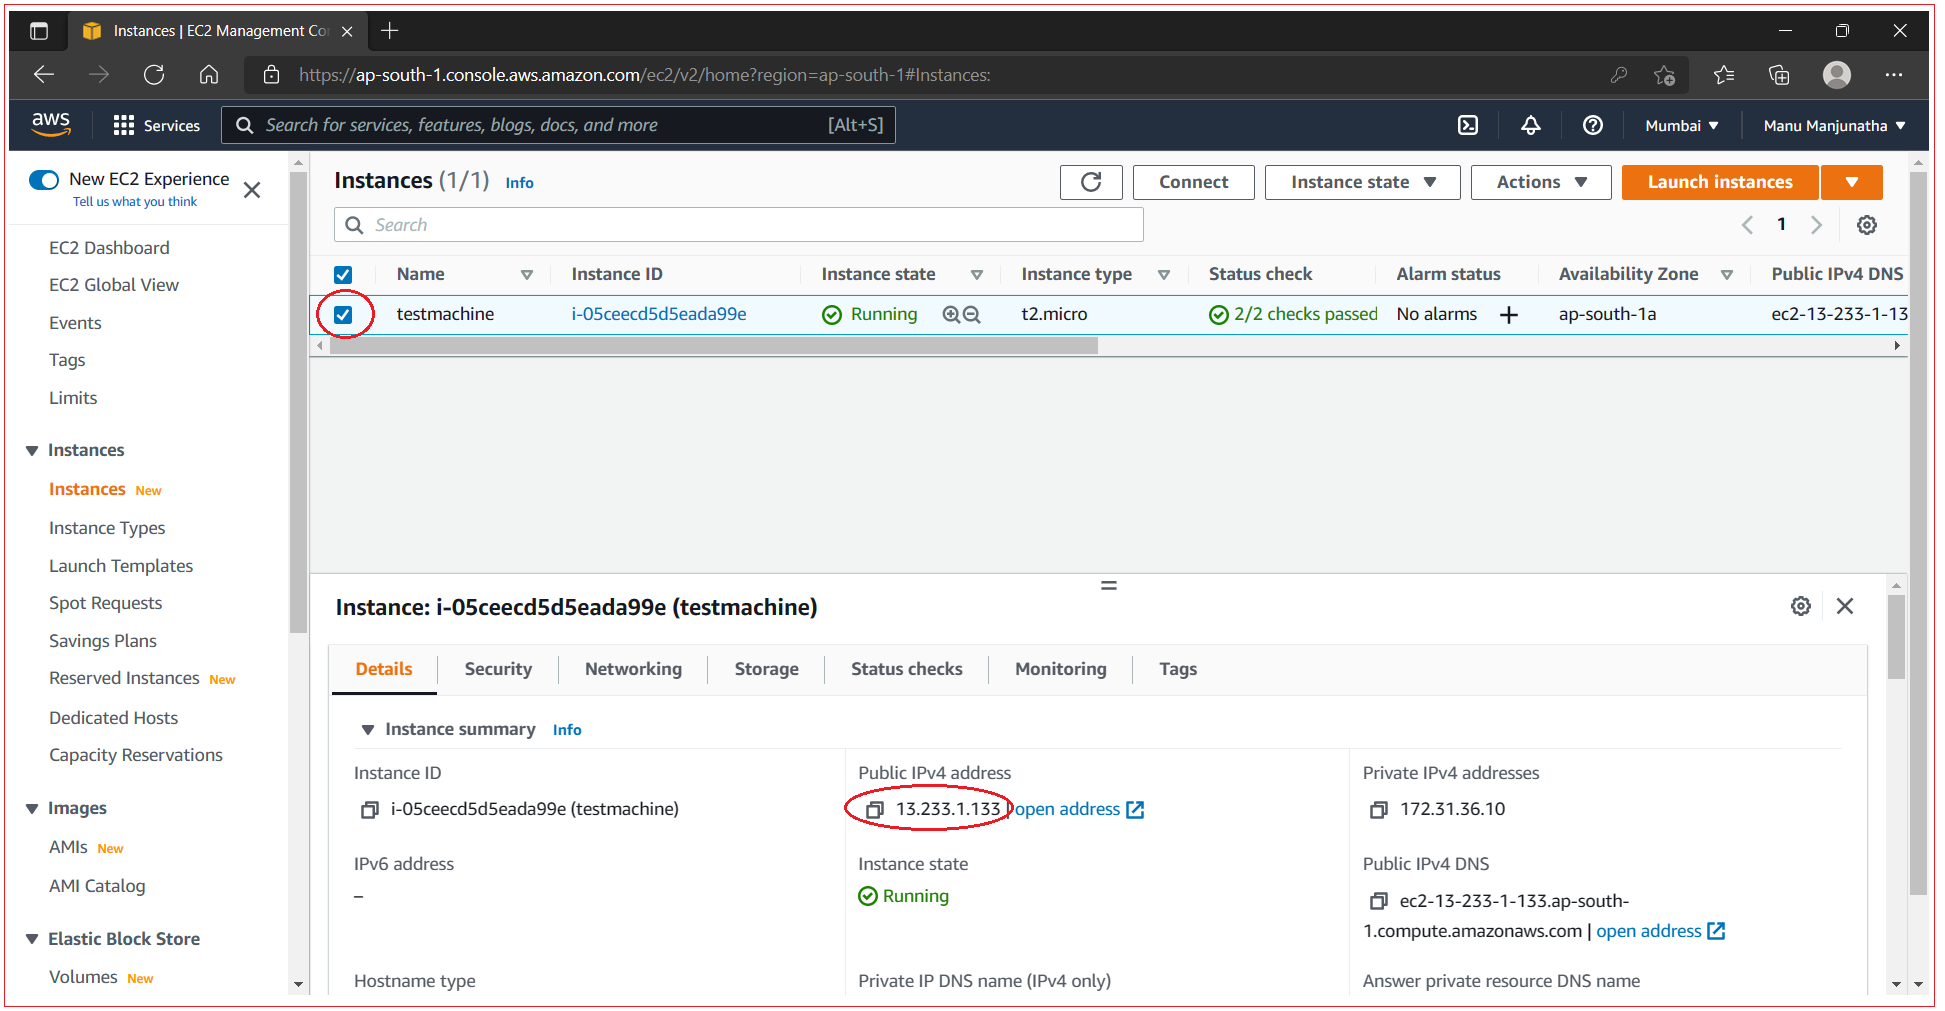
Select the checkbox of running EC2 instance to which you have to connect. It displays the details of the selected instance below. Find and note the public IPv4 address of your virtual machine.
Step 3: Set server host key to cache in registry of PuTTY
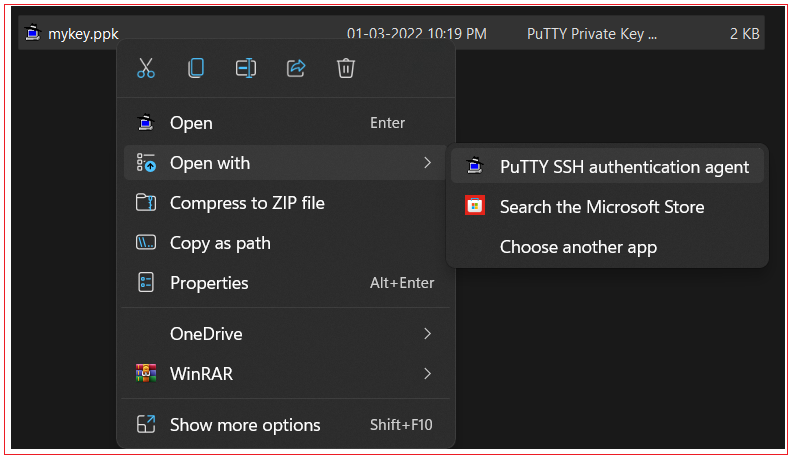
Find the mykey.ppk file you created in previous chapter Amazon EC2 Key pairs, and double-click to open it. Or right click on mykey.ppk select Option with and select PuYYY SSH authentication agent. You should see no changes or no any application open. Do not worry, it loads the authentication key to PuTTY registry cache.
Step 4: Connect to server
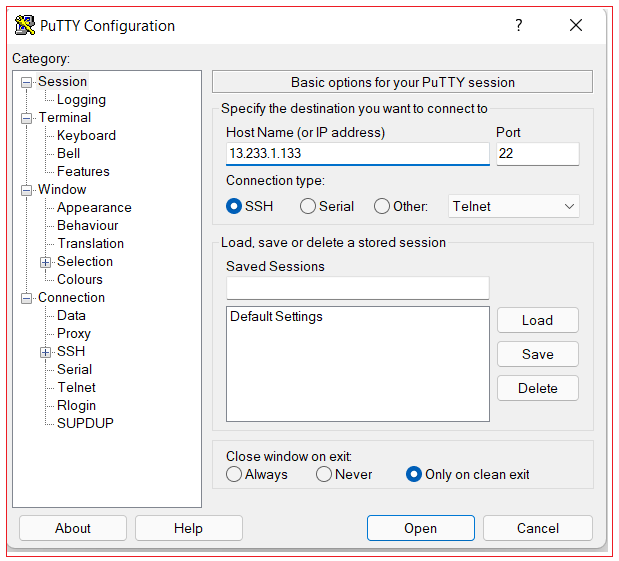
Enter IPv4 address to Host Name (or IP address) filed of PuTTY configuration window and then click Open.
Now PuTTY display warning to accept to add the key to cache. Click on Accept. If it does not display this warning window then you might have skipped pervious step or step is not correctly executed, you try the step 3 again and come back to this step.
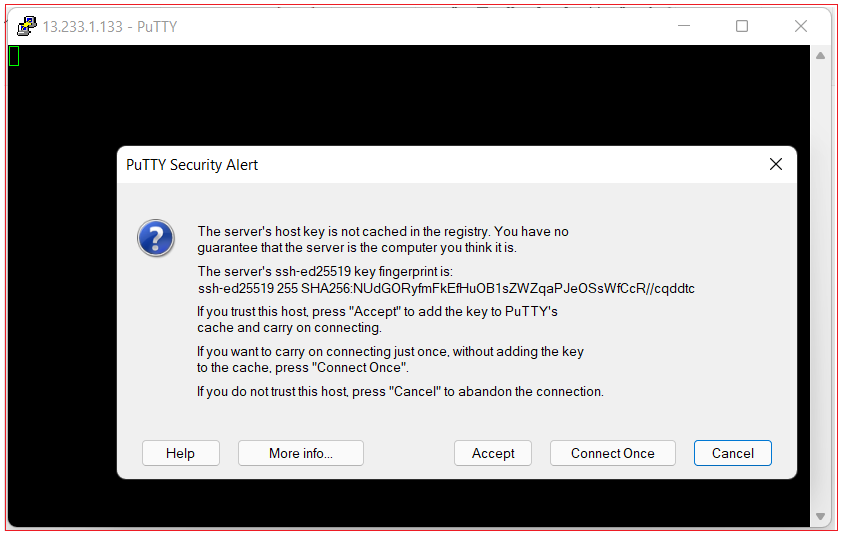
If server host key is cached in registry then you would see the connection window as below:
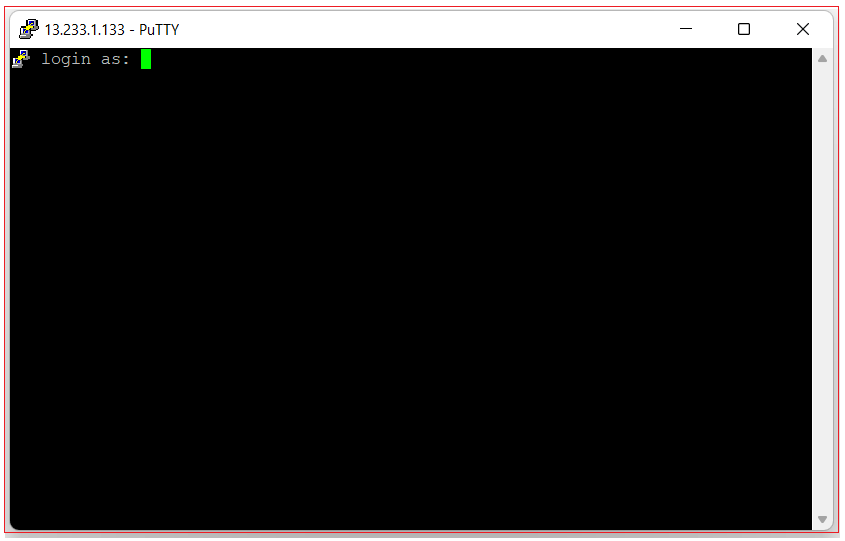
Type ubuntu as the login name. Click Enter button from your keyboard.

After a successful login you should see a message like the following:
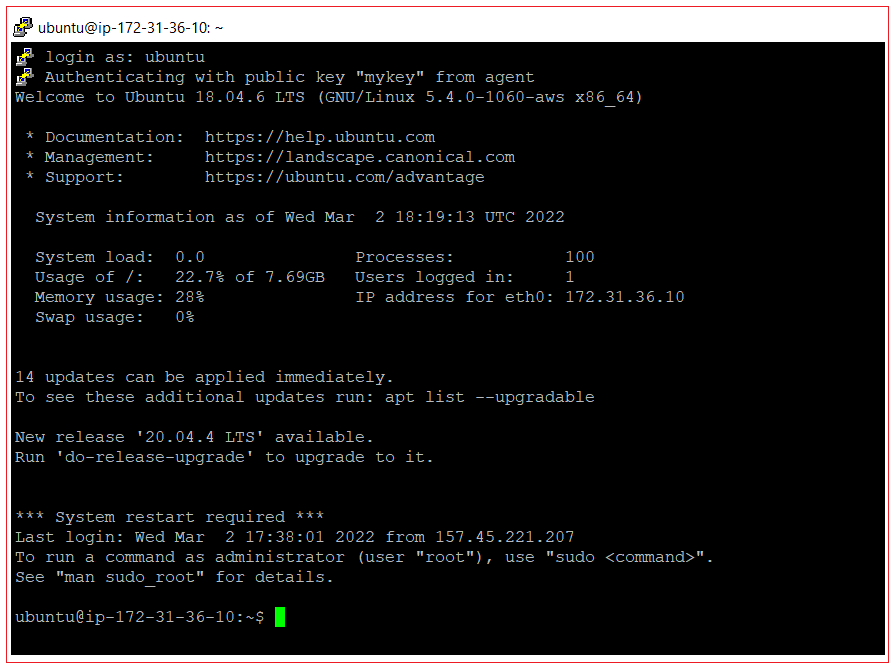
You’re now connected to your virtual machine and are ready to run terminal commands.
All Chapters

