
| ☰ See All Chapters |
How to allocate multiple IP address to AWS EC2 virtual machine
It can be useful to assign multiple IP addresses to an instance in your virtual machine to do the following:
Host multiple websites on a single server by using multiple SSL certificates on a single server and associating each certificate with a specific IP address.
Operate network appliances, such as firewalls or load balancers, that have multiple IP addresses for each network interface.
Redirect internal traffic to a standby instance in case your instance fails, by reassigning the secondary IP address to the standby instance.
To allocate additional IP address to EC2 instance you have to allocate additional network interface to virtual machine. Follow these steps to create an additional networking interface for your virtual machine:
Step 1: Open EC2 Network Interface management console
Open the EC2 service from Management Console and select Network Interfaces from the submenu.
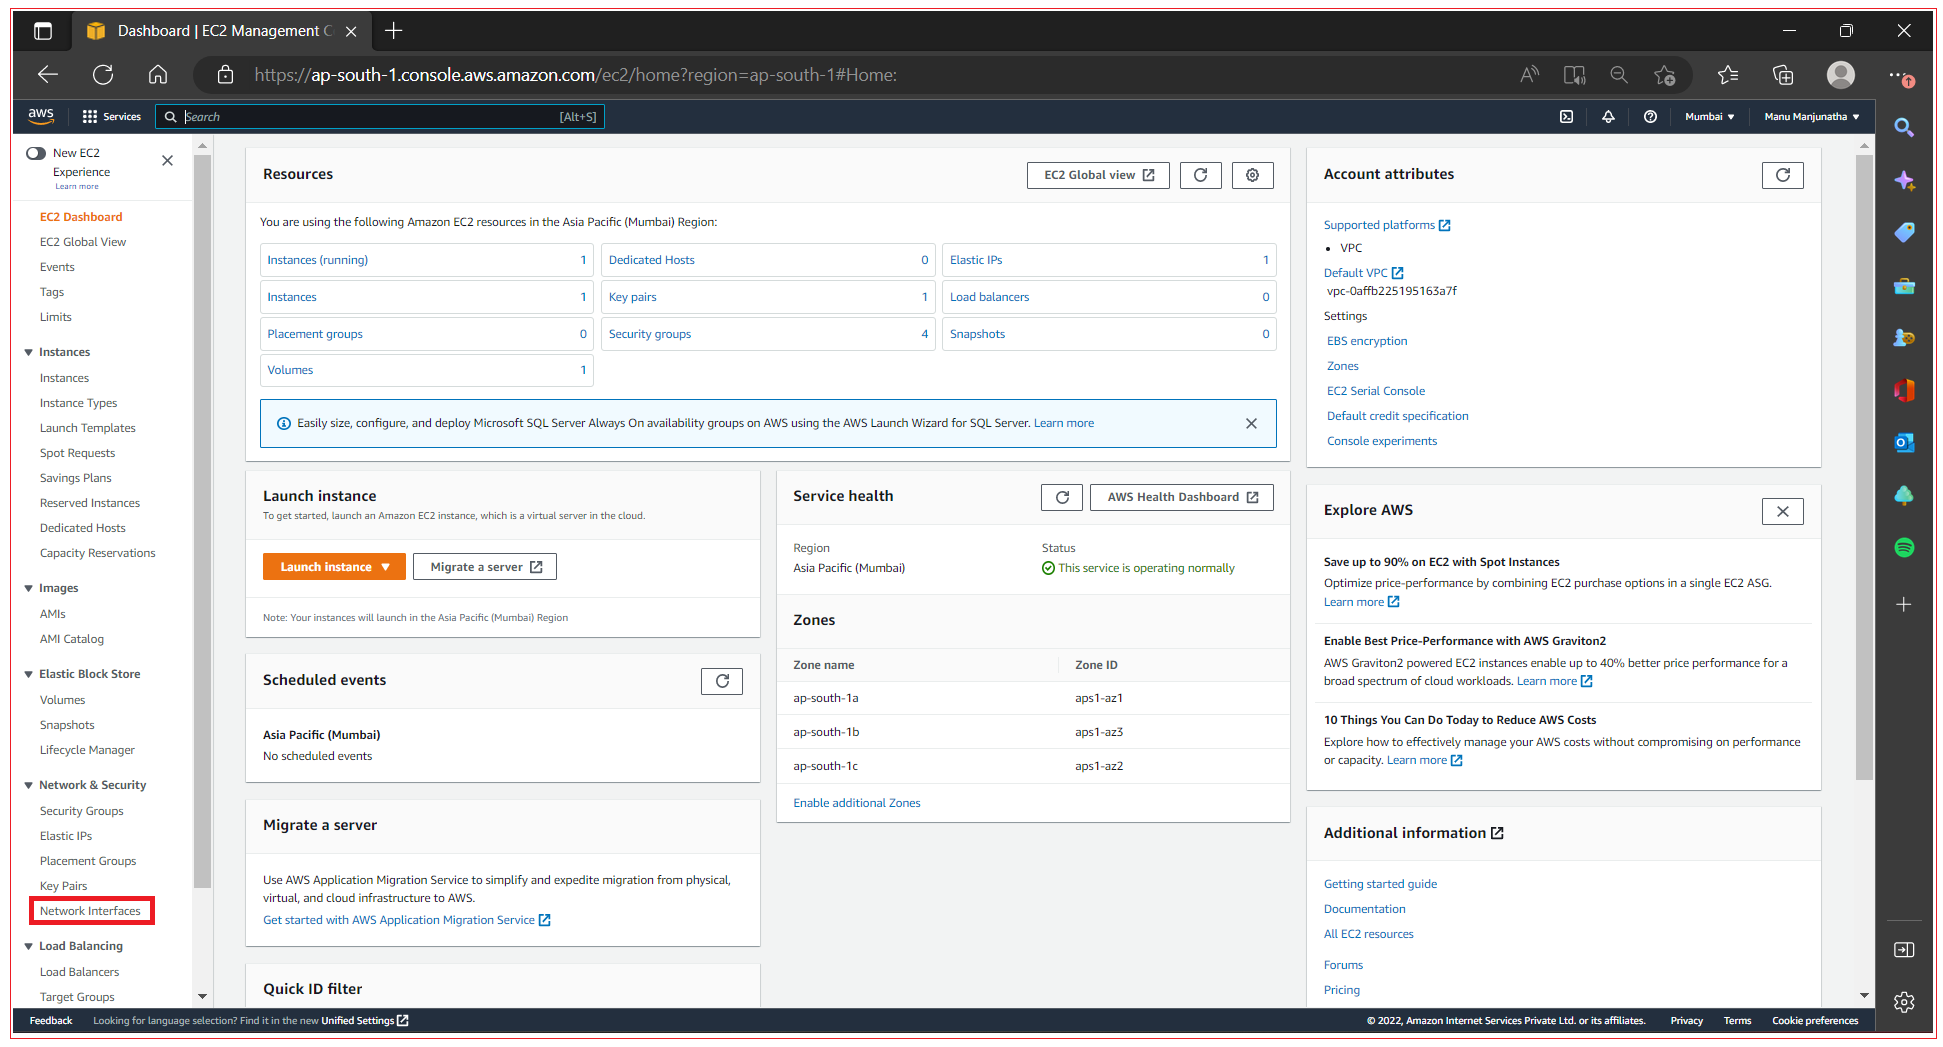
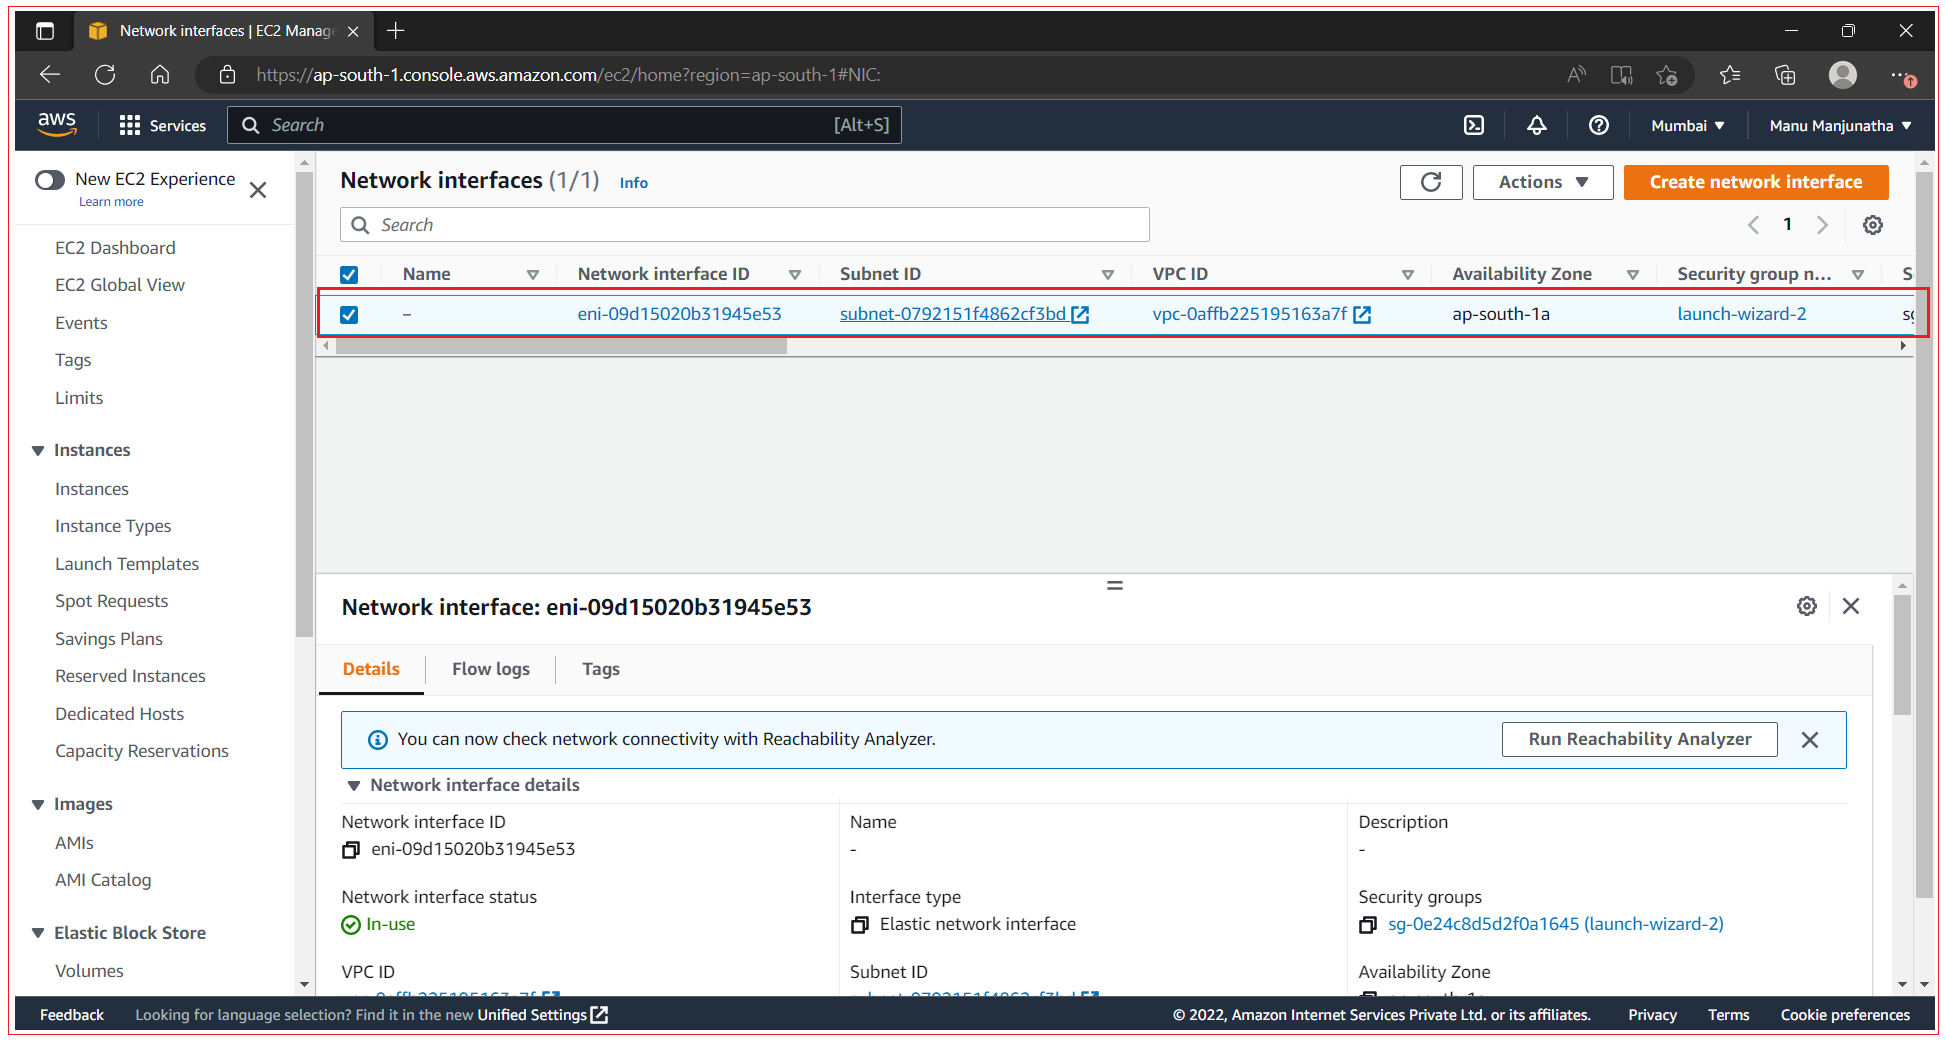
The default network interface of your virtual machine is displayed in the list. Note the subnet ID of the network interface.
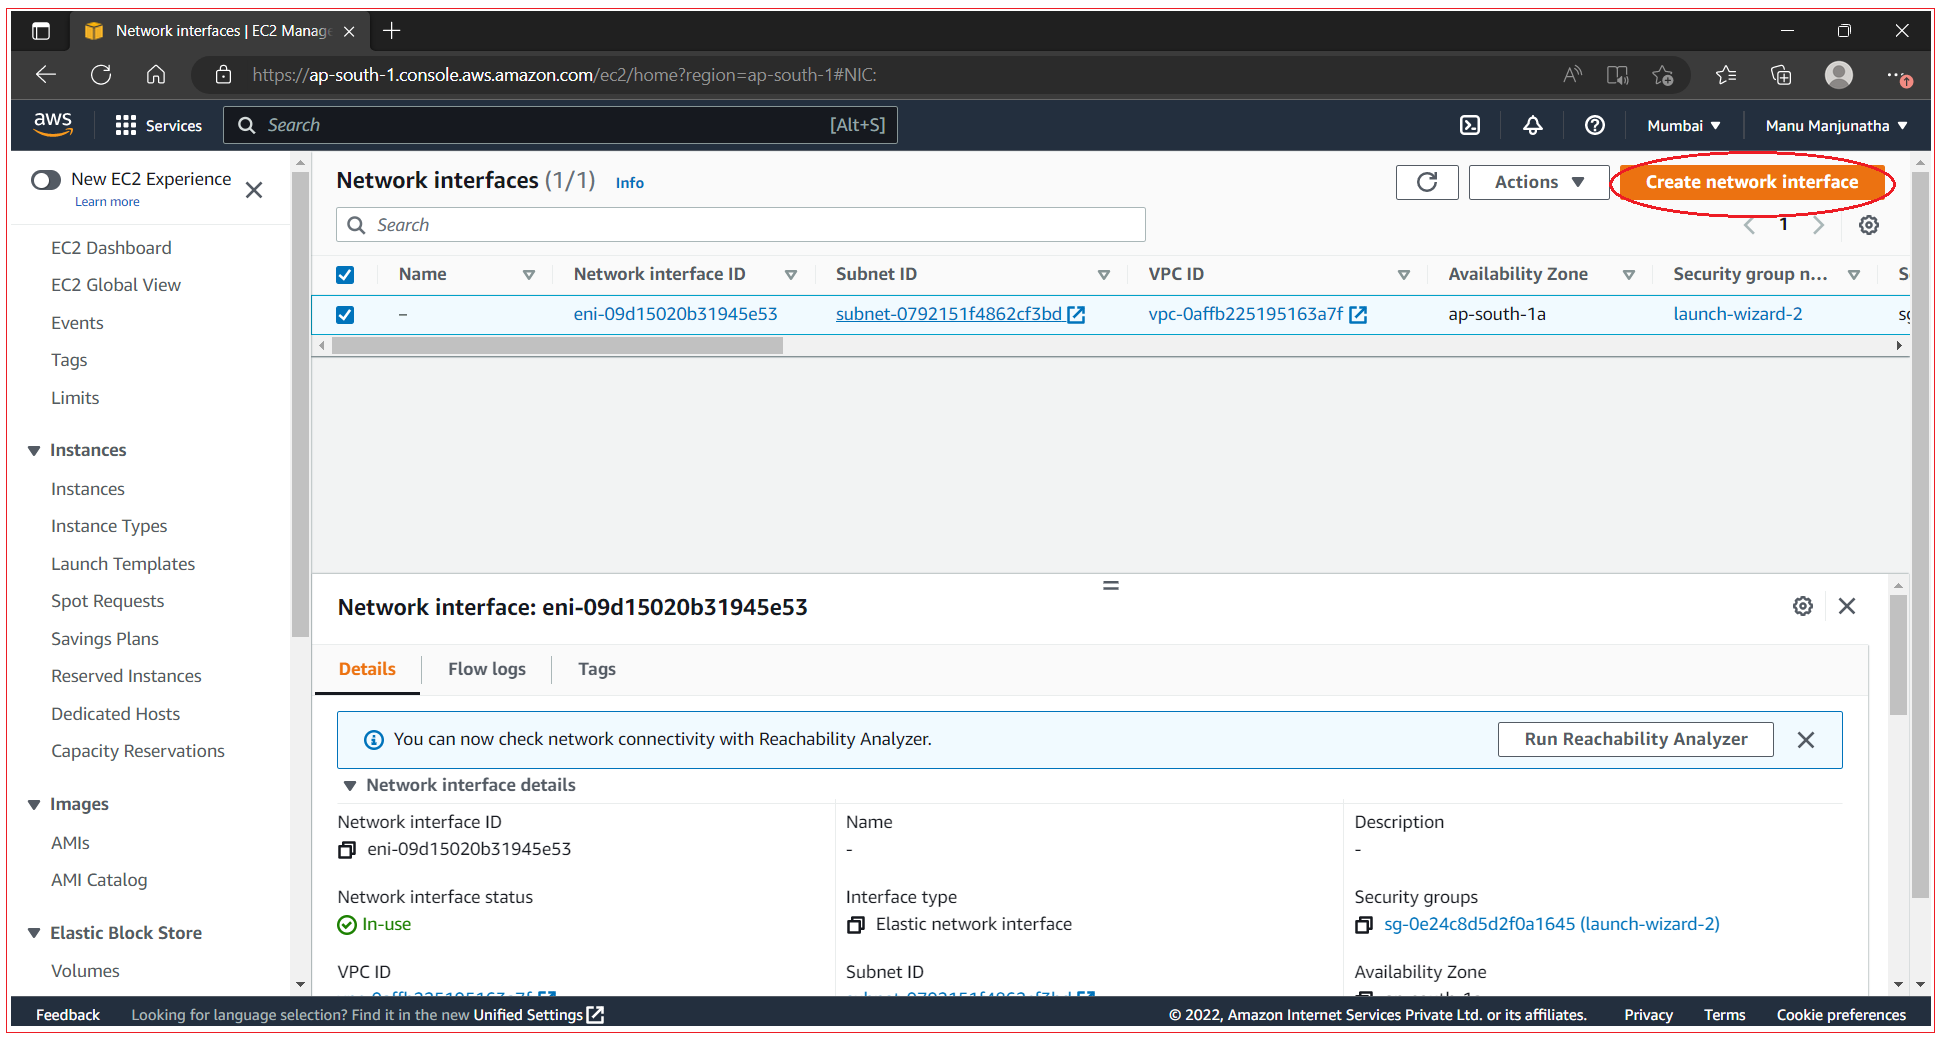
Step 2: Create Network Interface
Click on Create Network Interface.
Below screen is displayed to enter network interface details. Enter the description which is optional, select the subnet, when you focus on the Subnet input field it displays a drop down with list of available Subnet. Select the one you noted down in previous step.
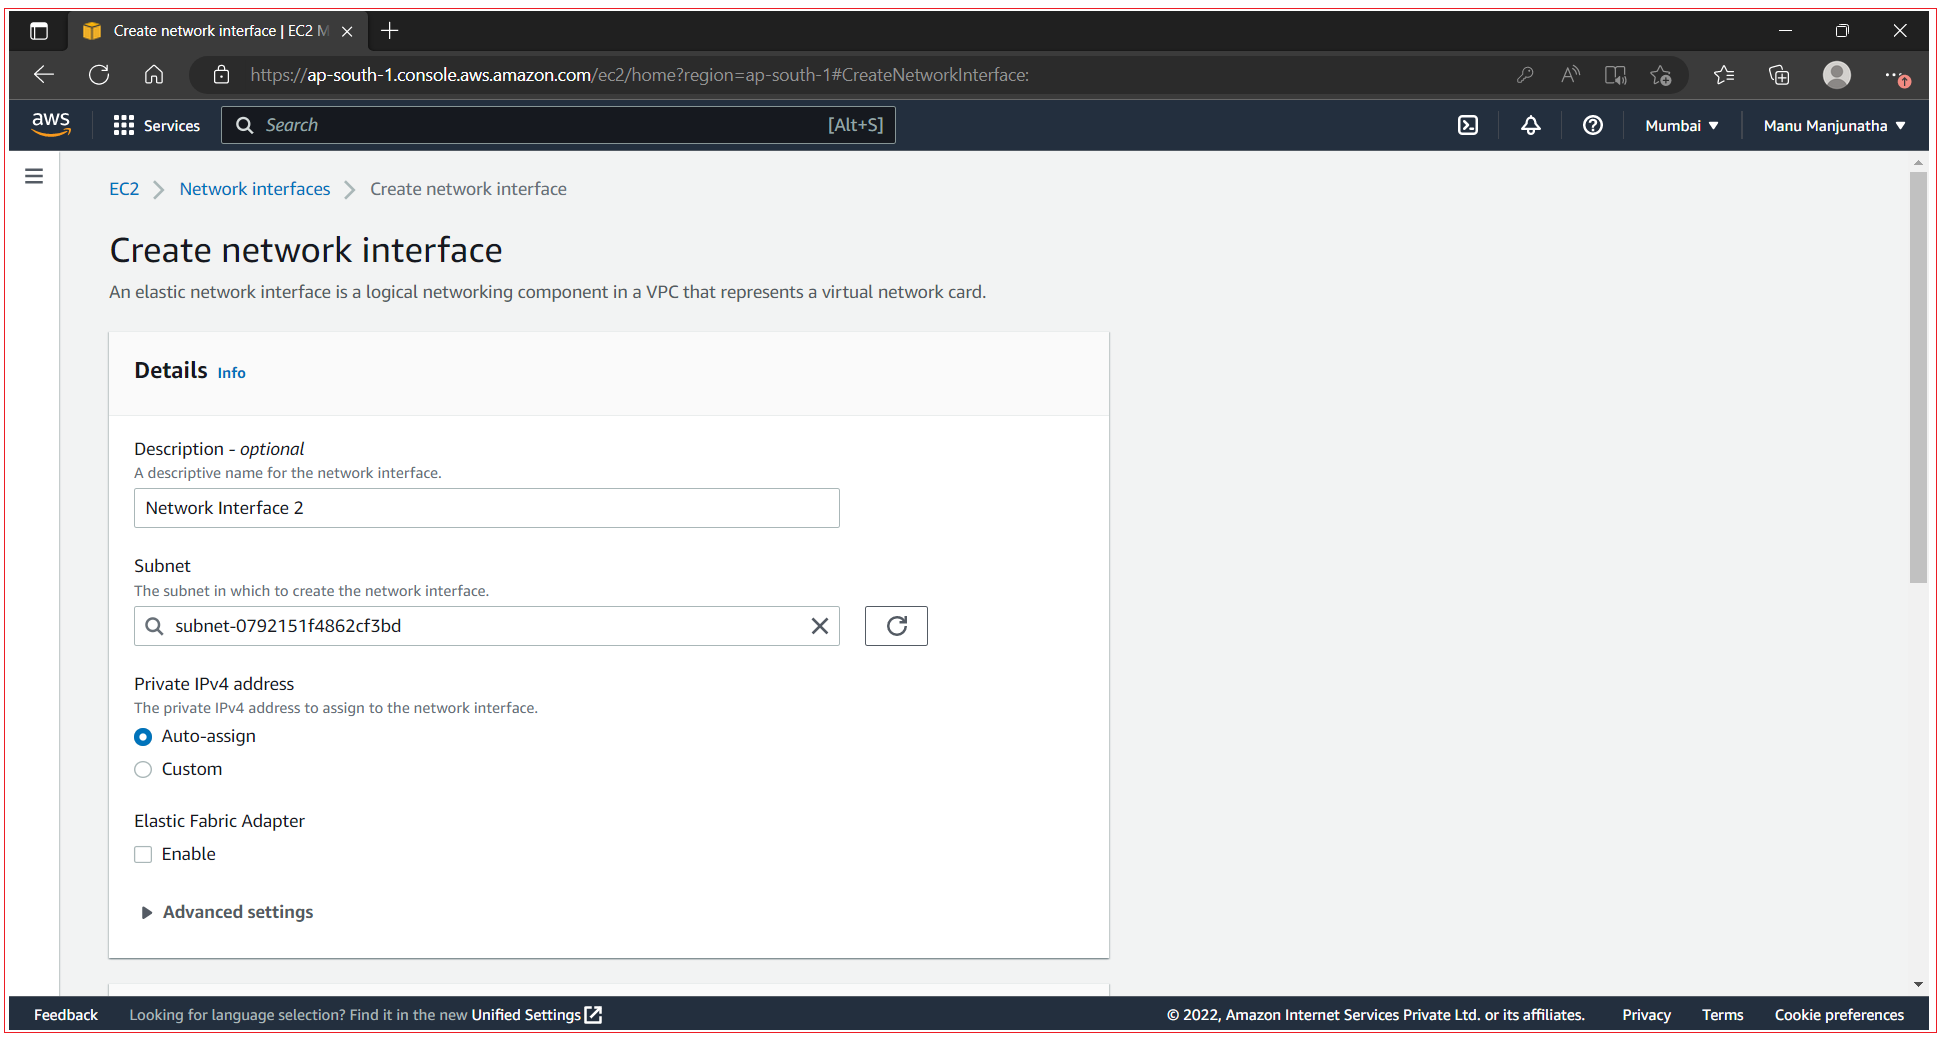
Scroll to bottom, select the security group, click on Create network interface.
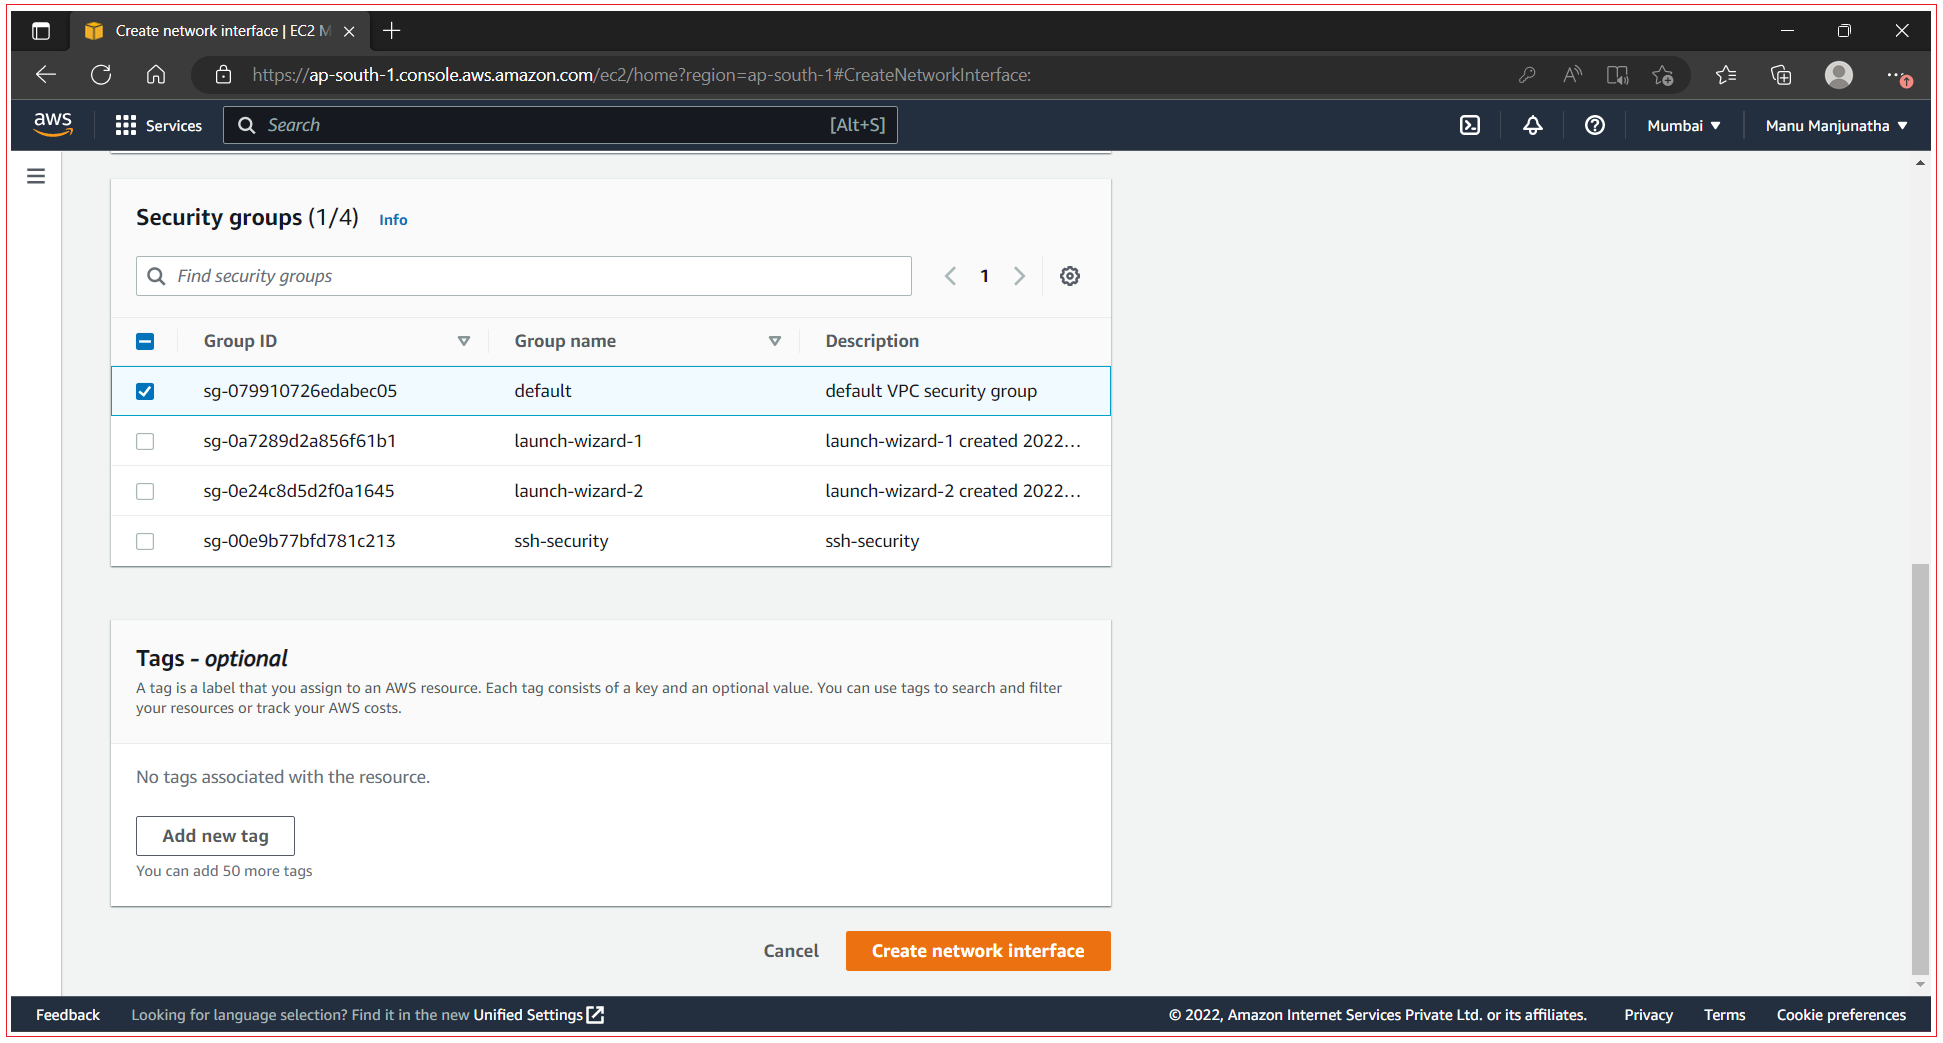
You can see the newly created network interface.
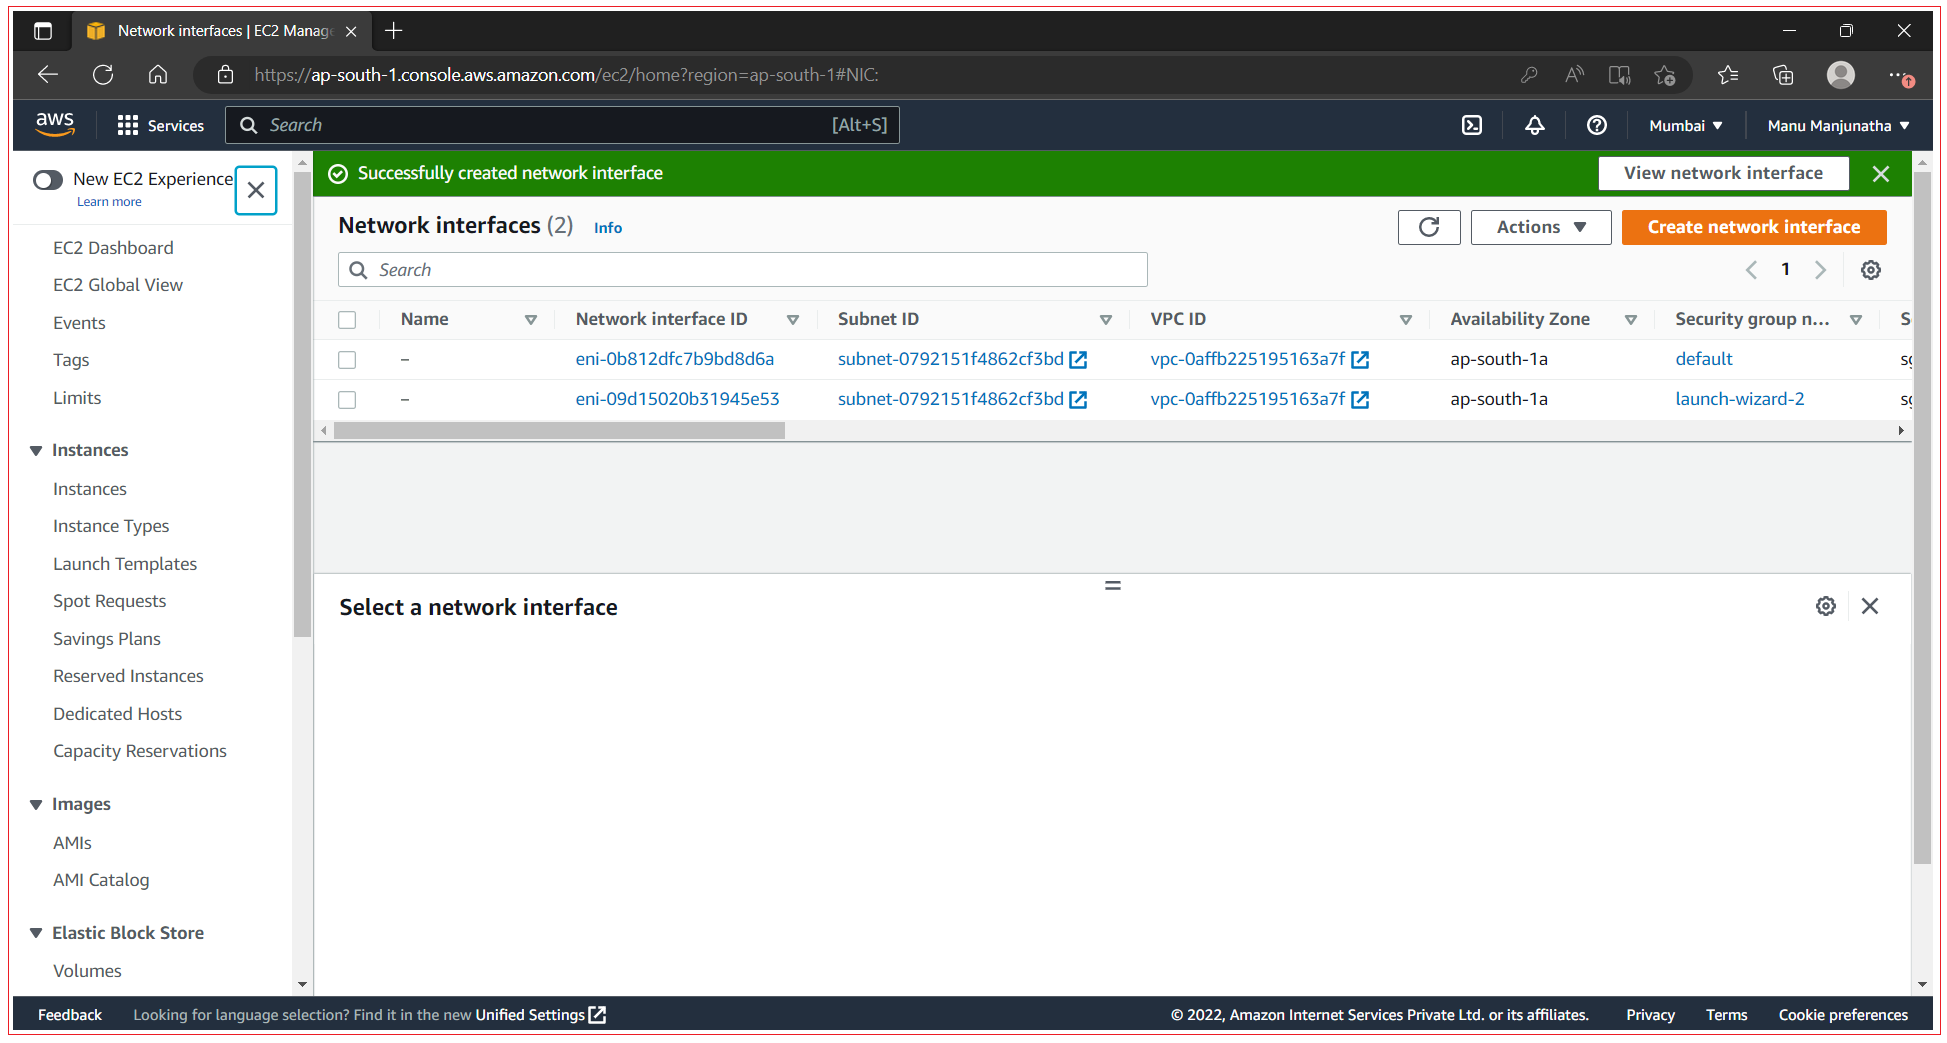
Step 3: Attach the new network interface to virtual machine
Select the newly created network interface, Open Actions menu and select Attach option.

Choose the only available Instance ID, and click Attach.
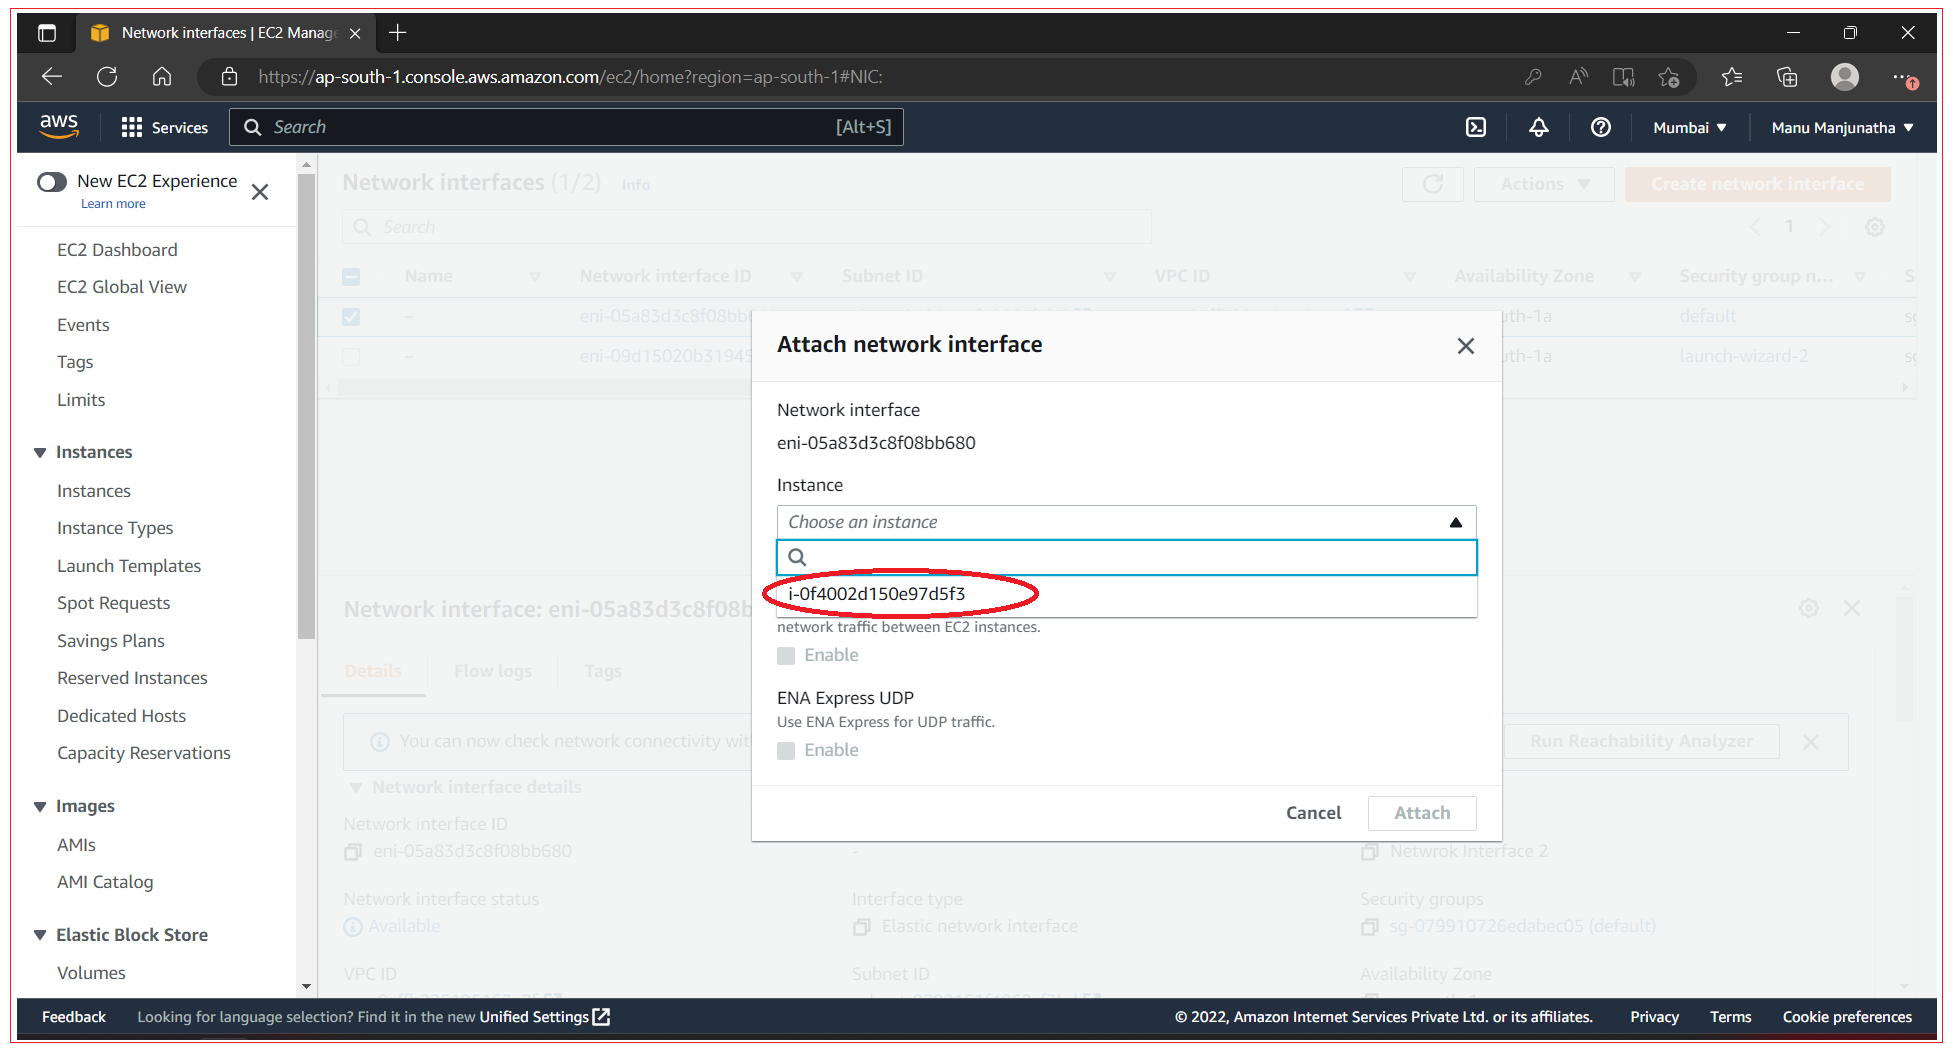
You should see success message as below:
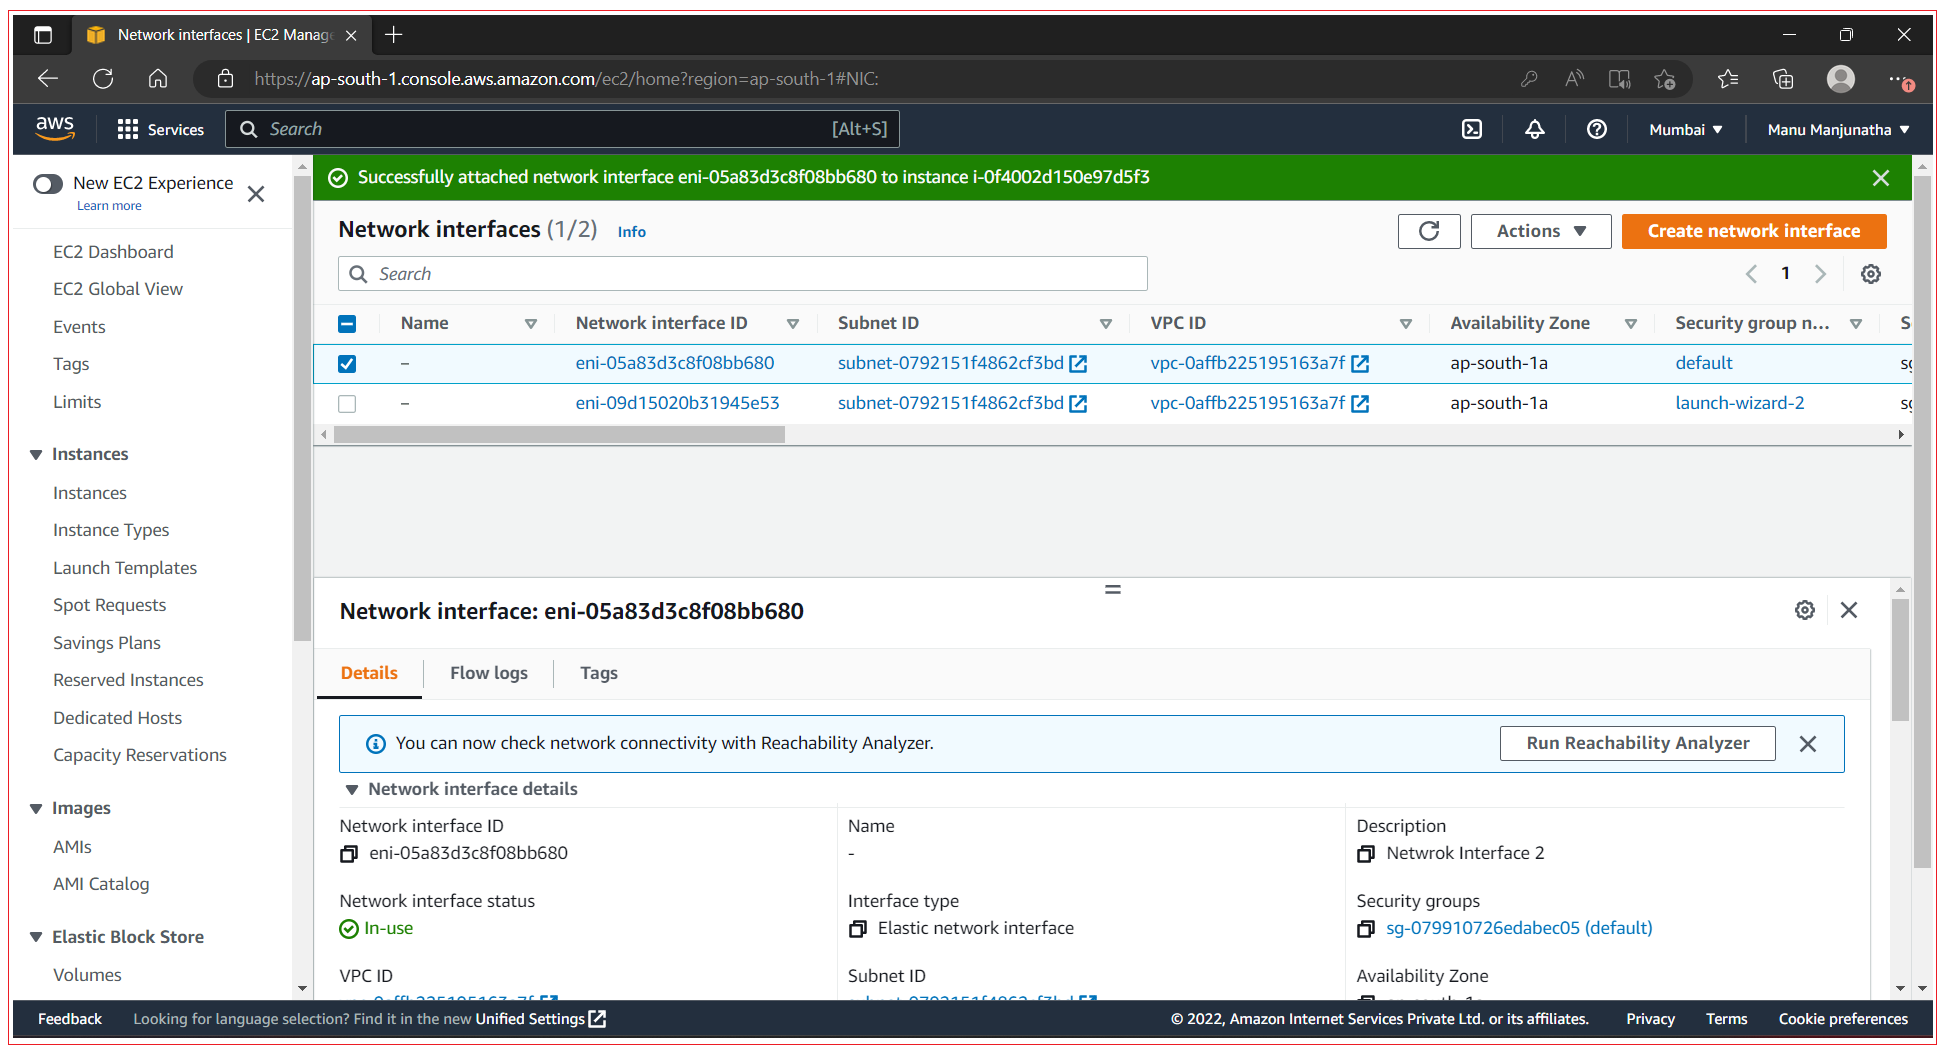
Step 4: Attach the IP to newly attached network interface of virtual machine
Refer the previous chapter to allocate the IPR address from Elastic IP Addresses. In the previous chapter we associated the IP directly to Instance, but now there are two interfaces attached to virtual machine. Now we have to associate IP to network interface as shown below:
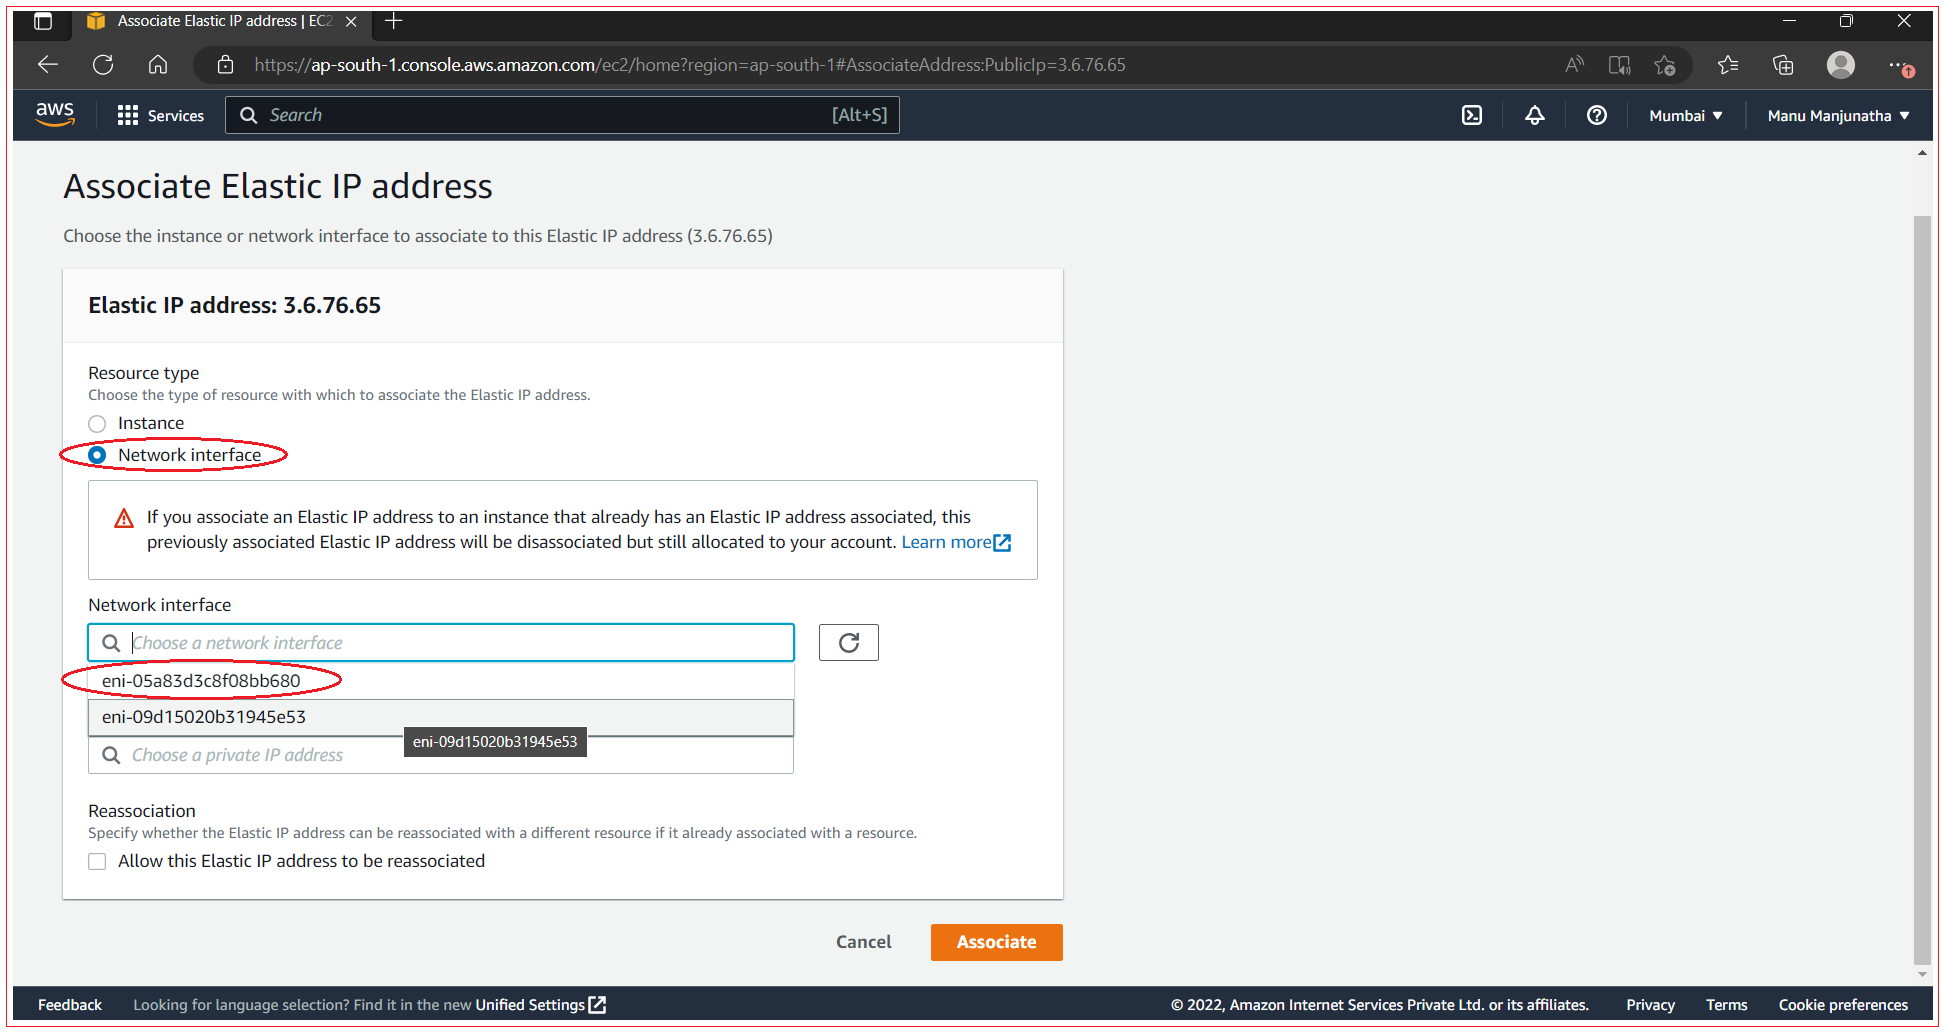
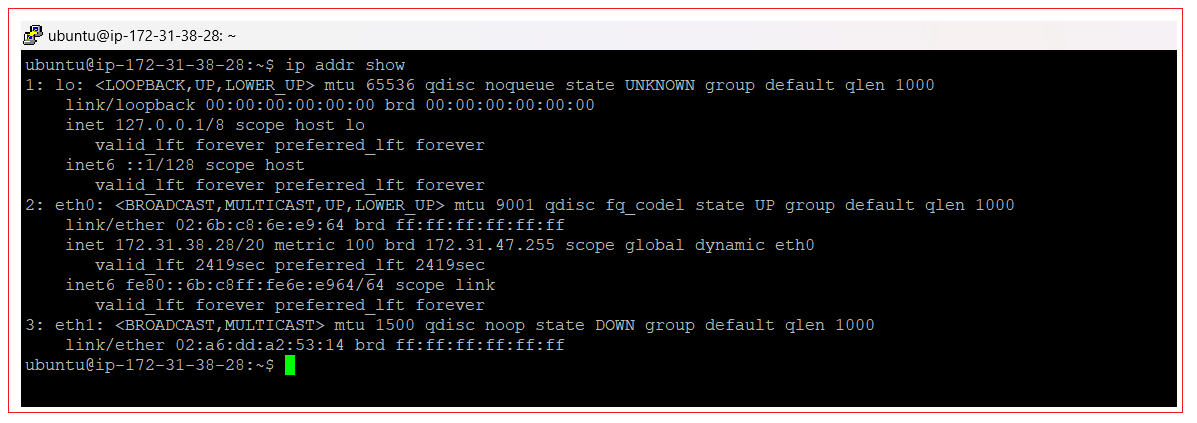
Select the newly created network interface click on Associate. Your virtual machine is now reachable under two different public IP addresses. Connect to your virtual machine using any one of the two IP address and run the command “ip addr show” which will display all the two IP address associated to machine.
All Chapters
