
| ☰ See All Chapters |
Angular Installation Setup
Angular development environment setup involves the installation of below steps. You should follow these steps in order. Before CLI tool installation setup, Node.js, npm utility installation step should have done. TypeScript compiler step (step 2) is not mandatory step. CLI tools will take care of TypeScript compilation. But we recommend you complete all steps. Whenever you need to test single TypeScript file you defnitely need Typescript compiler (tsc).
Node.js: An open-source framework that provides the packages needed for TypeScript and Angular development.
Typescript compiler (tsc) : A command-line utility that converts TypeScript code into JavaScript code
CLI tool installation: Command-Line Interface tool
Integrated development environments (IDEs)
Node.js Installation
Node.js is not a file with js extension or javascript file, this is installable software. To download the installer, go to https://nodejs.org/en/download/ and select the option that best suits your operating system. Node.js is provided through the MIT License. This means it can be used in both open-source and proprietary projects.
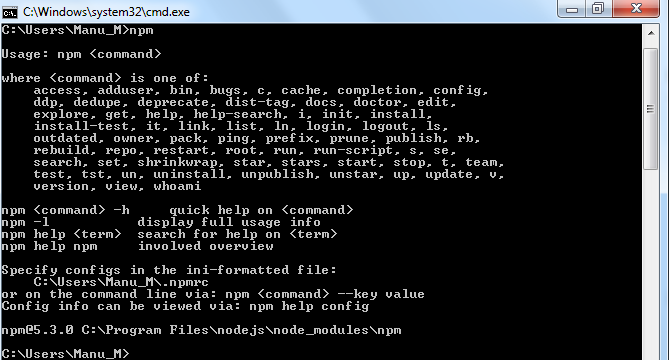
After installation you get a command line utility called npm (this may be npm.cmd on Windows or just npm on Mac OS/Linux systems). This npm is required to install the TypeScript compiler and the Angular modules. After Node.js installation you should be able to run npm commands from command prompt/terminal. If you can't, find the npm utility and add its directory to your Path variable of Environment Variables.
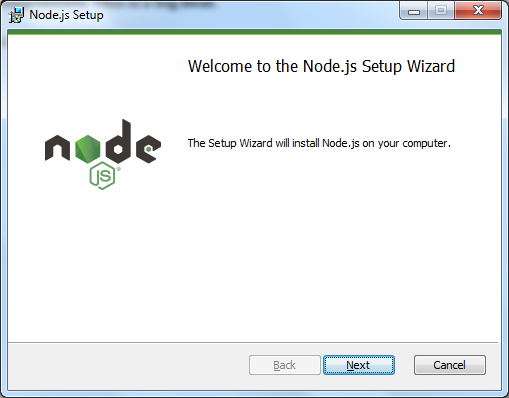
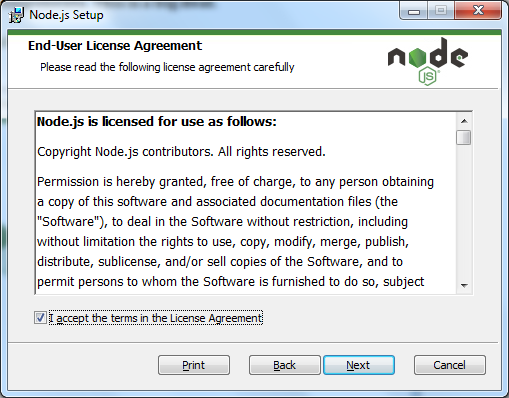
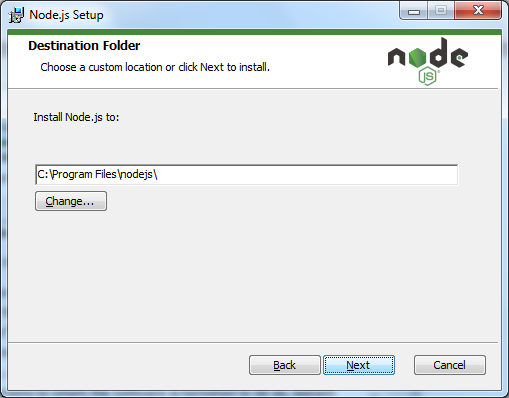
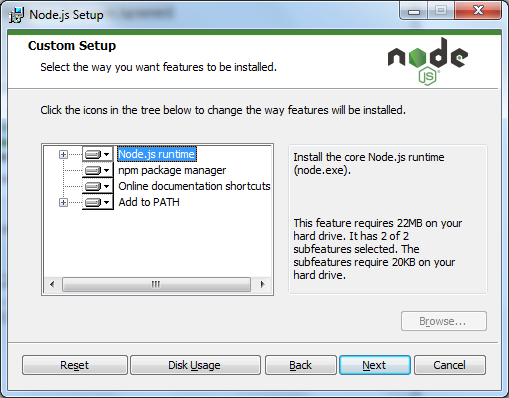
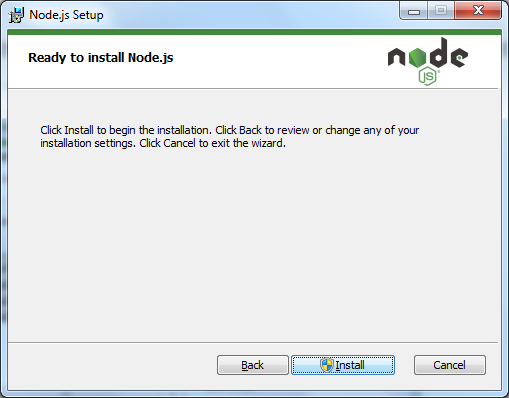
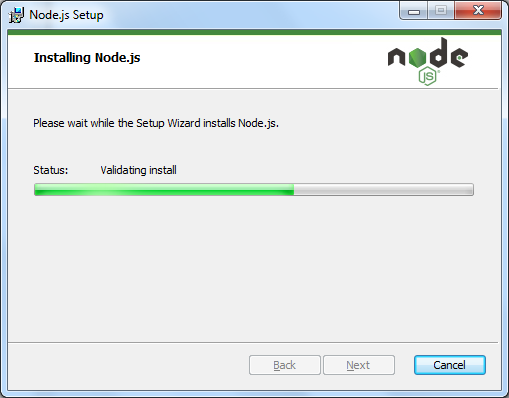
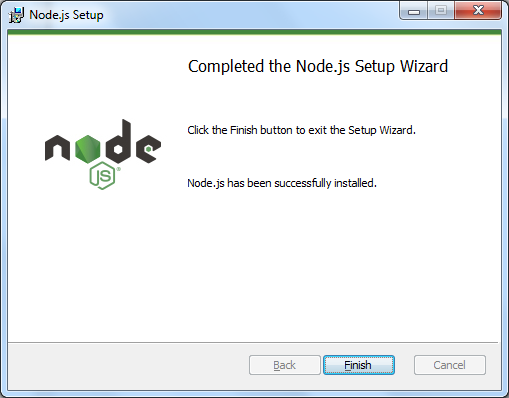
Open Node.js installable software (node-v12.16.2-x64.msi) and follow below steps:
After installation open command prompt anywhere and run npm. npm utility and all its directory will be set to PATH variable as a part of installation process itself. If you can't, find the npm utility and add its directory to your Path variable of Environment Variables.
The TypeScript Compiler
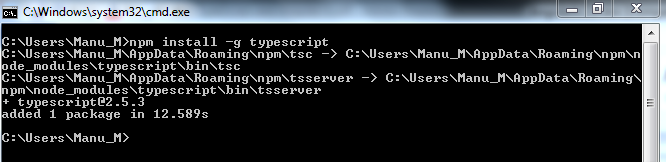
The easiest way to setup TypeScript is via npm. Using the below command we can install the TypeScript package globally, making the TS compiler available in all of our projects:
npm install -g typescript

This will install command line tool called tsc
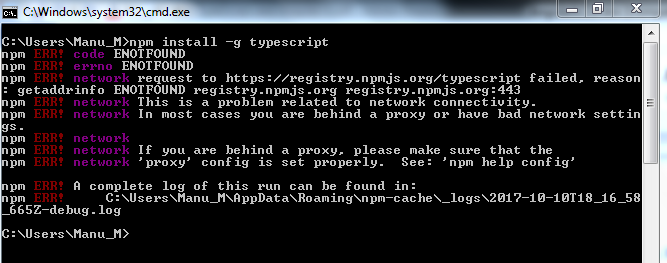
If system is not having internet connection you will get below error. Make sure to have internet connection while installing typescript.
If everything is perfect, after installation we get the below message
After typescript installation try opening a command prompt/terminal anywhere and running “tsc -v” to see if it has been properly installed.

The main reason to install tsc package is to convert TypeScript to JavaScript to run them in browsers. TypeScript is written in .ts files (or .tsx for JSX), which can't be used directly in the browser and need to be translated to *.js first. This compilation process can be done in a number of different ways:
In the terminal using the previously mentioned command line tool tsc.
Directly in Visual Studio or some of the other IDEs and text editors.
Using automated task runners such as gulp.
Using tsc utility is the easiest and most beginners friendly.
The following command takes a TypeScript file named main.ts and translates it into its JavaScript version main.js. If main.js already exists it will be overwritten.
tsc main.ts
In the next chapter you will learn to execute sample typescript application.
Angular CLI tool (Command-Line Interface tool)
Angular's preferred loader is Webpack, which is freely available at https://webpack.github.io. Generally, we won't access Webpack directly. Instead, we'll access Webpack through a tool called the Angular command line interface (CLI). A later section will discuss the Angular CLI in detail. If we are in the impression that Angular development is just a matter of coding TypeScript classes and their templates, it is false. But it's much more complex than that. To see what it mean, it helps to generate, build, and launch an Angular app. The Angular CLI (Command-Line Interface) tool makes this straightforward.
To install the angular CLI utility, we need to execute the following command: (Before this setup, Node.js, npm utility installation should have done.)
npm install -g @angular/cli
The installation may take some time. While installing make sure internet is available in the system. This is because npm installs all of the dependencies needed to build and launch Angular apps. This includes the Webpack loader, RxJS, and all the Angular packages, whose names start with @angular.
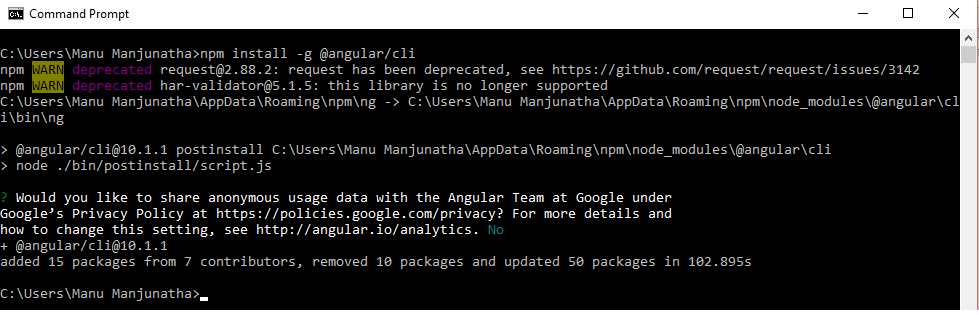
When the installation is complete, you can access the CLI using ng. This command can perform a wide range of Angular-related operations, and you can see the full list by entering the following command:
ng help
Categories of CLI Operations
build | Builds the application and places the compiled code in the dist directory |
completion | Generates completion scripts |
doc | Opens Angular documentation |
e2e | Performs end-to-end testing for the project |
eject | Ejects the application with Webpack configuration |
generate | Generates new code |
get | Obtains a value from the project configuration |
help | Lists the CLI's commands and operations |
lint | Checks the project for potential errors |
new | Creates a new Angular project |
serve | Builds and launches the application |
set | Sets a value in the project's configuration |
test | Performs the project's test suite |
version | Identifies the CLI version |
xi18n | Extracts strings for internationalization |
The doc operation is particularly helpful. If can't remember a field of the Component class, entering ng doc component opens a browser to angular.io/docs and searches for the term component. Similarly, ng doc directive opens a browser to angular.io/docs and searches for the term directive.
Integrated development environments (IDEs)
For angular development, IDE should be enough to support TypeScript coding. If you are an eclipse lover and like to use eclipse for typescript development then you get good number of eclipse plugins from market place. Install free version or paid version plugins according your project budget. But there are plugins which are completely free version which are really more than enough to work on complex projects.
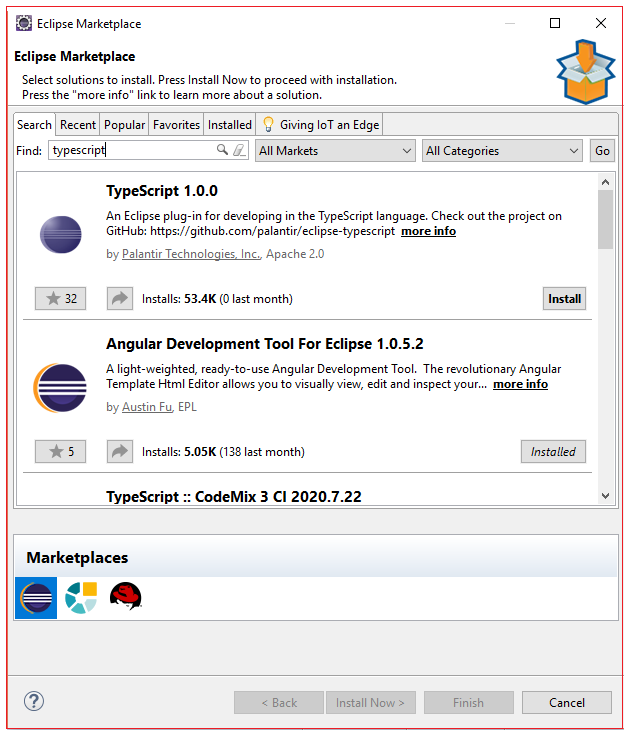
Apart from eclipse you can use IntelliJ, Visual Studio, Atom etc.., which is purely based on your interest. In our entire TypeScript tutorial we use eclipse with Angular Development Tool Plugin.
All Chapters
